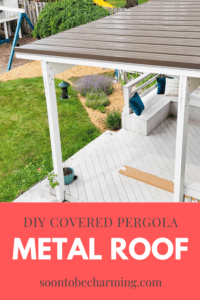
Pergola Makeover Metal Roof Final Reveal

I am so excited to be sharing this post with you! It took a bit longer than we anticipated…but we are finally ready to reveal the pergola makeover with our new metal roof. If you missed Part 1 and Part 2, make sure to check them out.
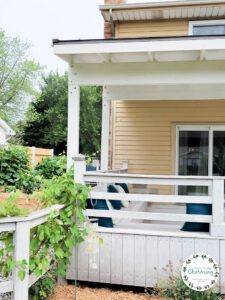
With every final reveal, I love to flashback to the beginning. Here is what our pergola looked like beforehand!
This post contains affiliate links, which means if you click on or make a purchase, I may receive a small commission at no extra charge to you. I always appreciate your support.
Painting The Pergola
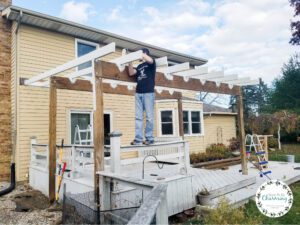
Now let’s pick up where we left off, at the end of my post in Pergola Makeover Part 2, we had just rebuilt the structure. This included all new rafters, rebuilding the beams and it was now ready for paint! Paint is one of the best stages because the transformation is instant.
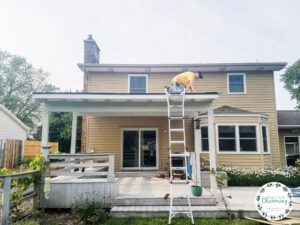
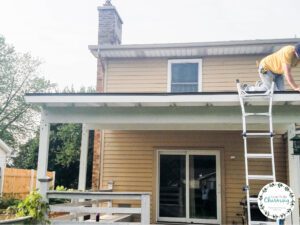
We painted the pergola our trim color, which we ended up changing to Pearly White by Sherwin Williams at the last minute. Originally we had chosen Moderne White by SW, but it wasn’t an available color options for our garage door (which is being painted by a company). However, the colors are extremely close. I even touched up a spot with the new trim color and it blended seamlessly with Moderne white! After seeing both colors, I do think I like Pearly White just a tad better because it is slightly creamier.
It was last November when we painted, and we lucked out by getting a stretch of 70 degree weather! Sometimes in Michigan it snows in November…so we were thrilled to get the pergola painted before winter.
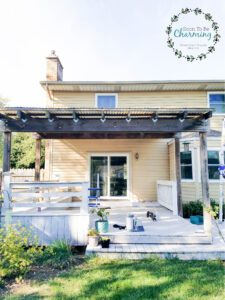
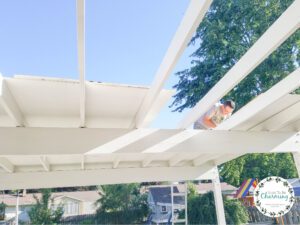
The pergola looked so much better with paint! It brightened up the entire deck and made it look much cleaner.
One of the biggest things I noticed, without the covered roof, was how much light came in through the sliders. Honestly, it was too much! At certain times of the day, the sunshine was too much. I really missed having a covered deck and was getting anxious to get the roof back on!
Prepping For A Metal Roof
First a quick disclaimer, we are normal home owners and don’t install metal roofs for a living! However, my husband is a millwright and has had experience bending metal…which definitely helped. Alright, now that we have that out of the way let’s get to the metal roof!
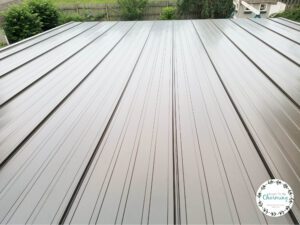
I choose the color Burnished Slate from Menards and we went with standing seam hidden fastener panels.
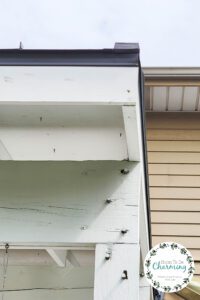
Before putting any metal panels up, we needed to paint sheathing and build the base layer. The problem was right when I needed to be painting the sheathing it rained for an entire week straight, all day. Instead of putting it off any longer, we decided to get a little creative.
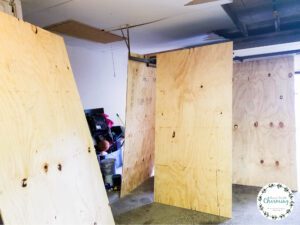
We had 11 pieces up in our garage, it was crazy, but it got the job done!
The rain finally left! With the sheathing painted, my husband could at last put the base layer down.
It was so nice to have the covered deck back!
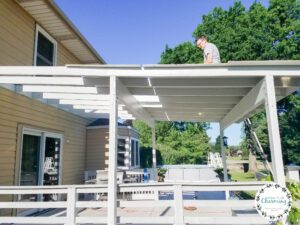
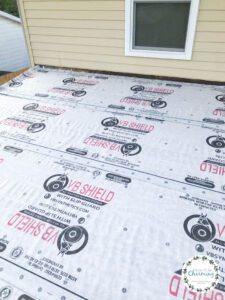
After all the sheathing was screwed down, my husband rolled out a roofing underlayment.
Installing A Metal Roof
To install a metal roof, here is what we ordered from Menards:
Standing Seam Hidden Fastener Panels (metal roof color)
Rake Trim (metal roof color)
Drip Edge
Endwall Flashing (metal roof color)
Z Flashing
Roof Edge (metal roof color)
Painted Screws (metal roof color)
VB Shield (Roofing Underlayment)
Metal Building Butyl Tape
Here is the tool we used:
6″ Sheet Metal Hand Seamer (the brand we had was Lenox)
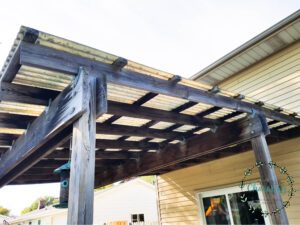
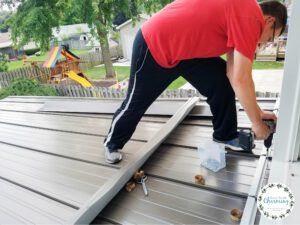
The drip edge went along the front edge first and then the metal panels.
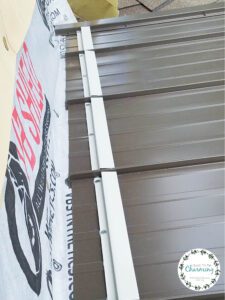
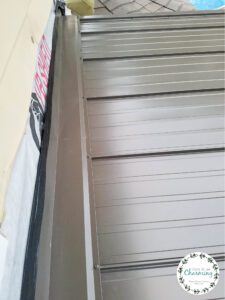
Next he installed the rake trim to the sides of the pergola with butyl tape underneath to seal it. The rake trim took a little finesse. Leave about an inch hangover in order to bend the end piece over. Here is a picture before the rake trim was bent on the left corner.
Here is the right corner with the trim bent.
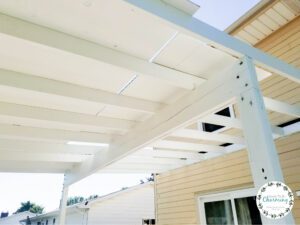
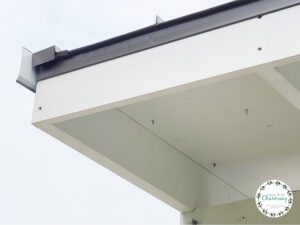
*You might notice the screws sticking through the underside…we are adding decorative boards underneath, but haven’t quite finished that detail yet!
Now to finish it up with metal flashing. We laid down the z flashing with butyl tape underneath and screwed each section into place.
My husband added one last strip of butyl tape along the entire edge of z flashing and then placed the endwall flashing on top.
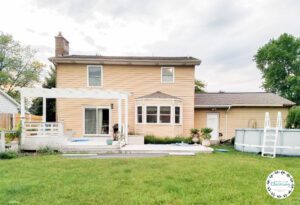
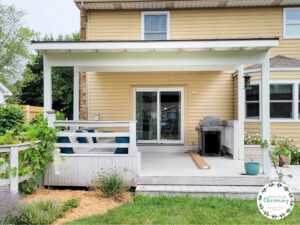
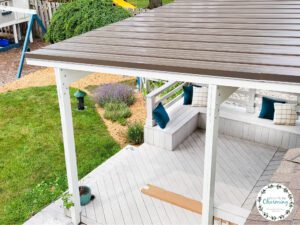
The metal roof is finally complete! I can’t believe how much better it looks!
I hope you enjoyed our pergola makeover! It was quite a transformation from the before to now. Make sure you subscribe to my blog HERE to see more great projects like this. We are currently working on siding our own house…you won’t want to miss that!
As always, thanks so much for checking out my post!
