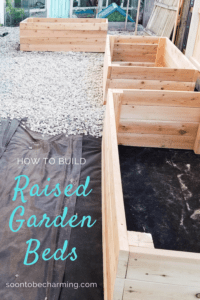
How To Build Raised Garden Beds

I love everything about raised beds! The way they look, the smell of cedar and especially how much easier they make gardening. I still have nightmares of the first garden I planted. In the excitement, I highly underestimated the amount of weeds. My garden began sucking so much of my time. The immediate solution was to add rocks, which helped a ton with the weeds. However, the garden beds that I inherited with this home were beginning to break down. I limped along with the old garden beds until they were no longer useable. Which we hit that point last year. It was finally time to build new raised garden beds! I have always wanted cedar garden beds, so for me that was an easy choice. If you have thought about building your own, but have been hesitant to take the leap…I highly recommend it! It is a pretty simple project to tackle. I will explain each step, so you can tackle this DIY project yourself and feel confident! Here is how to build raised garden beds.
This post contains affiliate links, which means if you click on or make a purchase, I may receive a small commission at no extra charge to you. I always appreciate your support.
What Size Garden Beds To Build?
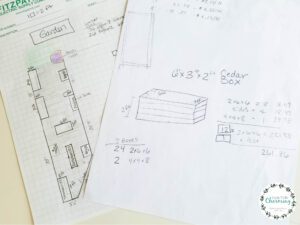
The first step is figuring out what size garden beds you want to build. I actually went out into my garden and laid out stakes. It was a great way to visualize the space, especially because our garden is on the side of our house and space is limited. Measuring out a few different size beds allowed me to make sure everything fit the way I wanted it to.
If you have a garden bed up against a fence or your house, I recommend not making it any wider than 3 feet. Any wider than that and you will need access to both sides of the garden bed. The longest I would make a garden bed is 8 feet to avoid them from bowing in the middle.
One last thing to consider is how tall you would like your garden beds. The taller the beds, the less bending you will have to do; however, the more expensive they also get. So consider cost with the size of garden bed you would like.
Once you figure out the size of garden beds you would like and how many you want to build, you can figure out how much wood you will need and the cost.
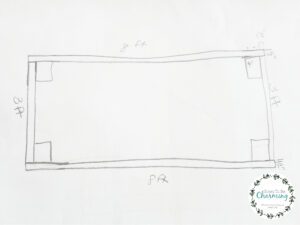
I sketched everything out to figure out the cost of each bed. In the end, I decided to build two 8ft x 3ft x 2ft beds and one 6ft x 3ft x 2ft bed.
Getting Cedar Lumber
I printed off my project planner and wrote everything down that I needed to purchase for the raised beds. See how we saved over $100 on lumber HERE.
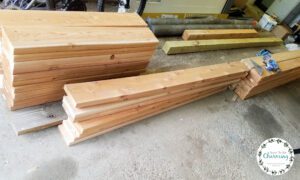
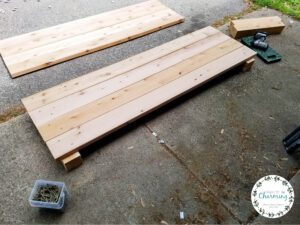
As soon as we had the cedar lumber in the garage, I began cutting all the boards.
For an 8ft x 3ft x 2ft raised garden bed you will need the following:
8- 2 x 6 x 8′ boards
8- 2 x 6 x 3′ boards
4- 4 x 4 x 2′ posts
2- 2 x 6 x 2′ supports (supports should be used for 8ft beds)
3″ deck screws
For a 6ft x 3ft x 2ft bed you will need the following:
8- 2 x 6 x 6′ boards
8- 2 x 6 x 3′ boards
4- 4 x 4 x 2′ posts
3″ deck screws
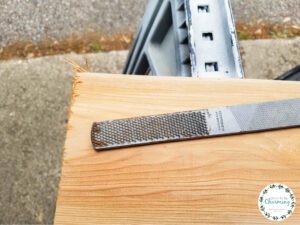
It is common for the boards to fray when they are cut. I used a metal file to lightly file the edges.
Building Raised Garden Beds
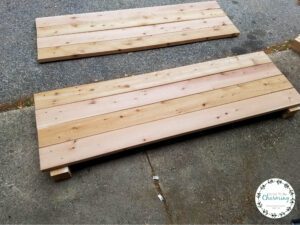
Start by building the longest sides first. Place two posts out and then lay 4 boards on top. The most important step is making sure the top board is square with the post. To do this, use a metal square to line everything up.
Below you will notice the posts are sticking out just a little. I made a rookie mistake. The boards said they were 5 3/4″ ( 6″ boards are never 6″ wide exactly), however, I didn’t measure them ahead of time and they were actually 5 1/2″ instead of 5 3/4″. I cut the posts 23″ long, which is an inch too long. My husband helped me out by trimming the extra off to make the posts flush with the bottom board. TIP- Measure everything because boards are never actually the length they say.
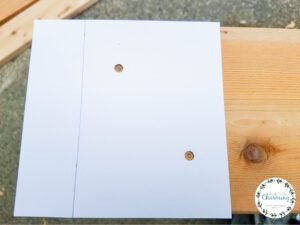
To speed up the process, I created a template to quickly mark all the screws holes. You want to make sure to stager the screws so the post does not split. The template was so helpful and worked really well. Keep in mind which way the boards will meet up. As you can see from the drawing, I placed the shorter ends inside the longer ends.
For the screw pattern, I needed to account for the depth of the 3ft board. For my template, I marked it 1 1/2″ in and then staggered two screw holes to go into the 4 x 4 post. Then on the 3ft sides, I flipped my template over because I didn’t need the 1 1/2″ spacer.
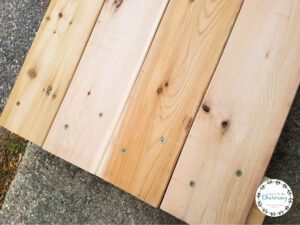
I completed all the long ends first.
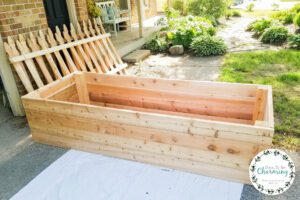
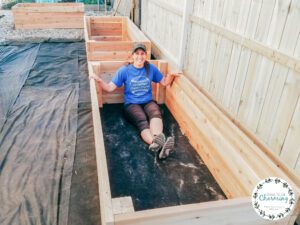
Next my husband helped me set both the long sides up and we grabbed the 3ft boards. I quickly marked the screw holes with my template and we screwed in the 3ft ends! Side Note: these beds are pretty heavy when completed. I was able to help carry the 6ft bed, but we brought in more muscle to help carry the 8ft bed. We didn’t put them together in the garden because it is better to build them on a level surface.
Adding Raised Beds To The Garden
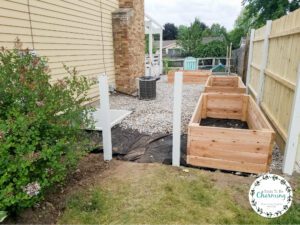
The raised beds were placed directly on the landscape fabric. Use a level to make sure your beds are set before you fill them.

All the raised beds in place!
Installing A Dripline System
I took a quick video of how we laid out the dripline system.
What we used:
1/2″ Blank Poly tubing (we needed 60 ft, so we bought 100ft so we had plenty)
Couplings: Elbow, Tees, Tubing End Closures
1/2″ Pipe– Choose the length that is right for your garden bed, just remember the valve will be above it.
Barb Tubing Elbow Adapter (to connect the pipe elbow to the tubing)
1/4″ Soaker Hose (our dripline has 18″ emitters, but I was hoping for 12″…they were all sold out when I was looking)
1/4″ Connector Barbs (put barbs into 1/2″ hose and connect to the 1/4″ soaker hose)
Filling Raised Beds
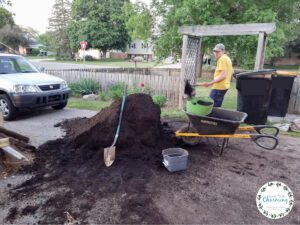
After the dripline was installed, the raised beds were filled with 5 yards of garden soil. My husband and I actually just lifted up the wheel barrow and dumped the dirt into the beds. It was much faster than shoveling the dirt into the garden beds.
Time To Plant The Garden
The beds were set in place, dripline completed and the dirt filled…it was now time to plant!
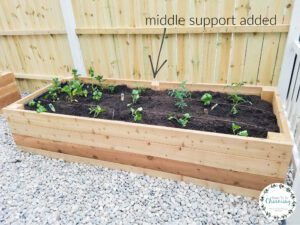
The garden quickly exploded and I absolutely love my cedar raised garden beds!
Need more garden ideas? We expanded our garden at the same time we built our raised beds, check out our full garden makeover HERE!

Thanks so much for checking out my post! Make sure to subscribe HERE to see more great house projects!
