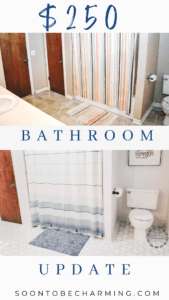
No Demo $250 Bathroom Makeover
Completing an entire bathroom makeover for $250? Is that even possible? I was going to find out! To be honest, I initially tried for a $100 dollar budget, you see those all over on Pinterest…however, with prices incredibly high right now I quickly saw that a $100 wasn’t going to work. To be more realistic I shot for a $250 budget, which is still a very inexpensive bathroom update. Here is my journey on our no demo $250 bathroom makeover. You’ll be amazed at what a little bit of paint can do!
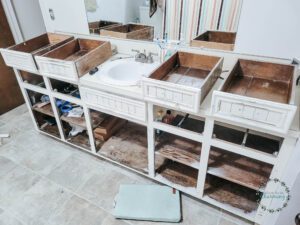
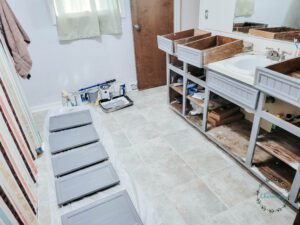
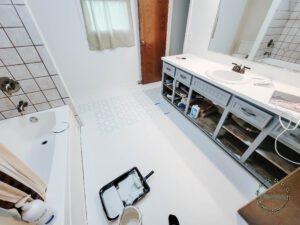
The Before
When you live in a fixer upper, you just get used to spaces being in need of repair. In a blink you’ve been walking into a bathroom with yellow drywall anchors as your only décor for 8 years and it hardly phases you. In my defense, we did focus more on the outside of our house tackling the roof, landscape, and residing it. I think that definitely counts for something, just remember that when you see our before pictures.
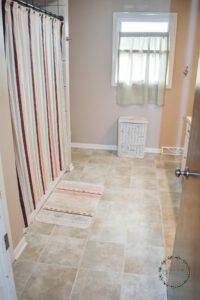


Then one day you decide to do something about it, that was me last October! It desperately needed an update and my husband had already mentioned a few times that it needed to be painted. So that is exactly what I did, I painted the walls, the cabinet, the countertop, and the floors. I would have painted the tile in the shower too, but I figured since this is our only full bathroom that it might be pushing it to ask my family not to shower for a week.
Bathroom Makeover Step 1: Painting The Walls
The bathroom is connected to our bedroom as well as the hallway. When it came time to choose the paint color, I wanted to match our bedroom color so the rooms would flow together nicely. The color in our bedroom is Pearly White by Sherwin Williams. It is slightly off white, so it has that beautiful creaminess to it. Bringing that color into the bathroom definitely brightened up the space.

I had painted our bedroom recently and thought I had enough paint leftover to complete the bathroom. However, I was wrong and this was the first big hit to the budget! The paint was from Sherwin William and so I headed to the store to get another gallon.
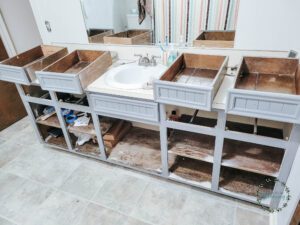
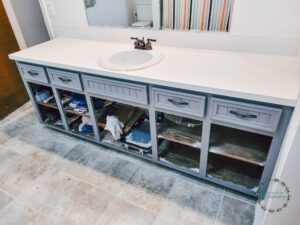
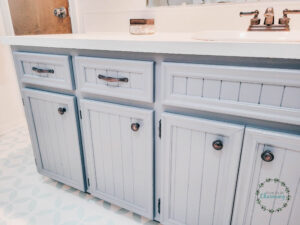
Bathroom Makeover Step 2: Painting The Bathroom Cabinet
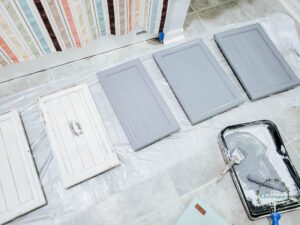
To keep the makeover cost as low as possible, I looked through all the leftover paint in the basement and put a couple of samples up. Below are the first two colors, I also added a light turquoise (Palladian Blue from Benjamin Moore). I was hoping to fall in love with the Palladian Blue (because I had almost a full gallon of that color), but I just kept leaning towards the dark bluish gray. It was a custom color, which I had used to paint the brick on the outside of our house.
I do love the idea of bringing the outside colors inside. Thankfully the cabinet wouldn’t use a lot of paint, so I picked up an additional quart, which is not too expensive. If you like the color, it was a custom mix but a similar color would be Granite Peak SW6250 by Sherwin Williams.
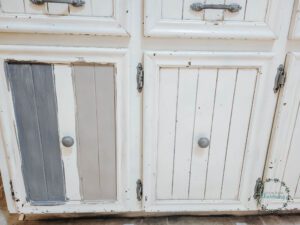
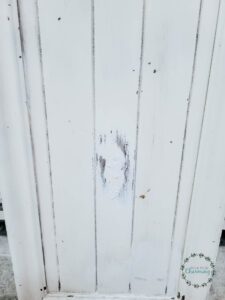
To prepare the cabinet for paint, first I lightly sanded. Keep in mind my cabinet was already pretty rough, so I used a 220 grit. If you have a newer cabinet with more of a glossy finish, you would want to start with a lower grit first, then end with a 220 grit.
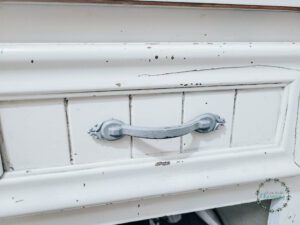
After the cabinet was sanded and wiped down, I removed all the cabinet doors and drawers.
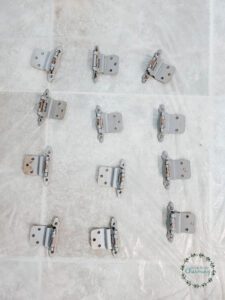
I also removed all the old hardware. My parents had a bunch of new hardware that was given to them and they weren’t using it, so they offered it to us. Beautiful oil rubbed bronze hardware and free, yes please!
It was definitely time for the old hardware to go. Also, the knobs were in the center of the cabinet doors so wood filler to the rescue.
The color on the cabinet looked amazing! I was beginning to get very excited about this transformation.
Spray Painting Hardware
Once the cabinet was painted, we added the new hardware on the drawers. However, the new hinges that came with the hardware would not work with the style of cabinet doors, so I needed to paint the old hinges to match.
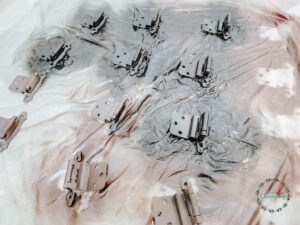
I began by scrubbing down all the old hinges with CLR.
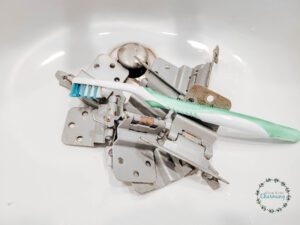
Then I laid out all the hardware, hooks, everything to paint. I used Metallic Oil Rubbed Bronze spray paint by Rustoleum.
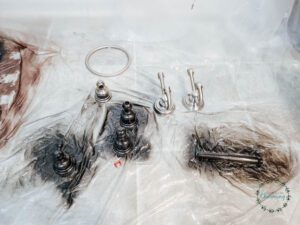
I even painted the faucet. This is definitely not the correct way to paint a faucet, however, they never properly installed a water shut off line to the bathroom sink…so we improvised.

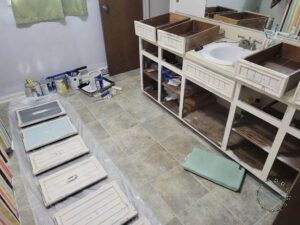
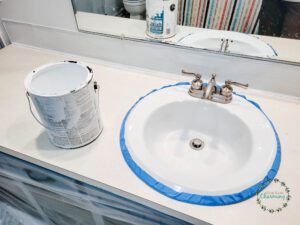
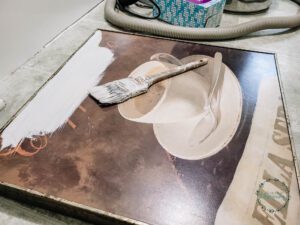
Bathroom Makeover Step 3: Paint the Countertop
With the cabinet updated, I couldn’t believe how ugly the yellow laminate countertop looked. A beautiful new quartz countertop was not in the budget. Even those “inexpensive” countertop kits were over a hundred dollars. I did a lot of research on countertops and at the end of the day I needed to keep in mind my purpose. This update is temporary, the cabinet and entire bathroom will need a complete gut job in a few years, so my goal is to just find a temporary fix that is better than what we have.
Paint the countertops? Sure, why not. One of the beautiful things about this bathroom makeover is I can take risks because if it doesn’t work, it’s not forever. For anyone that wanted something more permanent, I suggest spending the money for a nicer countertop.
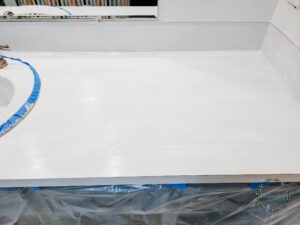
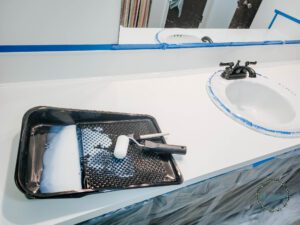
To prep the counter, I started by using liquid sandpaper to remove the gloss on the laminate. I began with one coat of primer, two coats of acrylic paint (Sherwin Williams Pearly White *same color as the walls) and three coats of polyurethane.
I used a foam roller for the two layers of paint and three layers of poly. Looking back I would have used the foam roller for the primer as well (I just used a brush). It was hard to get the brush strokes from the primer to disappear.
One Coat
Two Coats
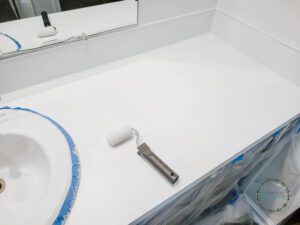
Sealing the counter with Polyurethane.
I was really happy with how the countertop turned out! It was so much cleaner looking than the old yellow laminate. What I wasn’t sure about was how well it would last?
***Now that the update has been completed for a couple of months, the countertop have lasted pretty well. I think my only issue is with it being white, it has a couple small stains on it. I didn’t expect poly to stain from makeup but it did slightly. Overall it still looks great, but I have to be a little more careful than what I would like. It still looks 100 times better than it did before and I would do it again. I would also recommend it if you wanted to update your bathroom and had a very small budget like I did.
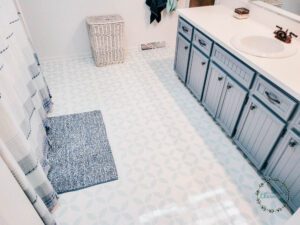
Bathroom Makeover Step 5: Painting Linoleum Floors
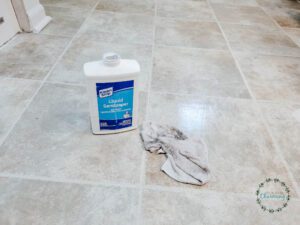
If you are considering painting your bathroom floors, take the leap! I am so so so happy with how my floors turned out. To get ready to paint the floors, don’t skip the prep. I started by lightly sanding the floor with 120 grit and then wiped the entire floor down with liquid sandpaper. Make sure to read the instructions and have proper ventilation.
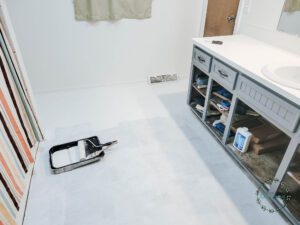
Time to prime the floors. Not going to lie, this was such an exciting step! I couldn’t wait to cover this old linoleum.
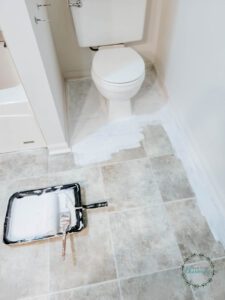
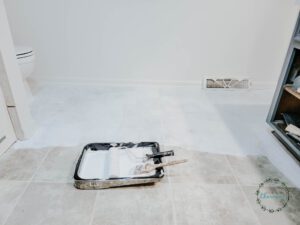
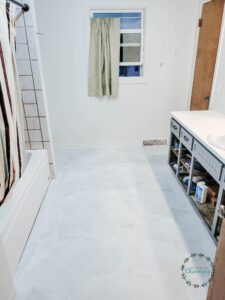
I used the same approach as the countertops. One coat of primer, two coats of paint (Pearly White again) and three coats of poly.
Keep in mind this is our only shower, so I had to plan coats and make sure they were dry so we could all make it to the shower when needed. It was a little tedious, but I made it work.
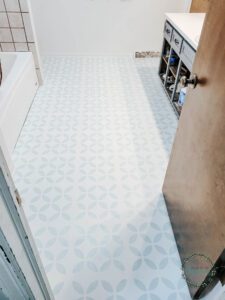
Floor Stencil For the Bathroom
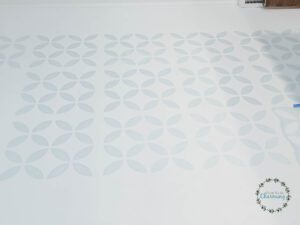
If you spend any time on Pinterest, you always see those awesome makeovers with stenciled bathroom floors. I did a lot of research and most people said their floors lasted well. I am completely new to stencils, but I was excited to jump in. The best part about my linoleum floor was that it had fake 12 x 12 tile lines. To utilize this I bought a 12 x 12 floor stencil. The linoleum tile lines were slightly indented which made it perfect to line up the stencil. If you were painting an old tile floor, the same would be true.
I used the same foam roller on the floor as I did for the countertops. My stencil color was Palladian Blue from Benjamin Moore (it is the color I have on all my exterior doors). My siding color and my exterior door colors were both brought inside with this bathroom update.

The full square tiles were easy to paint and went quickly.
I’m going to be straight with you, as exciting as the stencil was at the beginning…the excitement fades dramatically as you crawl around on your hands and knees for what seems like forever. I have a very large bathroom floor.
SHARE THE LOVE!
The Details
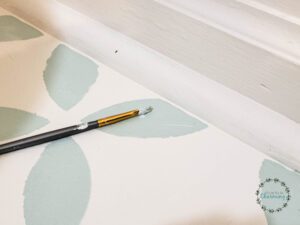
Once you finish all of the whole stencil tiles, you will need to cut your stencil down to get to the edges. I cut the stencil down multiple times to work around the room and get all the edges covered.
A note for next time, buying two stencils would be a good idea, one to keep whole and one to cut down. Along one wall I didn’t get the stencil all the way to the trim so I had to touch it up with a small brush.
If I had to summarize, Stenciling a floor is a lot like child labor. So much excitement in the beginning, getting started, anticipating what it’s going to look like. Then the pain comes. Crawling around on the floor, your knees hurt, your back hurts…you may utter that you are never going to do this again. All of a sudden you finish and you step back and look at the floor and you fall in love, your excitement comes back and you tell yourself it wasn’t that bad! The pain slowly fades away and you’re left with fond memories of stenciling your bathroom.
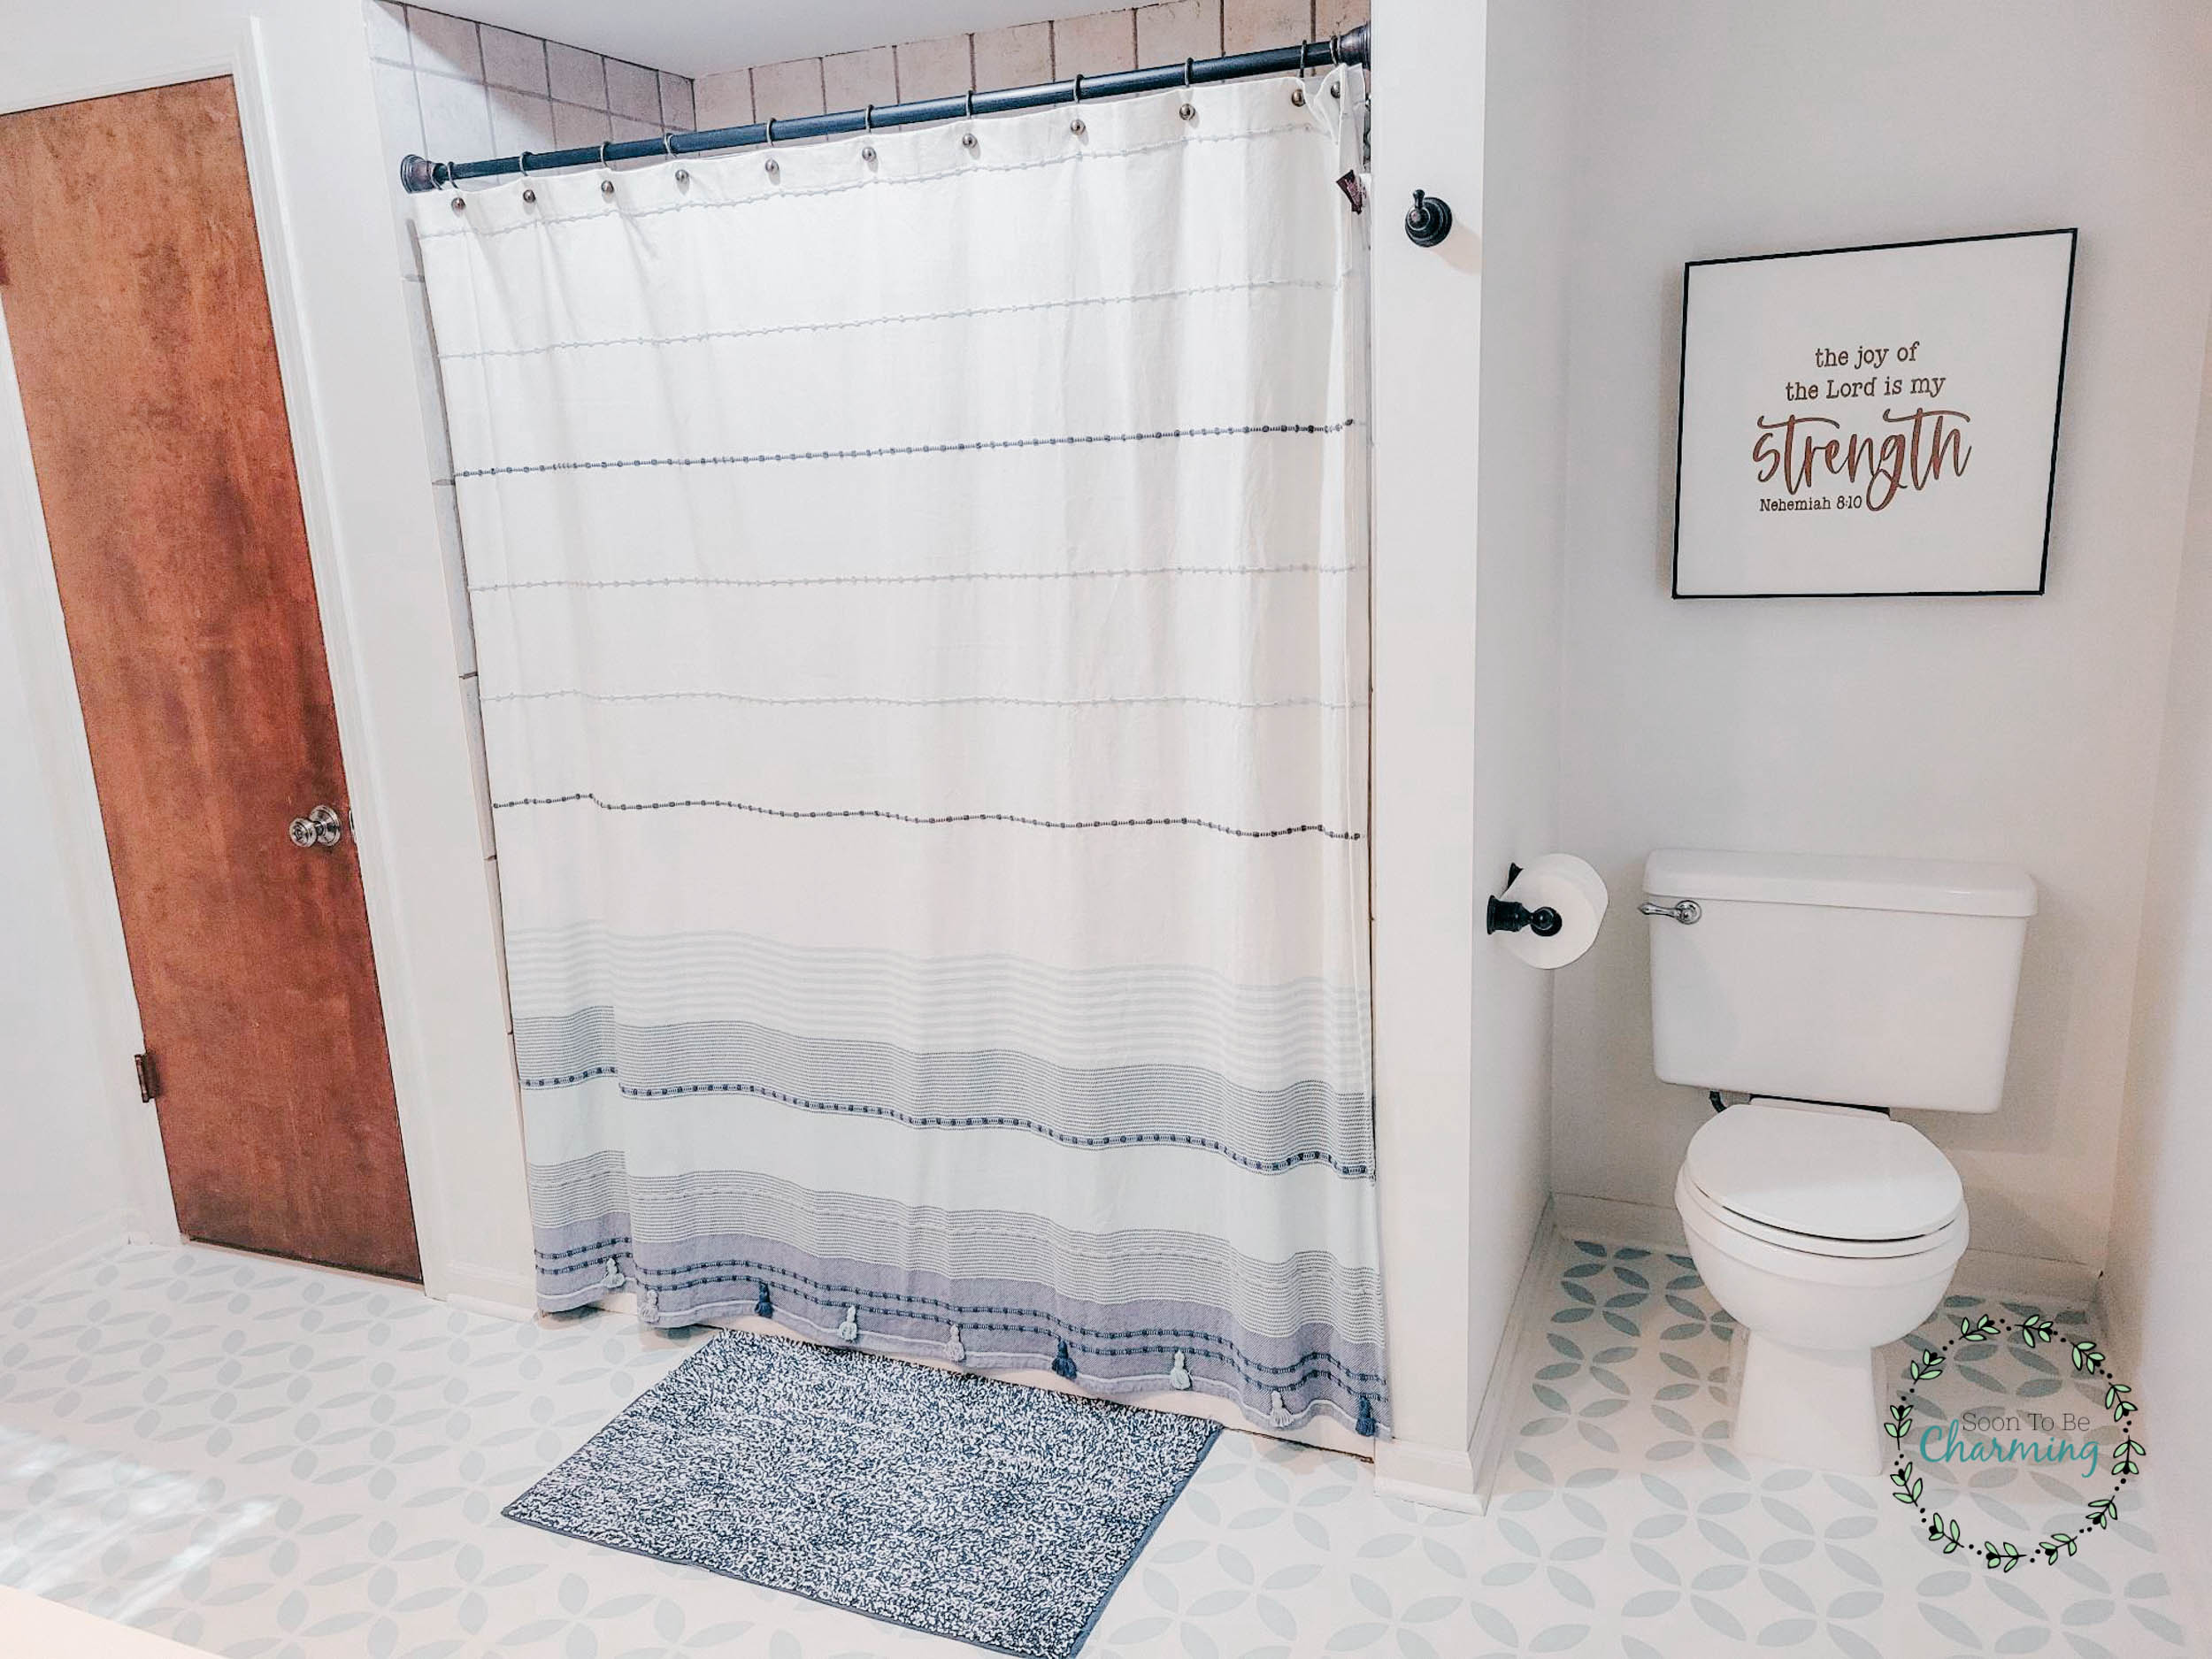
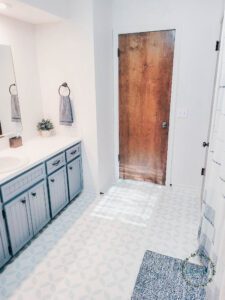
The Finished Floor
I did it! At this point I was so excited to pull the entire bathroom back together. First of all, to get all the extra bathroom items out of my bedroom and secondly, because I couldn’t wait to say I was finished!
Here Is The final Reveal Of Our Bathroom Makeover

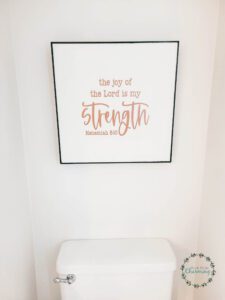
I made this sign, with the help of my mom and her Cricut! The painting had a big scratch on it, so I almost pitched it a couple different times. However, I loved the square shape of it….now I am so glad I kept it. It made the perfect piece to go in my updated bathroom!

Final Bathroom Makeover Cost
$96 Paint: Pearly White Gallon, Quart custom blue, oil rubbed bronze spray paint
$37 Tools: paint rollers ($6), trays ($5), liquid sander ($11), floor stencil ($15)
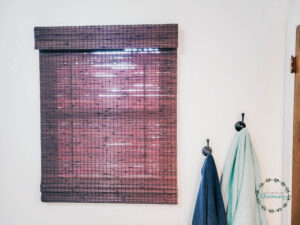
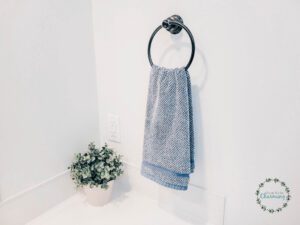
$120.77 Décor: Shower Curtain ($31.78), Hand Towels ($16), Bathmat ($20), Shade ($52.99)
What I already had/free: primer, paint brushes, hardware, painters tape
Total: $253.77
The bathroom transformation was amazing! I still can’t believe how beautiful and fresh the space feels. It took a little bit of paint, a lot of effort, but all for a pretty small cost. I truly hope you enjoyed this makeover as much as I enjoyed sharing it with you! Thanks so much for checking out my post!

Your bathroom looks beautiful!! So fresh and new!! Thanks for sharing this with us 🙂