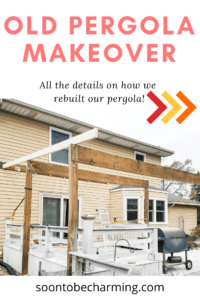
Old Pergola Makeover Part 2

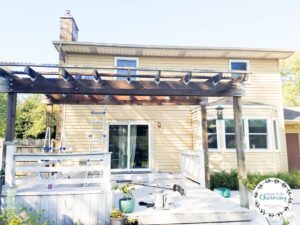
At this point we were all in, no turning back! The old covered roof was removed and we were left with an unsightly frame. Many conversations happened to discuss what our plan would be moving forward. Initially, this project was only going to be about removing the roof and paint. However, we just couldn’t ignore the warped frame and improper load structure. Do we just throw on paint and ignore the problems or do we pretty much redo the entire pergola? Well you are about to find out, here is our old pergola makeover part two!
Pergola Makeover Part 2
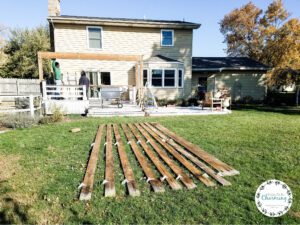
We left off in my previous post with the old fiberglass panels all removed, if you missed it CLICK HERE. Now we needed to remove the old closure strips. Closure strips are the thin strips on the very top of the pergola used to fasten the panels down.
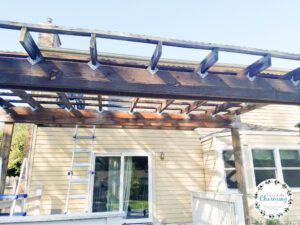
It’s amazing how every time you take something off, it makes the pergola look better and better. Now that the closure strips are removed, it’s time to power wash!
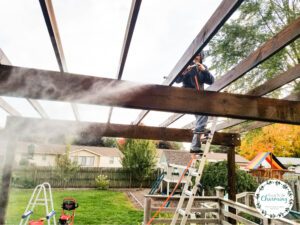
Washing all the grime off, made a huge difference!
Pergola Makeover: Support Beams
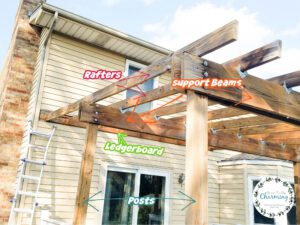
If you are not familiar with pergola structures, here is a picture of the pergola with all the beams and posts labeled.
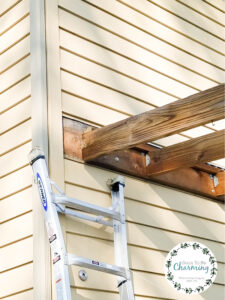
One of the first things we wanted to do is cut the extra wood off of the main support beams and trim back the ledgerboard.
Instead of the ledgerboard extending past the first rafter, we cut it flush.
Again, instead of the support beams extending past the post, we cut it flush. It’s the little details that make a big difference in the end!
Trimming the boards was an easy fix. However, the next part wasn’t. The main support beams were not fastened correctly and the posts were not bearing the weight of the pergola. The proper way is to notch the post so it holds the support beams. For us, that wasn’t even an option because the posts were not wide enough.
Making Proper Support Beams
My husband found another way, which is to cut the post shorter so the main support beam could rest on top of the post. The pergola would be the same exact height, but instead of having the beams fastened to the outside of the post, the beams would rest on the posts. Actually bearing the weight of the roof.
In figuring out how to properly support the pergola, we noticed one of the support beams was pretty warped. In the end, we needed to replace just one beam, which wasn’t so bad.
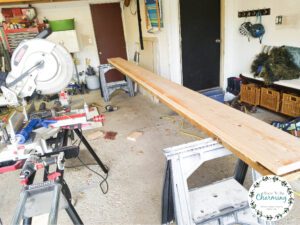
To make the new support beams, my husband glued three boards together. Two 12 foot boards and then a slightly shorter board in the middle.
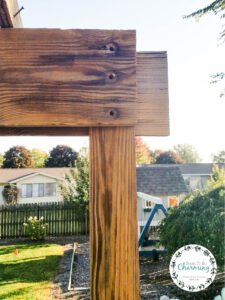
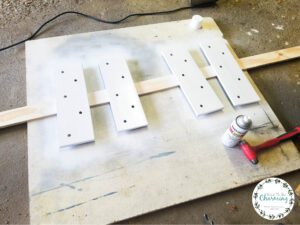
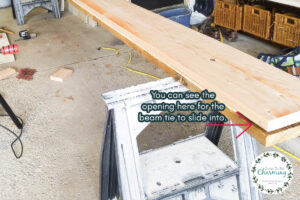
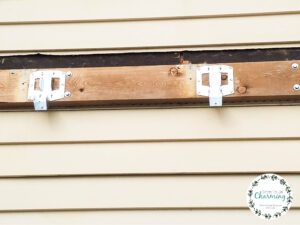
To securely attach the beam to the top of the post, we used beam/post ties that my husband made from a long piece of metal. He cut the metal to make four ties, one for each post.
He also painted them before he put them up.
To place the beam/post ties, first he shortened the post by the width of the support beam. Then my husband cut a notch out of the top of the post.
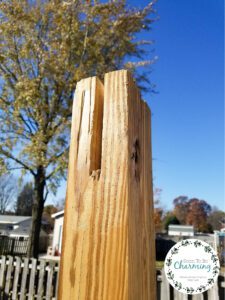
He inserted the beam/post tie and screwed it into the post.
Once the beam was in place, he screwed the beam/post tie to the support beam.
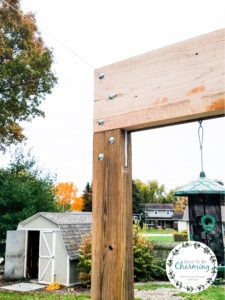
It looks so much cleaner than how the old posts and beams were connected!
One beam down, one more to go!
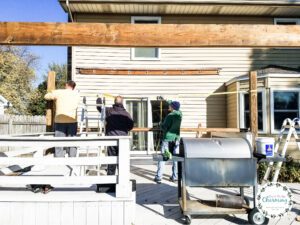
My husband definitely had help putting the beams up, they were heavy.
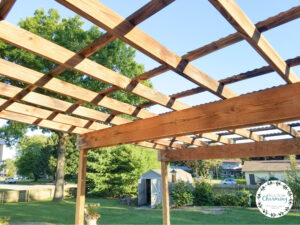
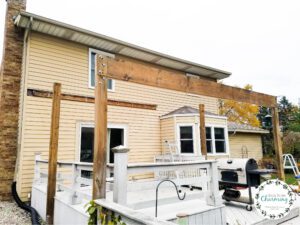
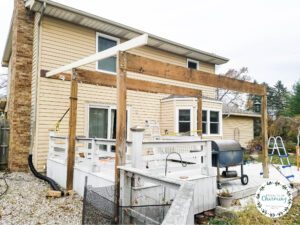
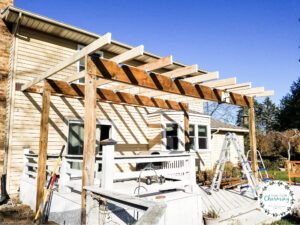
Both support beams up! We are finally starting to get somewhere.
Pergola Makeover: Rafters
The old rafters were sitting out in the yard, do we put them back up even if they are a little warped? This was our next big dilemma. Our project continued to get “bigger” than we originally intended. However, we wanted to do it right! At this point, I knew we would never regret putting up new rafters…but we would regret starring at warped boards if we put the old rafters back up. So off to the store my husband went.
He grabbed new brackets for the rafters as well.
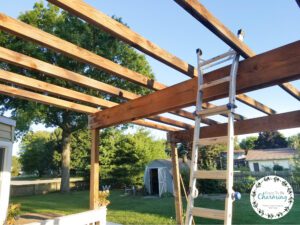
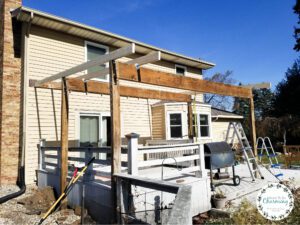
In a blink, all the new rafters were up!
Well it seemed like a blink to me, since my daughter and I were soaking in the sun! Might have felt a bit longer for my husband!

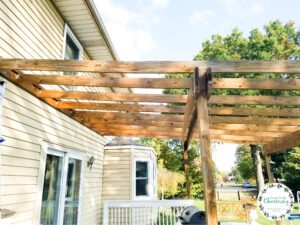
We were finally at the point to paint! Side note: we will be adding end boards when we complete the metal roof later this summer, which will help pull it all together!
My final post on our pergola makeover will come when it is completely finished! I can’t wait to finish this project and share it with you!
Thanks so much for checking out my post!
Until next time,
