How To Make A Panda Cake
Who knew a panda cake could be so fun to make! So I love making birthdays special for my kids and making a fun cake is a big part of that. It is something my mom always did for us and I love passing on the tradition. Most times I try to get all the decorations and all the other details done ahead of time, so the night before their birthday party I can focus solely on the cake. To bake, cool and decorate a cake I typically spend 3 to 4 hours. To help cut the time, it’s beneficial to bake the cakes earlier in the day and then block some time at night (when you are kid free), to decorate.
Getting inspired! I definitely like to research ideas. Sometimes, I pull a few ideas from different cakes and blend them, other times I come with the design all on my own. It just depends on the theme of the cake. With a panda cake, there are so many images out there, it is quite easy to pull inspiration. The best part, beautiful cakes don’t always have to be extremely difficult to make, I promise! To start, I typically buy figurines to go on my cake. I don’t always have the time to sculpt something from fondant, nor is that my expertise. Ready to dig in? Here is how I made my panda cake, I hope you will give it a try!
This post contains affiliate links, which means if you click on or make a purchase I may receive a small commission at no extra charge to you. I only recommend products I love and appreciate your support.
How To Make A Panda Cake
Start by making box cakes according to the directions. I used two cake mixes in three 9″ pans and one smaller 6″ pan. The 6″ pan will go on top.
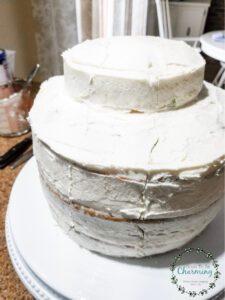
I use a homemade buttercream frosting recipe and begin stacking.
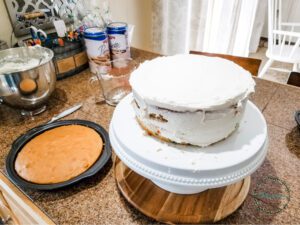
Two layers done, two more to go! I placed the smaller 6″ cake off to the back left. Having tiered cakes works well with a waterfall effect. I did stick 4 cake pop sticks (kind of like dowels) into the top tier to strengthen the cake.
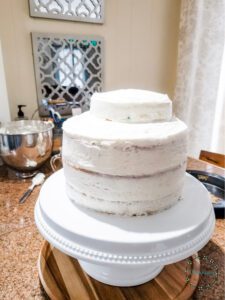
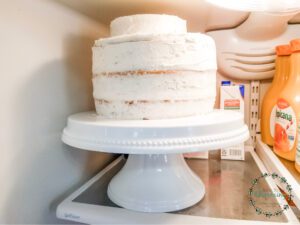
After I finished stacking the cakes with a crumb coat, I place the cake in the fridge to chill for about 30 minute.
Getting Ready To Decorate The Cake
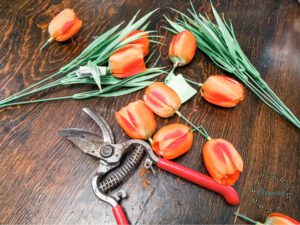
Now to make it pretty! To start, I picked up a couple bunches of artificial tulips at Walmart for $1 per bundle. I liked the way the stems looked and thought they would fit well on the cake. In order to get the stems, I clipped all the tulips off, then washed them. Now they are ready to go on the cake.
![]()
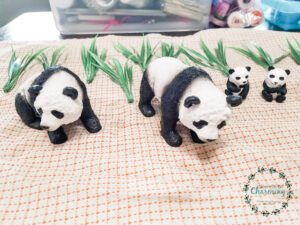
As I mentioned above, I tend to use figures to save time and make it easier. I found this panda family on Amazon and love, love, love them! Plus after the birthday is over, my daughter has a set of pandas to keep!
![]()
![]()
Cake Frosting Tips
I only used 2 tips for this cake. The grass tip and a medium round tip for the rocks. The rest was applied with a normal knife.

![]()

Decorating The Cake
I began by sketching out where I wanted the waterfall to go. You can see the knife lines in the picture below.
I apologize, I forgot to take pictures while I was decorating the cake…but I will still walk you through it in detail!
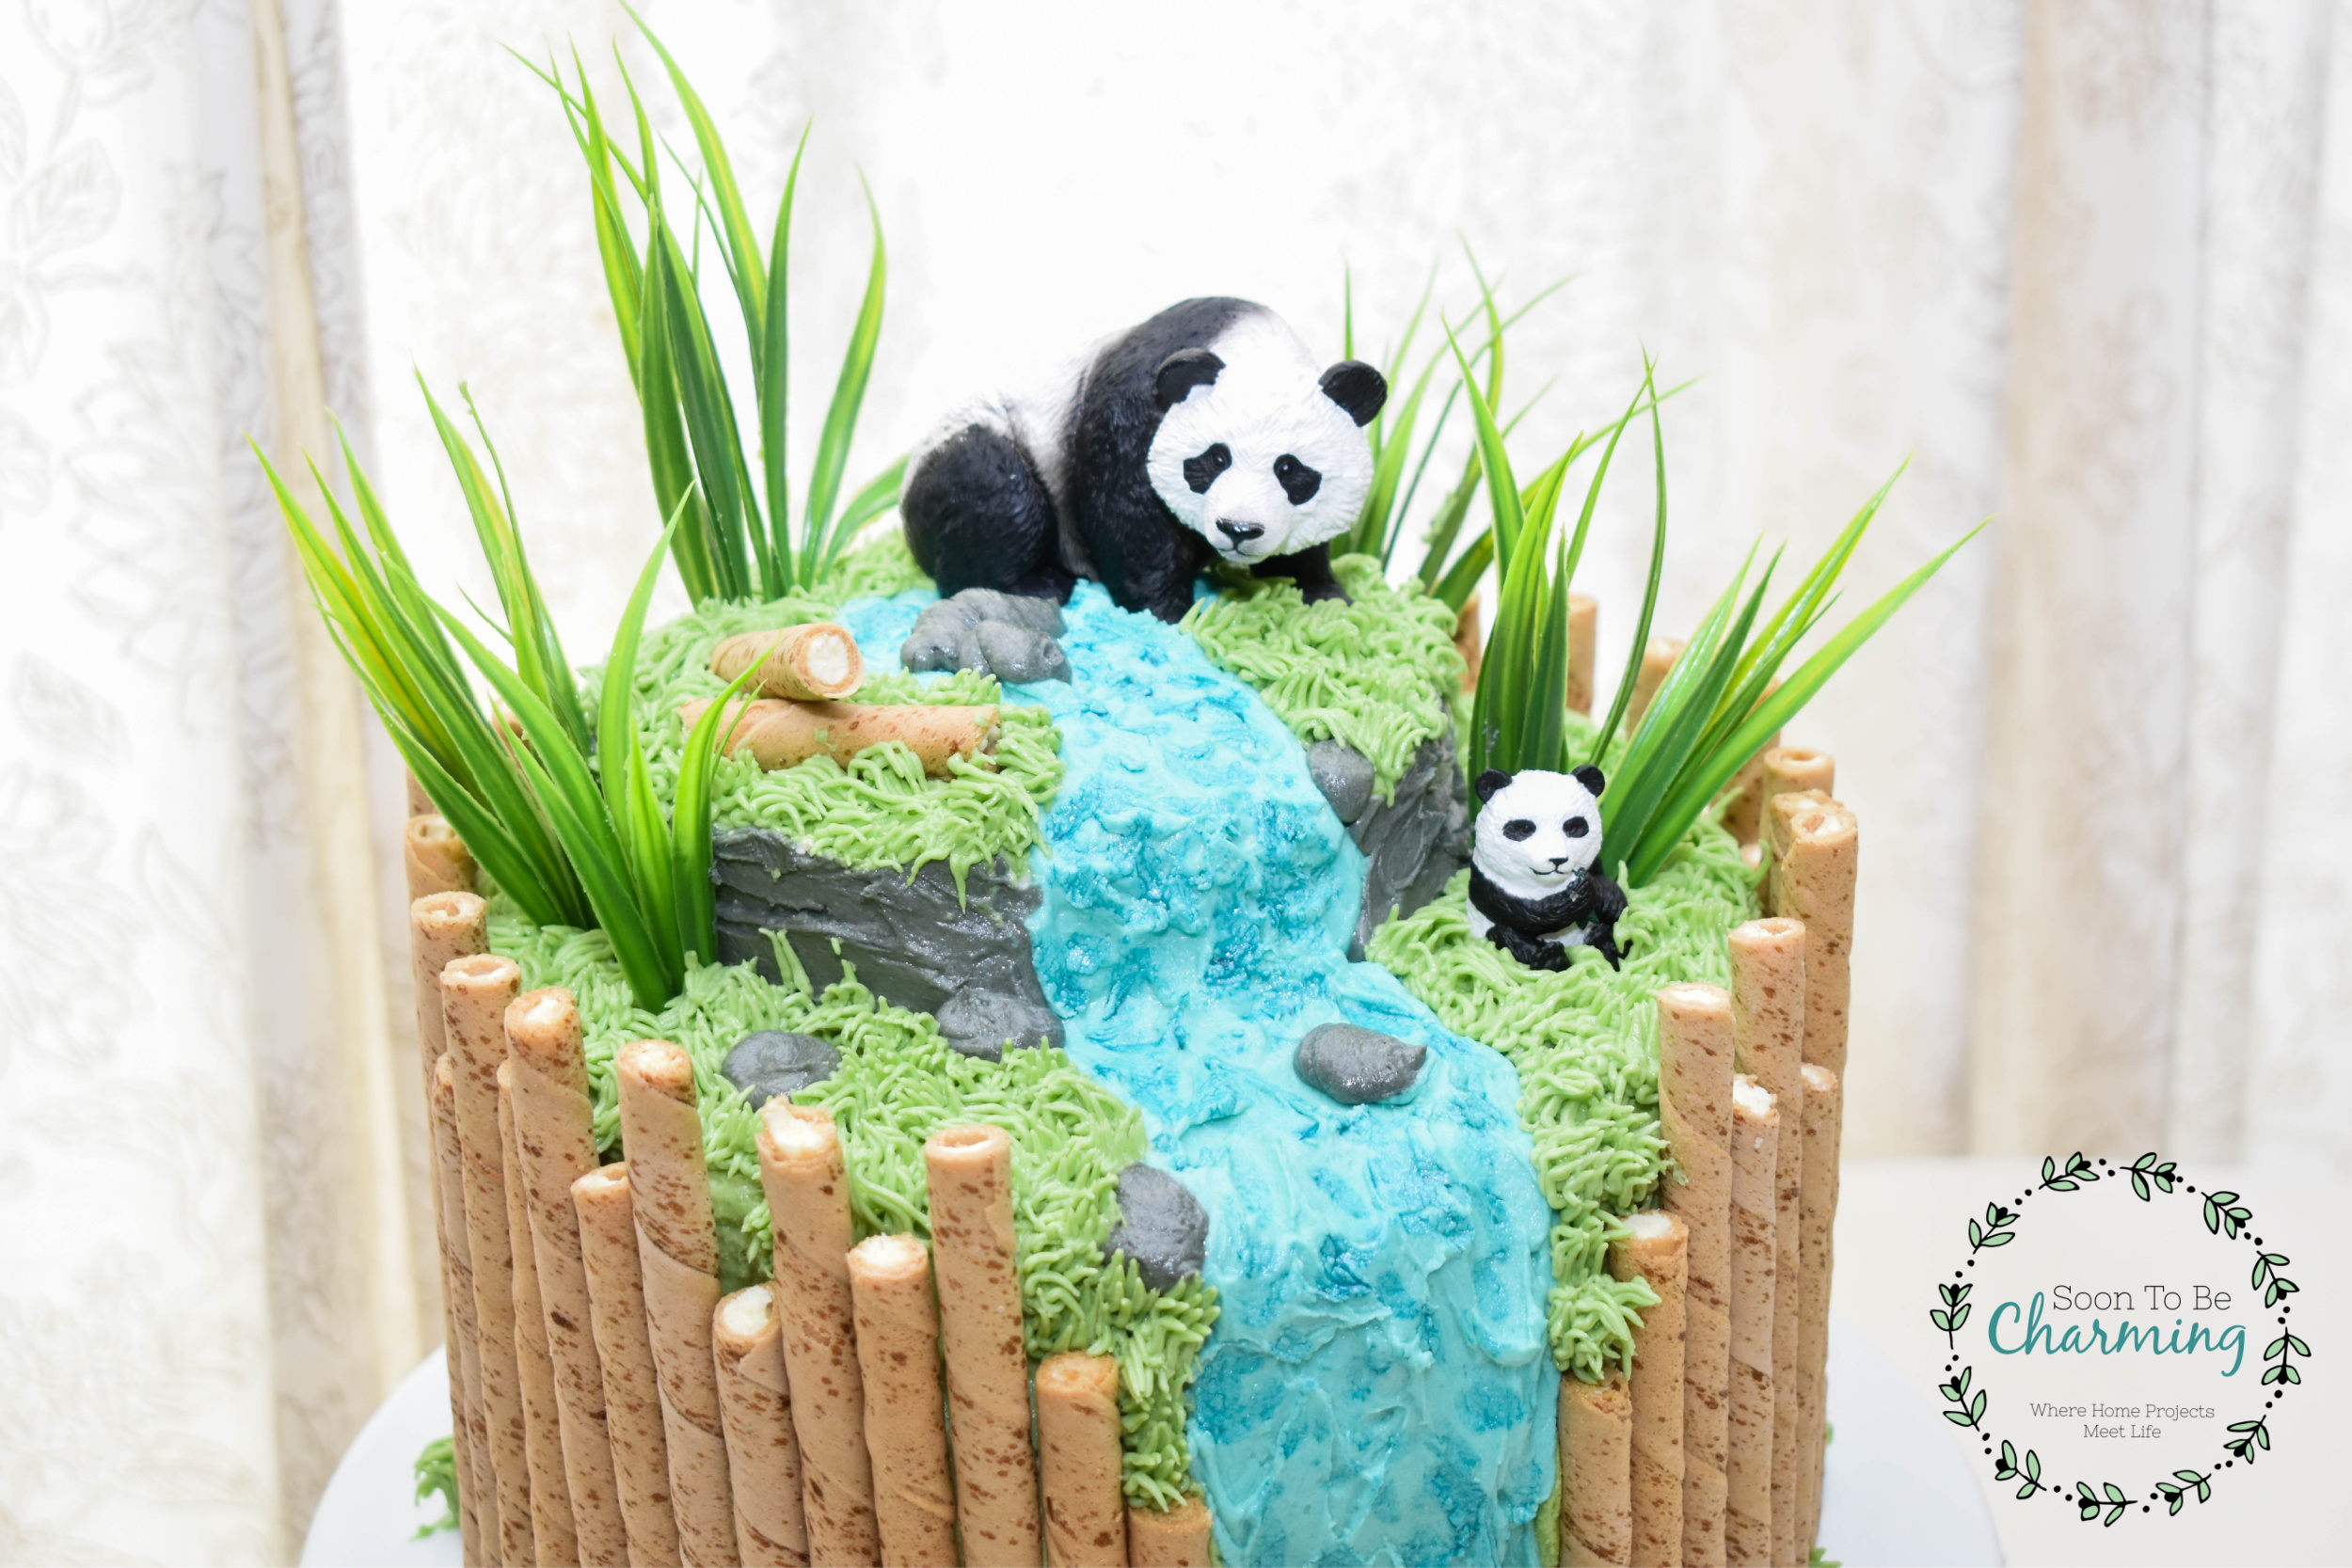
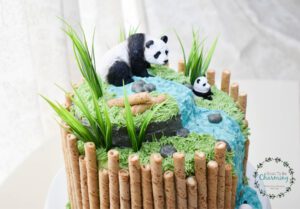
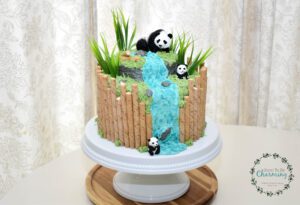
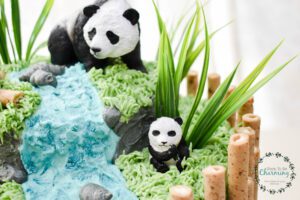
First, I filled in the waterfall with frosting. For this cake, I mixed a blue and green gel coloring to get a pretty turquoise water color. The turquoise color was also on the plates, so we tied that into a lot of the decorations as well.
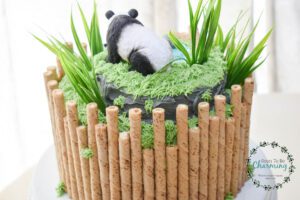
Next, I frosted the top of the cakes green to lay the foundation for the grass. Then I moved on to the side of the upper 6″ cake with gray frosting and smoothed it out with a knife. In order for it too look more like a rock ledge, I didn’t smooth it completely. I put a few ridges in it with the knife.
To get the right color for rock, I tend to mix black and brown gel coloring. The brown warms the gray color up and looks more like rock. If you use just black gel colorant it ends up as a much cooler gray, with a purplish tint.

Here you can see the blue waterfall, green tops and rock sides.
Bamboo Wall
Next I added the side walls to look like bamboo….however, I should have done the grass first. I staggered the bamboo between short and tall, so I had to fill in the grass afterwards which was difficult. If you look close you can see some missing spots!
So If I did it over, I would finish the grass next and go down on the sides a little (so if a short piece of pirouette was placed there, the grass would show through).
![]()
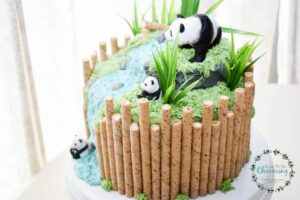
After the grass is finished, now put the pirouette wall up. As I mentioned I staggered the height and had them tier down towards the waterfall. I simply cut the pirouettes with a knife. My daughter isn’t much of a chocolate fan, so I bought Pepperidge Farm French Vanilla Pirouettes and they were delicious. I used two cans for my cake, but bought 3 to make sure I had enough.
As a side note, they won’t be edible the next day (they were soggy after a night in the fridge). So put them on the same day you serve the cake.

![]()
Here is the wall! I know there are many cakes already on Pinterest with this idea, but it was really cool to see in person. The pirouettes do really look cool on a cake!

Final Cake Decorating Details
To complete the cake I added a few last details. I put rocks in the river and waterfall just by squeezing gray frosting out into a blob. For the rock in the waterfall, I made sure to add a little more blue frosting over it to look like it was cascading over the rock.
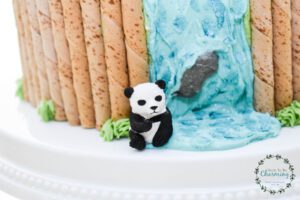
I also added a little blue edible luster dust (mixed with vanilla extract) and painted it onto the river/waterfall to give the water dimension and a little sparkle.

![]()
Next, I added the panda figures! After the wall was completed, I decided only to put one of the adult pandas on the cake with the two babies. The large pandas are a little heavier and frankly, I just ran out of space. I still set the daddy panda out at the base of the cake stand….I couldn’t leave him out completely!
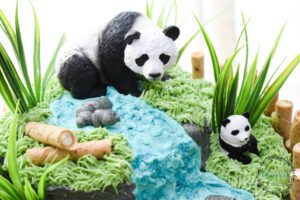
Lastly, I put the stems (I cut and washed earlier) into the cake to look like tall grass. This adds even more dimension.
Then step back and enjoy your beautiful cake!
Thanks so much for checking out my post! Make sure you check out more of my cakes under the Holiday, Seasons and Celebrations Tab!
