How To Improve Your Landscaping

How to improve your landscaping? If you would have told me three years ago that I would be writing a post on landscaping, I would have laughed out loud. My landscaping consisted of flowerbeds filled with weeds, dirt and a few scattered woodchips. However, in a few short years and on somewhat of a tight budget, we have completely transformed our yard. I am here to tell you it can be done…so let me show you a glimpse of what we did.
When we moved into our sweet 1970’s mustard colored house, it was love at first sight! Thankfully, my husband and I are not afraid of a little DIY, because the house definitely needed some work. However, we could see the potential.
With so many projects to be done, landscaping sat on the backburner for a few years. Replacing the roof and windows came first. Finally, out of sheer desperation, a little embarrassment and maybe lack of funds for a bigger project….we began to focus on our landscaping.
Save For Later!
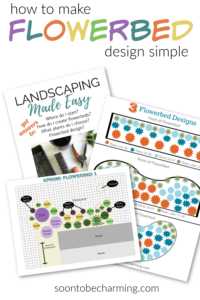
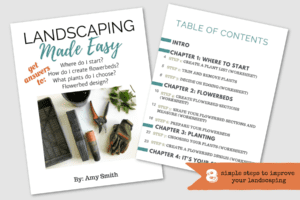
Going through the process of improving our own landscaping, inspired my new ebook Landscaping Made Easy. When I first started, I wish I would have had a timeline or something to help me stay focused. I wished I had worksheets to help me design my flowerbeds. Going through this process myself, inspired me to want to help others navigate it as well!
Where We Started!
Let’s walk down memory lane. I would love to show you where we started and how far our landscaping has come.
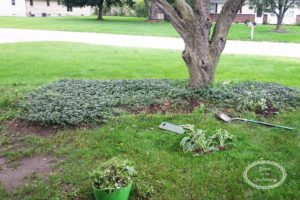
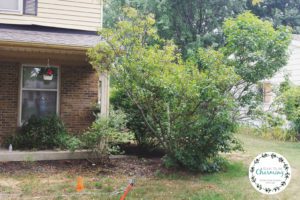
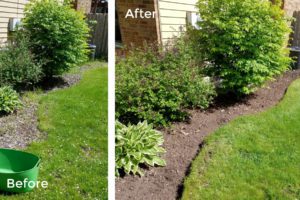
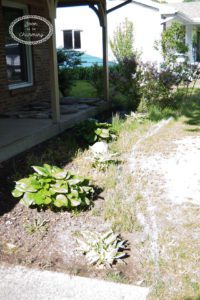
The front flowerbed! I faithfully weeded that flowerbed every year, but without woodchips I couldn’t keep the weeds from coming back. Plus, so much Vinca!! Vinca is actually a very pretty groundcover, but it is hard to keep weeds from growing up through it. I also wanted more of a variety of plants in my front island bed, so in the end I decided to remove all of the vinca.
Landscaping Tip: Getting ready to remove ground cover? Use a small pitch fork…works like a charm.
Let’s look at a few more pictures of our original landscaping! Everything was overgrown when we moved into our house. In the picture below, we had some very overgrown lilac bushes. I wanted to keep the lilac bushes, so I trimmed them down quite drastically.
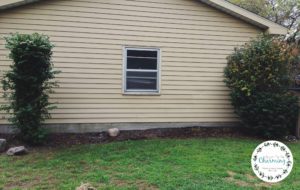
With the lilacs all trimmed, the front landscaping was pretty bare (It was also the first picture of our new windows…yay for new windows).

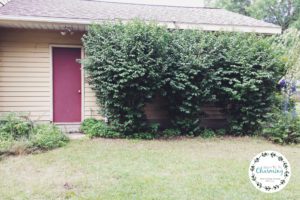
Burning bushes everywhere! It was hard to even see the back of the garage the bushes were so high.
Removing Unwanted Shrubs and Plants
Removing large unruly shrubs can be difficult, but it will really improve your landscaping. My husband broke a shovel or two trying to remove these burning bushes. If you really like burning bushes or are thinking of buying them for your house, I would recommend the dwarf variety! You will still have vibrant red color in the fall, but then they won’t be towering over your roof every summer.
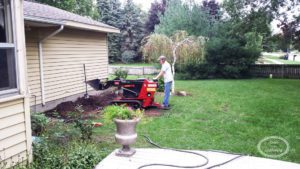
Anyways, we were building a small retaining wall in the back yard for our playset and had a dingo rented…so we made a small detour and used that to pull out the roots of all the remaining bushes.
If you don’t want to remove your shrubs, then make sure to spend time getting your overgrown shrubs trimmed and shaped to improve your landscaping.
Shaping Your Flowerbeds
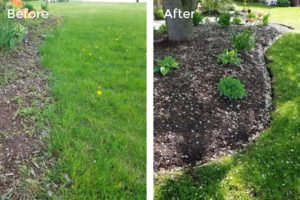
Attending to your flowerbeds is another important tip. Clean cut lines are a very simple and effective way to improve your landscaping! Even if you don’t want to spend money on edging materials right now, you can make a clean cut line with a small edging shovel. It will make a huge difference.
Planning Can Help Improve Your Landscaping
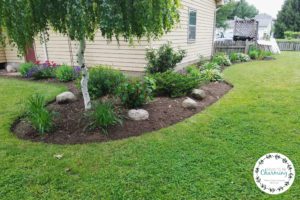
If you are not ready to overhaul your entire yard, like most of us, then expect landscaping to take time. However, the right planning can keep you on track. After removing unwanted plants, shaping your flowerbeds and adding woodchips…your landscaping will be much improved, but we aren’t done yet!
My ebook, Landscaping Made Easy, walks you through breaking down your flowerbeds into more manageable sections to help you plan.
I have been working on my front flowerbeds, which I broke down and numbered as flowerbeds 1 and 2. It makes it easier to only have to focus on one or two areas at a time, especially since my island flowerbed is so large. To keep the cost down, I only buy a few plants each year.
In the beginning, I would just plant them in the flowerbed wherever I thought looked best. However as time went on, I ended up needing to move plants around more and more to make everything work. I finally created a flowerbed design so I would have an actual plan.
Landscaping is so much easier, when you plan. Designs tell you where to plant everything, make sure your flowerbed is well rounded and more!
Flowerbed Design
Here is the design plan I made for the flowerbed along my porch. This plan shows all the plants based on their spring colors.
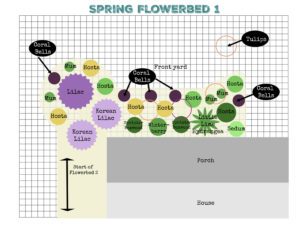
I am still working on purchasing the rest of the plants for my front flowerbed design, but I know what to buy and where it will go.
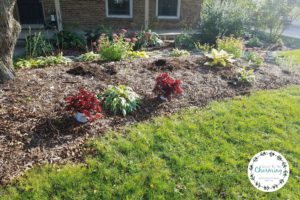
Here is a glimpse of my front flowerbed and all the gorgeous fall color! You will see a few gaps, but that is where plants will be going in the near future.
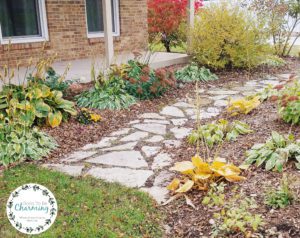
It’s hard to believe it looked like this only 3 years ago.
Want to see how we installed our flagstone walkway? CLICK HERE.
Here are a few more pictures of our landscaping improvements!
As I mentioned, it is a process. It does take time for plants to grow and fill in, but following my flowerbed design makes the process so easy.
Over the past few years, I have learned so much. The process we used to improve our landscaping is the same process laid out in my ebook Landscaping Made Easy. The ideas are simple, the worksheets helpful…and planning will help you get where you would like your yard to go.
Need help designing? My ebook also gives you a few design ideas and some flowerbed design templates to help get you started!
Winter is the perfect time to plan and design, then you will be ready to go as soon as spring hits!
WHAT IS INCLUDED IN LANDSCAPING MADE EASY!
I can’t believe how far our landscaping has come in just a few short years! Thanks for checking out my journey, I hope this inspires you to start a landscaping journey of your very own!

Share This Pin!