How To Lay A Flagstone Pathway
I have love flagstone pathways, but I had always envisioned them in grand landscaping. So the thought of having one in our own yard was quite exciting, but intimidating at the same time. What I learned from laying our own flagstone pathway is…flagstone makes any yard look better!
However, when we first started on this landscaping journey the decision wasn’t so clear. It was hard to figure out the best design for our front flowerbed. We have one flowerbed that lines the porch and another kidney shaped flowerbed with a large crab apple tree. In-between the flowerbeds is a small stretch of grass, which is pretty much dirt. The spot is shaded from the tree and the kids constantly walk through there to the neighbors house. With all the foot traffic, simply throwing down more grass seed wasn’t a good option.
{This post contains affiliate links, which means I may receive a commission if you click on a link or make a purchase. This comes at no extra cost to you. I appreciate your support!}
My husband and I thought about filling it all in with wood chips and landscaping. I also thought about making the kidney shaped flowerbed raised and having two levels.
However even if one of the beds was raised, connecting the flowerbeds would make it look like one really giant bed. This would require a lot of maintenance and a lot of plants to fill.
We finally decided to keep the flowerbeds separate, but we still needed to figure out what to do with the dirt path in-between. After a lot of discussion, we decided having some type of walkway made the most sense. We looked at several different options, but my favorite by far was flagstone.
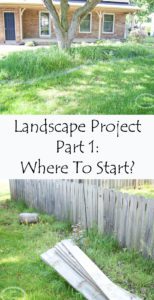
Initially we decided to wait and install the walkway the following summer. We had just finished a huge landscaping project on our entire yard. CLICK HERE TO GO BACK TO LANDSCAPE PROJECT PART 1: WHERE TO START
However, my facebook marketplace loving husband came across an incredible deal! One we couldn’t pass up. Someone was selling a huge pile of flagstone for a very affordable price. So there it was, now a ton of flagstone was sitting on our porch and in a blink we jumped into another big project! I mean who needs to sit around and rest right?!
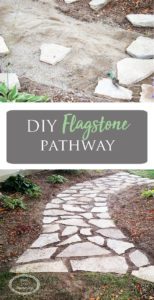
Putting In A Flagstone Pathway
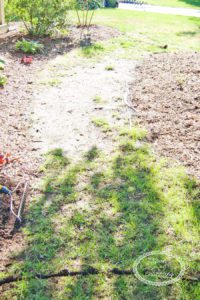
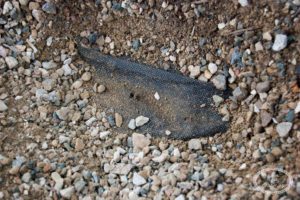
To start, we figured out the shape we wanted the pathway to be. The middle was determined by the edge of the flowerbeds, but we had more freedom to decide on the ends. We played off the curves of the already existing flowerbeds and then dug a line with our shovel to determine the final shape.
Once we had the shape of both ends figured out….we were ready to start digging. OK, so maybe my husband was ready to start digging! I will totally admit I am worthless when it comes to shoveling. I will be hopping up and down on the shovel like 3 times while my husband empties a big area.
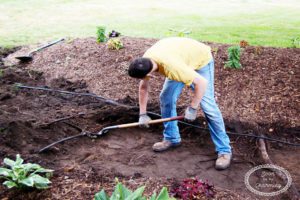
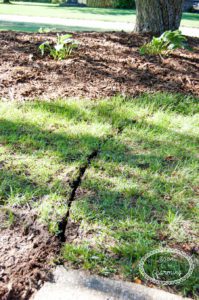
It is never as simple as digging either! In this small path we ran across 3 underground sprinkling lines (which my husband was actually happy to re-route and simplify). We also ran across a bunch of roots from our large Crab Apple Tree. We needed to cut them all out to proceed.
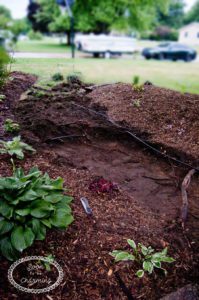
The Depth
Our goal was to dig down 6 inches. We needed 3-4 inches for the stone dust and then the width of the flagstone, which was about 2 inches. I think in the end, my husband dug about 8 inches deep (messing with the roots and sprinkler lines). We did fill a little dirt back in so the walkway wasn’t too low.
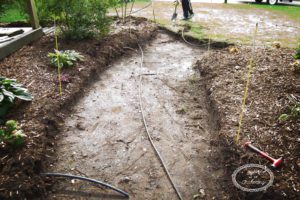
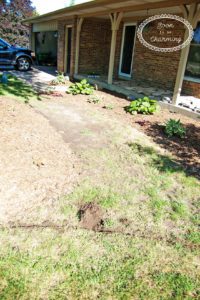
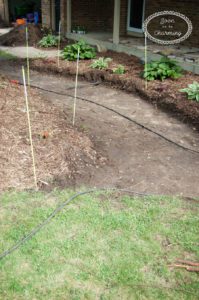
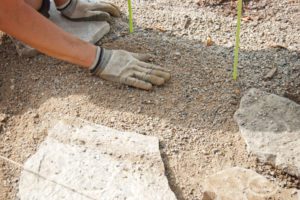
After everything was cleared out, we smoothed the dirt to get ready for landscape fabric and stone dust. Below you can see we put stakes along the pathway. We measured the walkway and put stakes in to make sure the path was the same width all the way around. At first, it ballooned in the center and that didn’t look very well. I am so glad we measured and used the stakes to keep the path consistent.
The landscape fabric was laid down next and then the stone dust was piled on top. Below I just scrapped the stone dust off the landscape fabric to show you. After the picture I covered it back up.
Laying the Flagstone
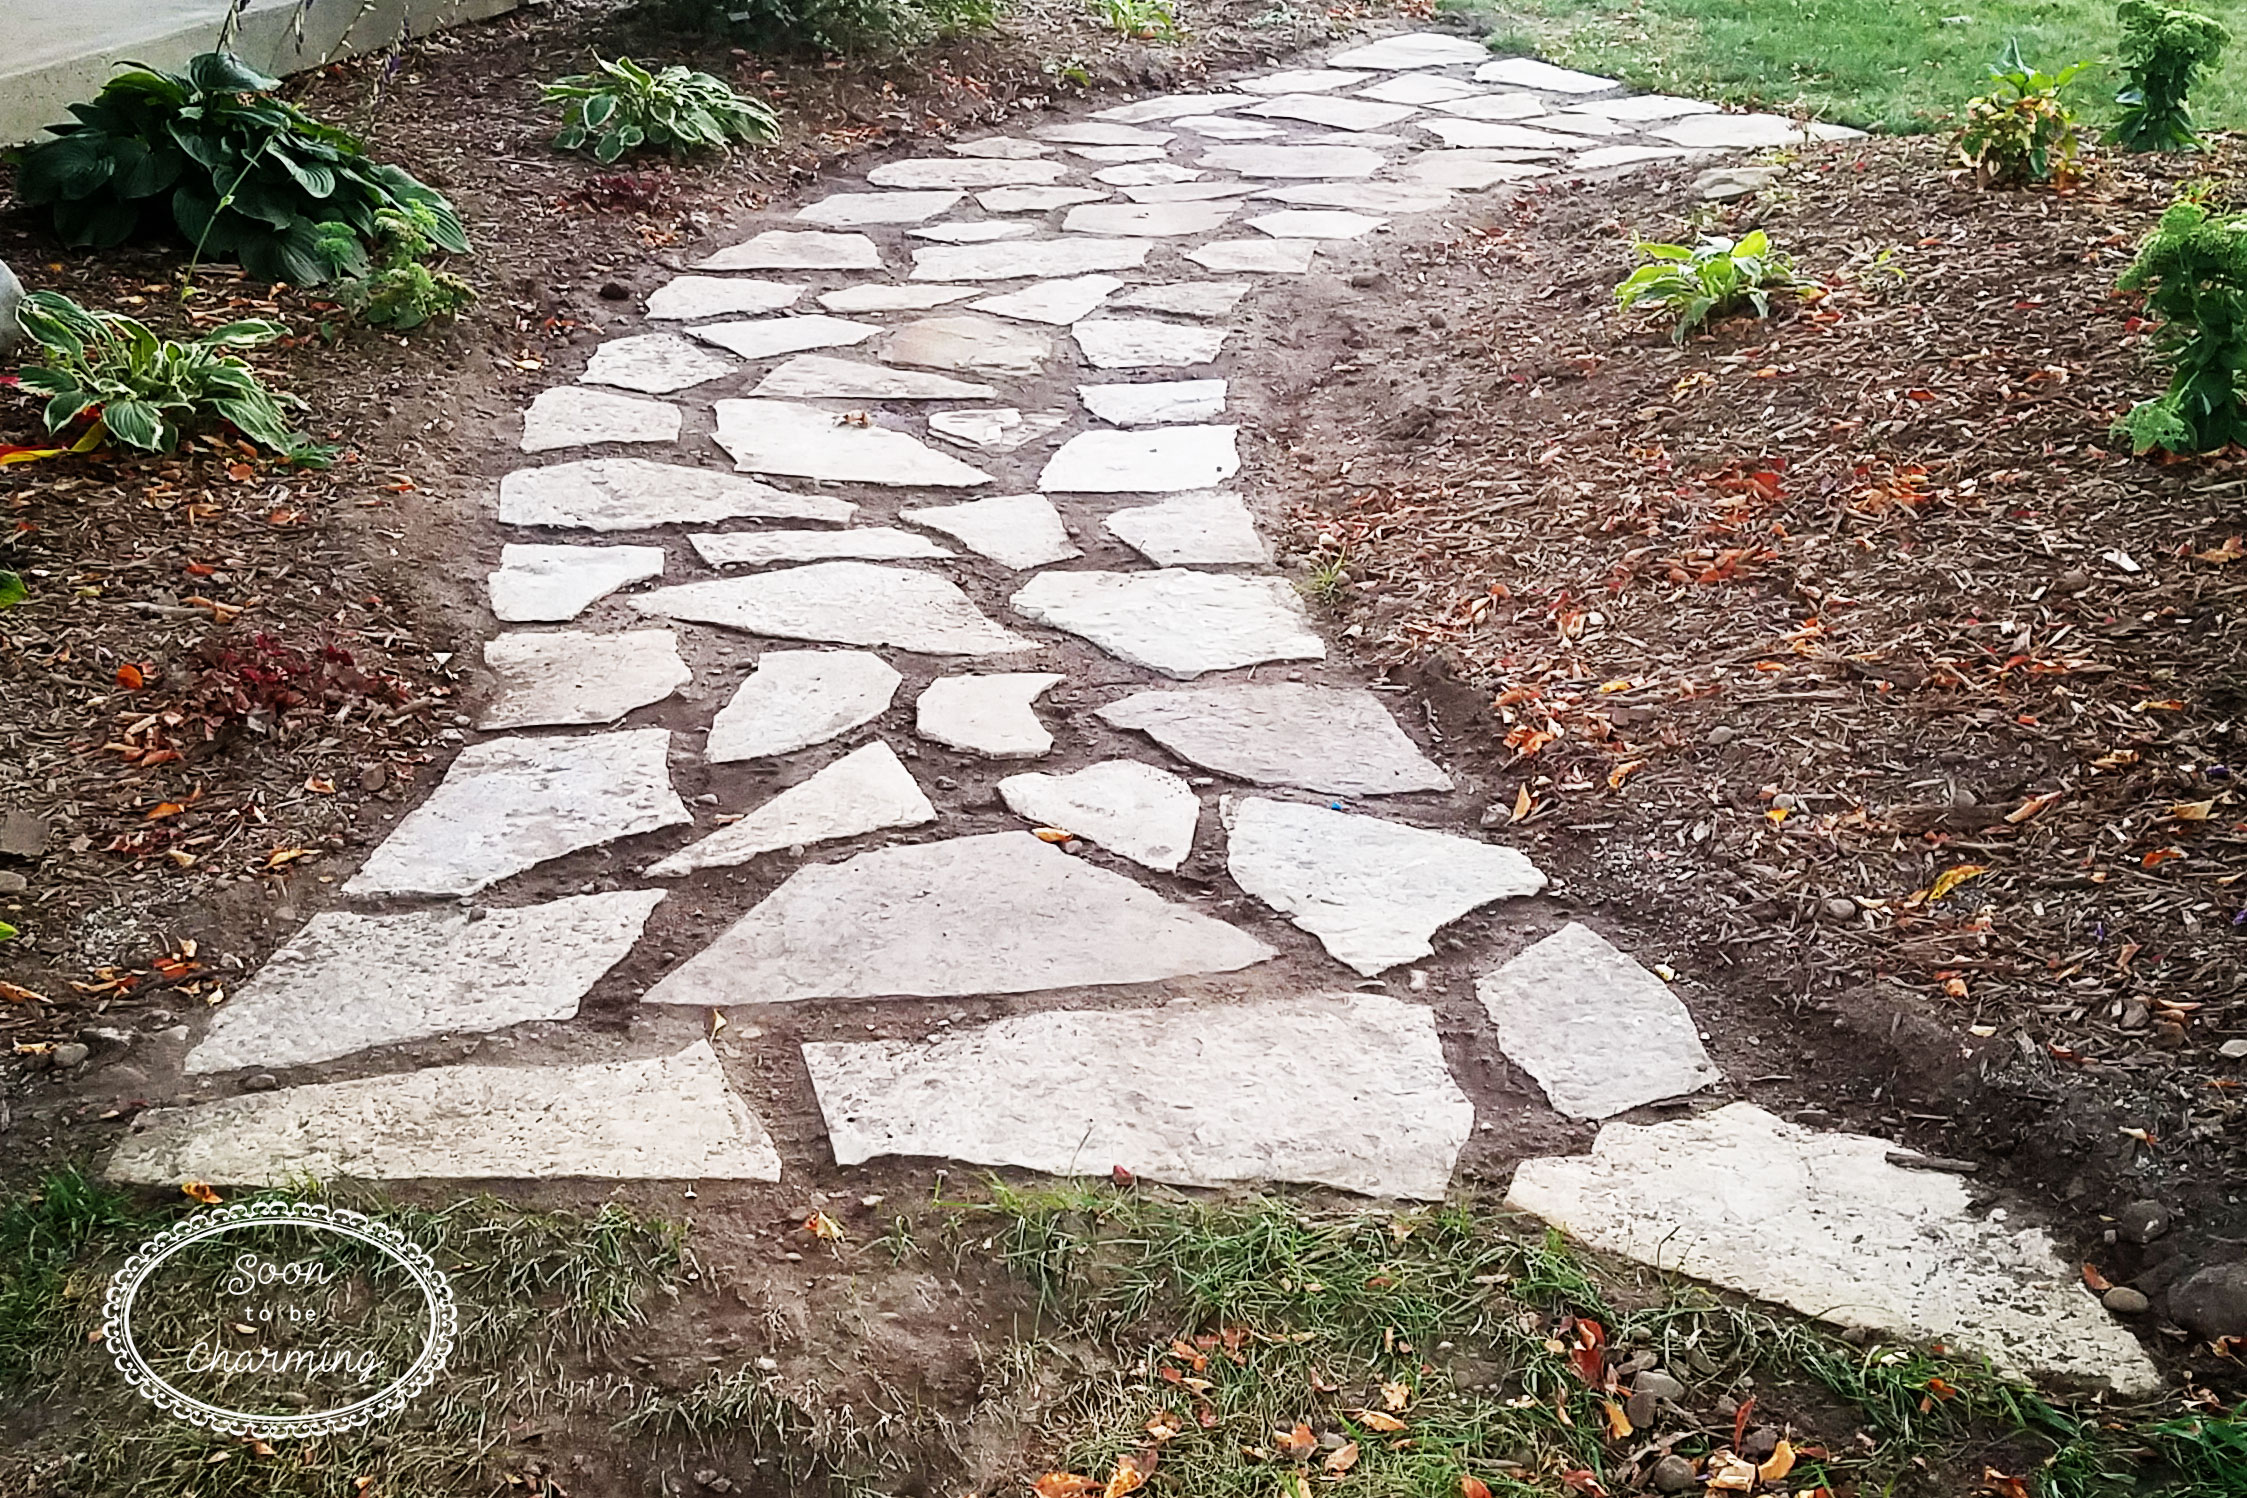
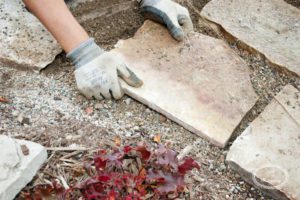
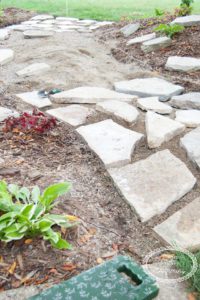
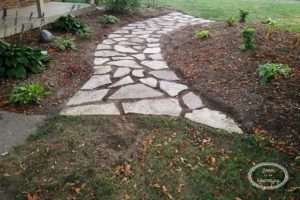
Laying down the flagstone was a lot more tedious than we anticipated. First of all, we wanted the size of stones evenly spaced throughout the path. We didn’t want all the large pieces at one end and on the other end have to finish with all small pieces. So to begin, we pulled out all the larger pieces to get a visual of how many we had. Then set aside a few larger pieces for the middle and far end.
Laying down about three rows at a time seemed to work for us. We would move the pieces around several times and try to keep a consistent gap between all the rocks. This process took a lot of time. My husband and I looked at every single rock placed and agreed on it before moving forward.

Once we figured out what stones fit well together, we had to lift each stone back out, one at a time, and level them. We would need to pull dirt out or fill some in so it didn’t teeter.
Keeping Your Pathway Level
To keep the rocks level with each other, we tied a string the entire length of the pathway. Initially we noticed our pathway sunk towards the middle, so we filled in a little more stone dust until the rocks were level with the string.
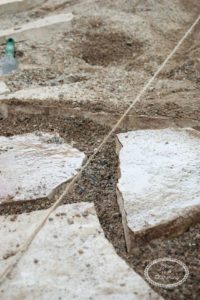
Once each stone was secure in their spot and leveled next to the other rocks, we lifted it back up and sprayed the stone dust with water, then put it back down. This allowed the stone to “set” and stay in place better.
And we continued working on one stone at a time.
While we did set aside some larger stones for the far end of the pathway, it is best to start at one end and work your way to the other. If you work from the ends it may be harder to fit stones in the middle of your path.
With that being said, if you look at our picture, we did lay the entire path out. However, they were just temporarily placed to help us visualize, but we “set” them by starting at one end and working towards the other in case we needed to make any adjustments.
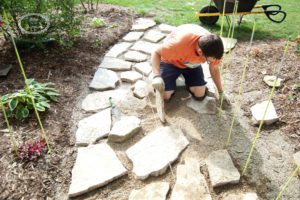
My husband wore knee pads which was very helpful!

Can you believe it!! We finally had all the stones set!!
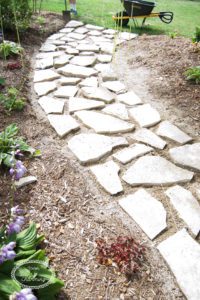
Once the stones were all individually set, we wet the entire path down again.
Finishing Your Pathway
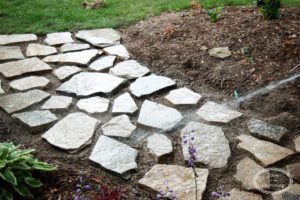
At this point, there are a few different ways to finish your pathway. I personally like more of a cottage garden look, so I wanted to fill it in with dirt. To fill it in we shoveled a bunch of dirt back onto the stones and used a broom to sweep the stones clean. We continued until the dirt filled in the gaps and were level with the stones. We watered the dirt down to let it settle and filled more dirt back in. In the end, the dirt needs to be level with the stones.
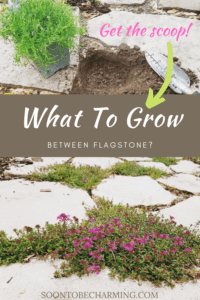
I bought creeping thyme to plant in between the stones, however, the process actually took a lot longer than I thought and it all died. Whoops, well I guess I was a little too busy and forgot to water them. Before they died, they smelled amazing like lemon! I can’t wait to get some more planted this summer and watch them fill in!
UPDATE: My plants are finally starting to fill in after a couple hiccups! Check out the progress here:
Get ready for your project!
My New Ebook is Here!
Make sure to check out my new eBook Landscaping Made Easy. This is the perfect ebook to help you tackle your yard! What if you could improve your yard, even if you have a small budget! It takes planning and the 8 step timeline from Landscaping Made Easy will help you get there.
CLICK ON THE IMAGE TO SEE WHAT IS INCLUDED…

Making a flagstone pathway yourself it completely doable. It takes a lot of work and time, but the end result will be amazing!! Thanks for checking out my post and let me know what landscape project you are working on below!

PIN IT FOR LATER!
SEE MORE LANDSCAPING POSTS HERE:

Hi there. Thanks for your article, it was very helpful for me to read as I prepare for my own flagstone path project. I’m also planning on creeping thyme between my flagstones. Did you ever plant some between your pavers? I’d love to see photos of your pathway with the creeping thyme in place.
Hi Alex! First of all, I absolutely love my flagstone path…so glad to hear you are putting one in too! So I did plant creeping thyme in my pathway, we also have a short flagstone path to our garden in the backyard where we planted it as well. It did really well in the backyard with full sun…but didn’t do as well up front because it is part shade. I ended up replanting Irish moss up front, but here is a picture of the creeping thyme on our garden path. It is gorgeous, so if you have full sun I would definitely say do it! If it is part shade, I would advise looking into Irish moss.
https://wp.me/a8T9X8-1Il