Clean Up Your Flowerbeds in 4 Simple Steps
I love my yard, I hate my yard, I love my yard, I hate my yard…..it’s like picking off petals of a flower. We all love the beauty flowerbeds bring, especially when it is overflowing with blooms, but don’t always love the work to get to that point. Weeding is not fun, wood chips are not fun…but unfortunately we can’t get the end result we want, without putting in some effort.
Over the last few years, it’s been amazing to watch our yard transform. Literally three years ago my front flowerbed was dirt and we were sifting out rocks…this spring it was filled with bright orange tulips. Thankfully sifting rocks isn’t on my spring checklist anymore (that was a nightmare), but seeing the transformation does make the hard work feel that much better!
This post contains affiliate links, which means if you click on or make a purchase I may receive a small commission at no extra charge to you. Thank you for your support!
CLICK HERE TO SEE HOW WE SIFTED OUT THE ROCKS
So how do we get our flowerbeds ready for spring? Let’s break it down into 4 simple steps.
How To Freshen Up Your Flowerbeds
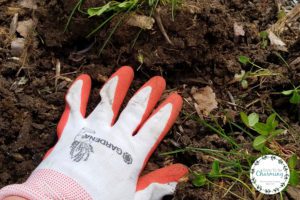
Step 1: Weed Your Flowerbeds
Grab your kneeling pad and start weeding your flowerbeds. It is amazing how much better the flowerbeds look with all the weeds pulled! Here are some tips for pulling weeds:
- Use gardening gloves, the gloves will help you grip the weeds better. Another recommendation is to use different gardening gloves for weeding and for planting. This will help prevent the seeds from spreading.
- Grip from the top of the root, pulling from the leaves will cause the weed to break off from the root.
- Pull up (from the top of the root) and twist when pulling out the weeds.
Weed Prevention Tip
Did you know…landscape fabric is not meant to be put down under wood chips? Most professional landscapers do not recommend it as a weed barrier for many reasons. It prevents water from getting to the roots of your plants, once weeds do start to grow they get rooted in the fabric and are harder to remove. It doesn’t allow your wood chips to break down into your soil and landscape fabric prevents needed airflow to your plants. Landscape fabric is meant to be placed under landscape rocks or stone pathways and not as weed prevention.
The best way to naturally prevent weeds is simply by layering 2-3″ of wood chips.
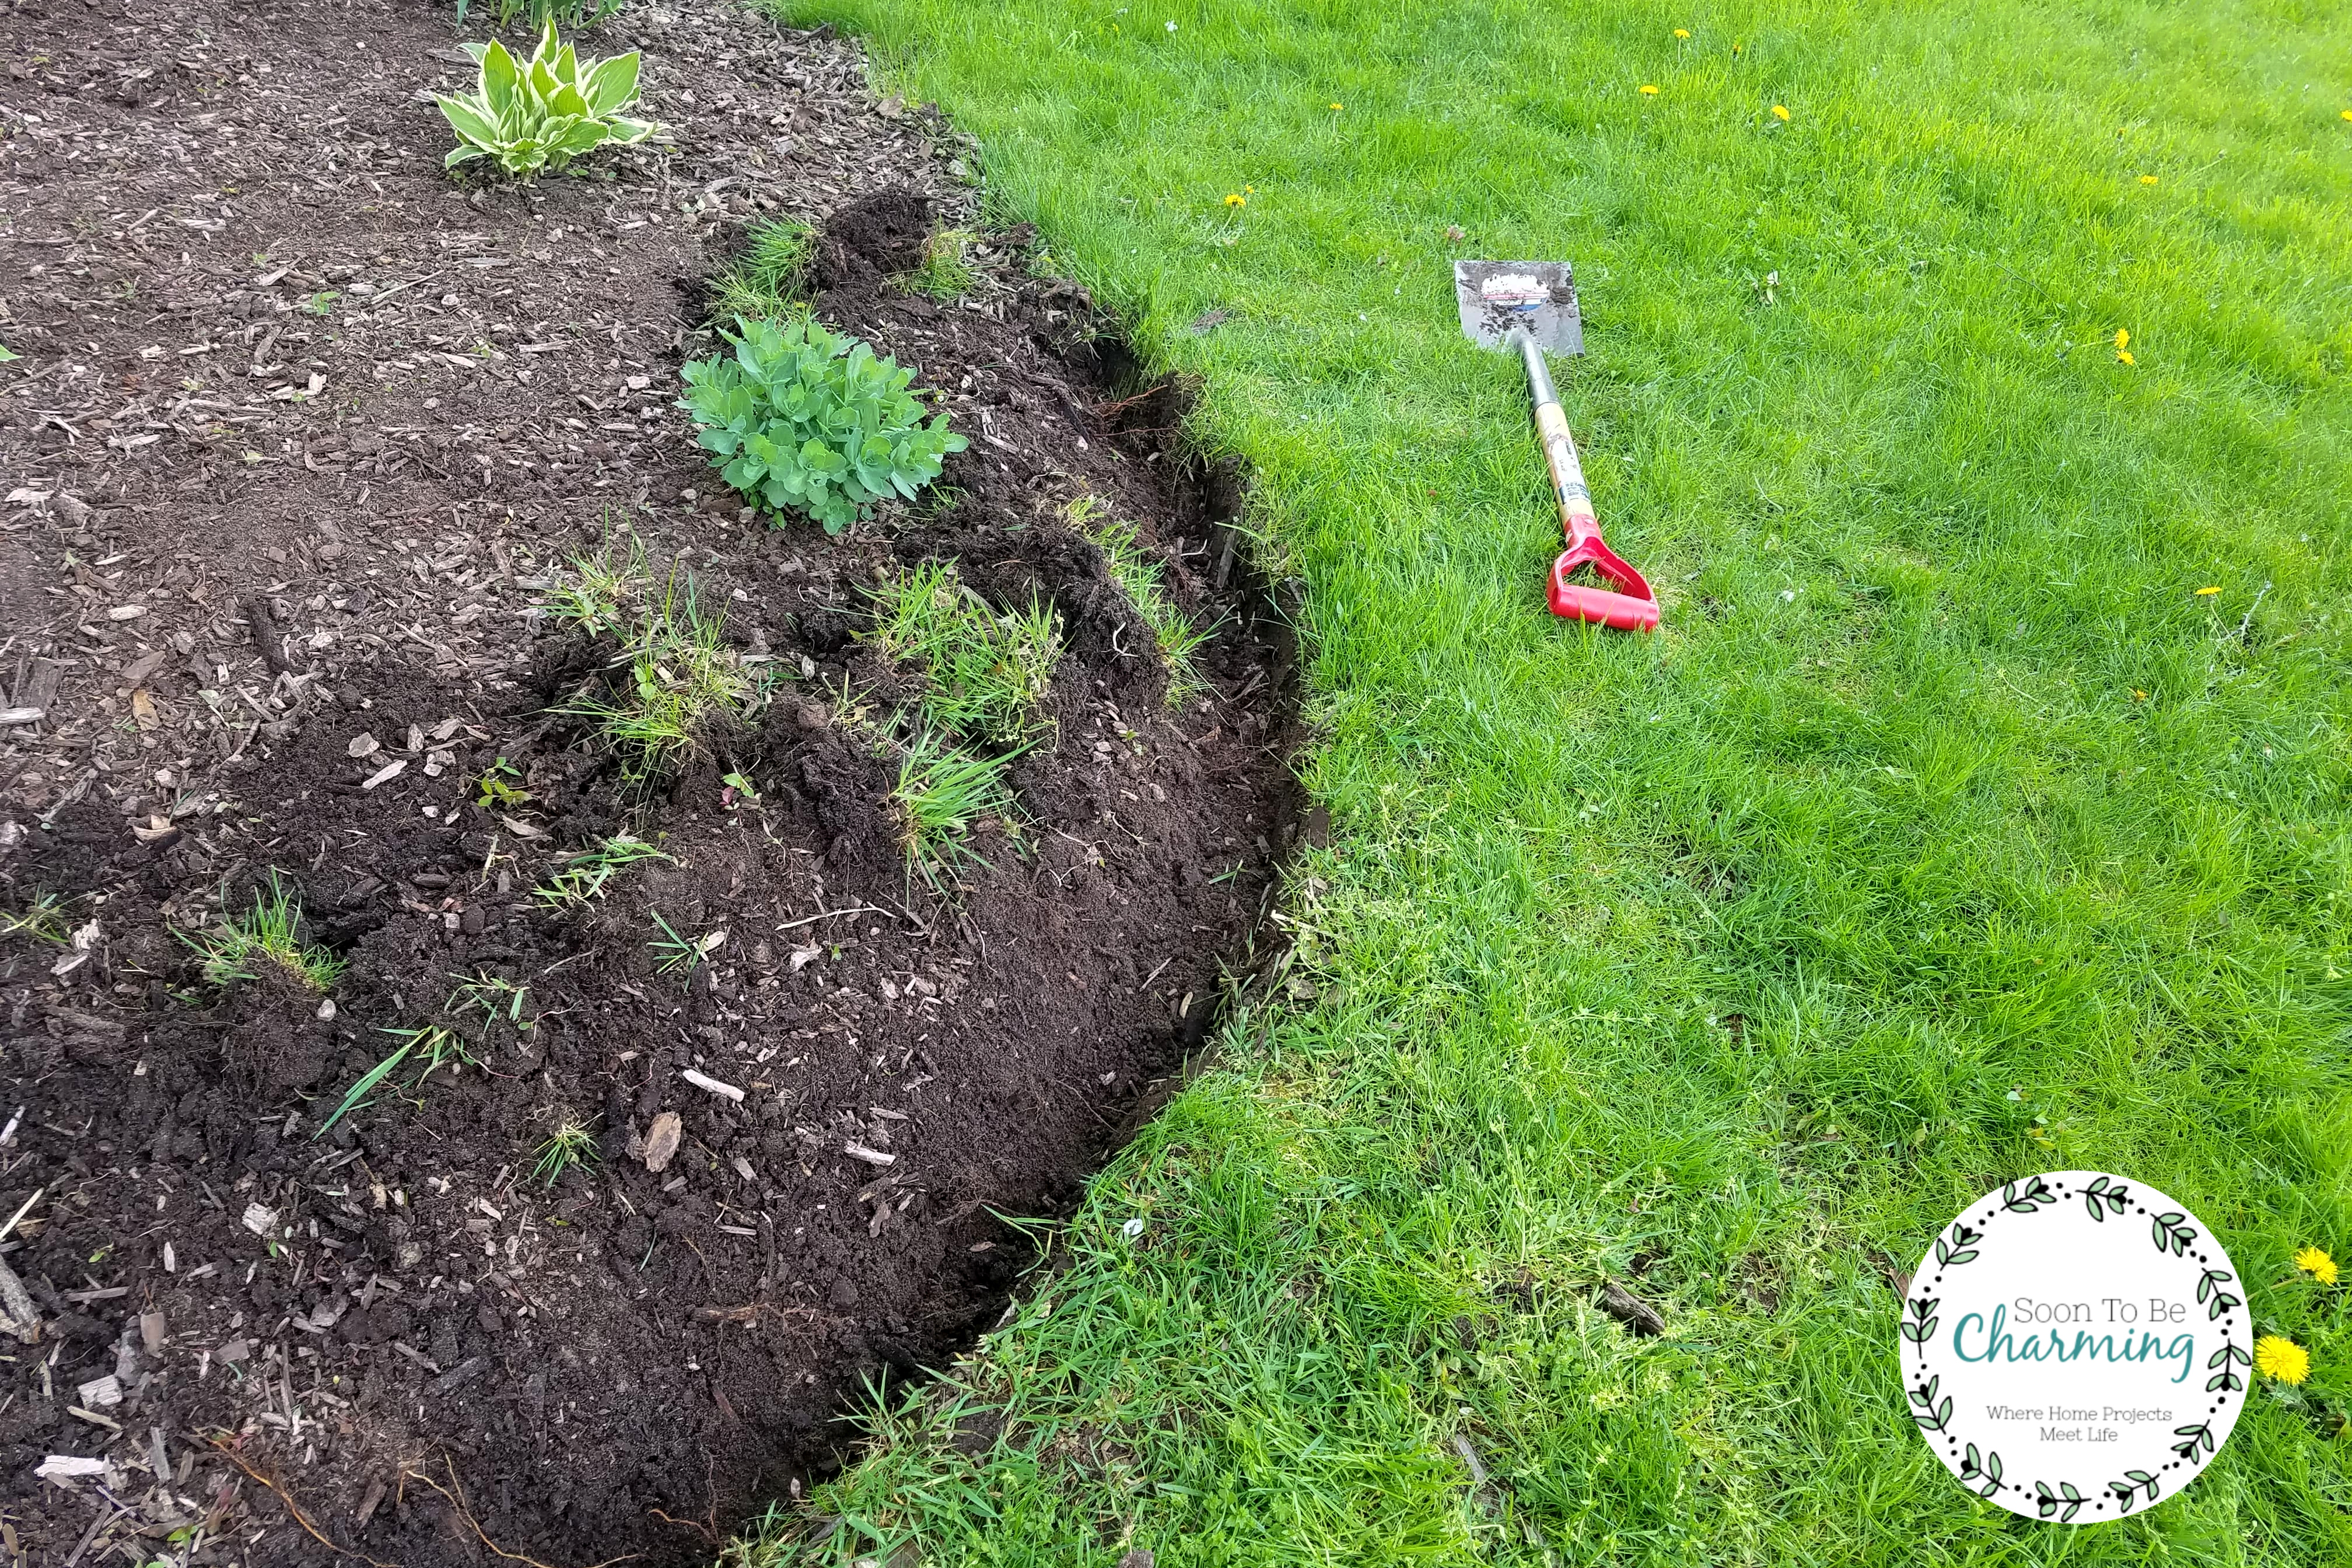
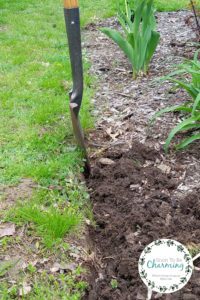
Step 2: Low Maintenance Edging
One of my biggest pet peeves is how terrible edging looks around flowerbeds after a couple of years. The pavers that topple over, the bricks out of place. Just take a quick drive and I am sure you will see several examples. Edging takes maintenance. So a few years ago when we began our landscape makeover…edging was a big topic. We decided to go with no edging material and simply cut our edge in with a commercial edger (CLICK HERE TO SEE THE EDGING MACHINE WE USED). It worked amazing, and yes you could always rent it again…but we decided to maintain it with a simple edging shovel (*pardon the rust…our little blessings left it outside in the rain).
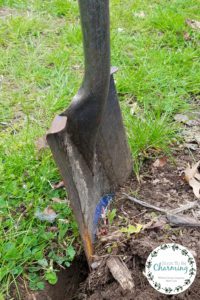
First of all, once the original edge is there…it is not hard to cut back in with a shovel to freshen it up!
Edging Steps:
- Use the shovel to cut along your edge line about 2-3 inches deep and remove dirt up into the flowerbed.
- Remove the sod and weeds pulled up when creating the new edge. I would just shake off as much dirt as possible and then put the weeds or grass pieces in a bin to get rid of.
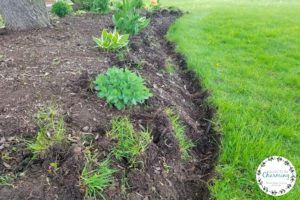
- Then smooth the dirt back away from the edge line…creating a nice slope up into your flowerbed. (If you are wondering what all the white is below….my crabapple tree began dropping petals and covered the flowerbed.)
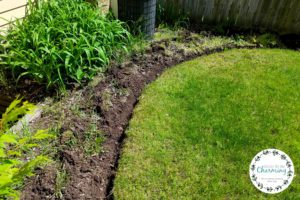
This edging is about as simple as it comes.
[Just for a time reference, it has been two years since we originally edged our flowerbeds and I would say it was definitely time to freshen the lines up]
With this type of edging, it will take some easy maintenance every couple years….but I still am extremely happy with our decision not to use an edging material (plus it saves you a lot of money!)
Step 3: Add More Plants
If your flowerbed has the space, adding more plants is always a great way to brighten them up. We are still in this stage! Our flowerbeds are still pretty empty… but landscaping takes time, especially if you are on a budget.
When adding additional plants, make sure to select plants that meets the sun, soil and water requirements of your flowerbed. I use the plant detail worksheets from my ebook, Landscaping Made Easy, to keep track of all the plant requirements!
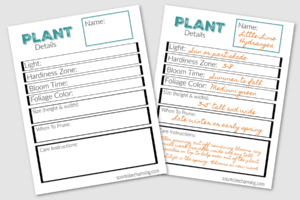
I have also created a LANDSCAPE BINDER to keep all the plant detail worksheets together! The binder is easily accessible and helps keep track of when to prune, make sure all the plants have the right sun requirements and more. To get the free printables to start your own landscape binder…CLICK HERE.
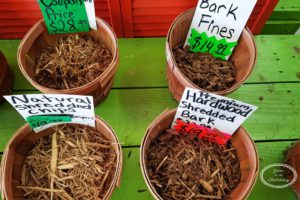
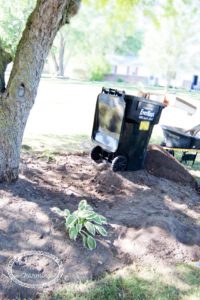
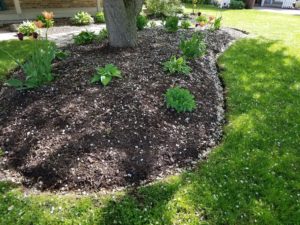
Step 4: Add More Wood Chips
As I mentioned in step 1, keeping thick layers of mulch will help keep the weeds down. After two years, our mulch is getting pretty thin. Adding mulch will give your flowerbeds a fresh look and keep them looking nice throughout the summer with less weeds.
How much mulch do I need?
It is suggested to have 2-4 inches of mulch down. *remember mulch is made to break down, so it is always good to add 1 inch more than the thickness you desire.
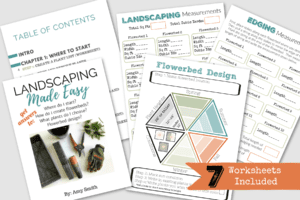
Mulch Calculator
To calculate how much mulch you will need to buy….CLICK HERE for a mulch calculator. Enter the dimensions of your flowerbed and the thickness you desire, then it will calculate that amount of cubic feet or yards of mulch you will need.
WANT A WORKSHEET TO KEEP TRACK OF YOUR MULCH MEASUREMENTS?
CHECK OUT MY NEW EBOOK, LANDSCAPING MADE EASY!
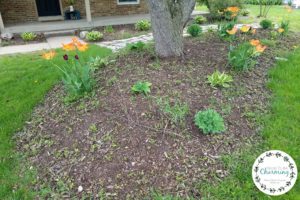
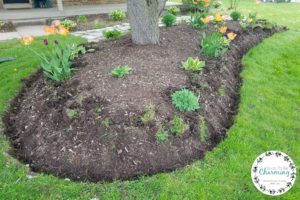
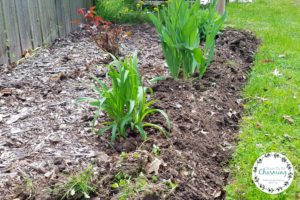
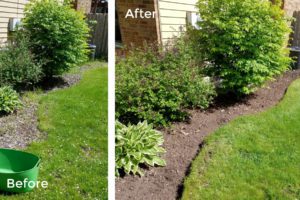
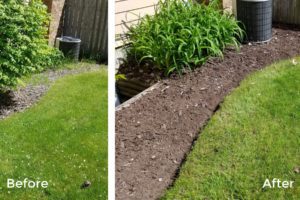
Let’s look at the before and after photos of a few of my flowerbeds!
Front East Flowerbed
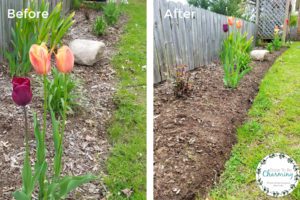
Front Flowerbed
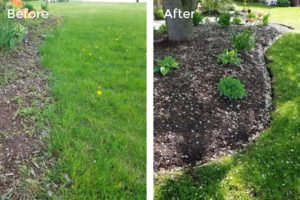
West Flowerbed
Taking care of your flowerbeds, does require a little effort. However, the more regularly you keep up on maintaining your flowerbeds, the less effort it will take each spring. Plus the feeling of walking around your yard during the summer and seeing clean cut flowerbeds overflowing with blooms, is hard to beat.
Weeding and Edging Supplies:

![]()

![]()
Thanks so much for checking out my post! Happy landscaping!

Our flower beds were a mess here in Killeen. We spent hours and hours cleaning them up. I really wish we had a dumpster rental in Killeen Texas. It would have made cleanup easier. I guess I will plan to do that next time.
I love the before/after shots of your front flower bed especially!
Thanks Elizabeth! It is amazing how far our front flowerbed has come in the last few years.