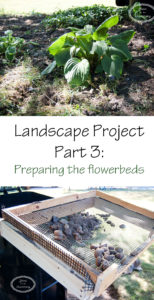
Landscape Project Part 3: Preparing the Flowerbeds

Creating clean cut edges for the flowerbeds made a huge difference! Yet before we could throw down the woodchips, we needed to prepare the flowerbeds. We decided not to lay down landscape fabric for a couple of different reasons. First of all, it is difficult to plant flowers and bushes with landscape fabric down. Secondly, we had so many flowerbeds…the time and cost was a big consideration. Lastly, we felt like it wasn’t a complete necessity.
My recommendation is you prepare the flowerbeds a week before you are ready to put down the woodchips. We learned the hard way. Instead, we had the woodchips delivered and since we needed so many, the woodchips spanned our entire driveway. Now we were really pressed to get the flowerbeds prepared!
{This post contains affiliate links, which means I may receive a commission if you click a link and/or purchase}
Getting Started
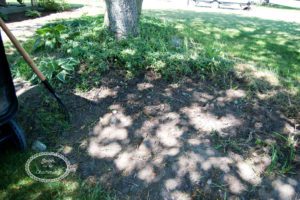
To prepare the flowerbeds, the first thing we did was weed as much as possible. Remember, the flowerbeds were pretty much dirt…so the weeds were terrible. Luckily, the past three years of living without any woodchips allowed me to become a master weeder! OK, disclaimer, this is not something you should try to achieve.
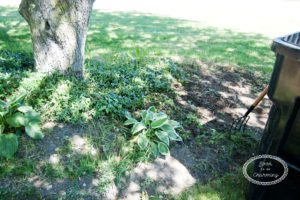
My soon to be herb garden! You can’t even see the sage, it was hidden by all the weeds.
In spots where we were creating new landscape, we used the string trimmer to shave the grass down as low as possible.

Then we sprayed a weed killer all over the new landscape beds. If we would have had more time, we would have laid newspaper down and watered it to create a barrier. This is the one point I wish we would have planned better. At least I can pass the wisdom onto you! If you are interested in using newspaper as a barrier, start collecting them long beforehand. With the amount of woodchips we were putting down, we would have had to start collecting months ahead of time. I was a little nervous about having no barrier, but to my relief it hasn’t been a problem!
The Challenges
(Note: we continued on with woodchips in the rest of the flowerbeds while we prepared the front flowerbed)
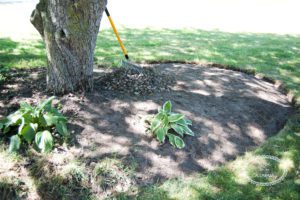
The front flowerbed gave us one of the biggest challenges! It was more than half covered with a ground cover plant called Vinca. I loved the pretty little purple flowers during the spring. However, it only flowered for a few weeks and it was impossible to keep the weeds out.
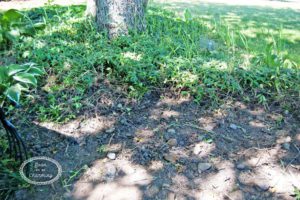
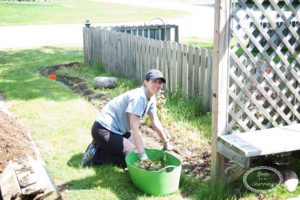
So we made the decision to remove the Vinca. It was hardwork, but using a little pitchfork was the perfect tool. Little did we know that removing the Vinca was just the tip of the iceberg. Once it was all removed, we realized the entire flowerbed was filled with rocks.
The more we removed the Vinca, the more rocks we found. To start, we tried raking them up.
But with every stroke came more and more rocks.
We had to decide what to do. Option 1, just leave the rocks and pretend like they aren’t there! Not gonna lie, half way through…this option seemed very appealing. Option 2, remove the rocks just on the surface and try to smooth it out. Option 3, the works….remove as many rocks as possible.
Love This Post? Don’t Forget To Pin It!
Removing the Rocks
Yup, we went with option 3. We want landscaping that will last a long time and cutting corners now will only haunt us later…not to mention how frustrating it would be to try and plant something.
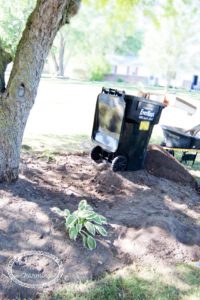
So we went to work. Let me tell you, my brilliant husband created a sifting screen to help us sort the rocks from the dirt. He built it to mount on our yard waster dumpster allowing us to pull it around the flowerbed.
How It Works
We shoveled a pile onto the screen.
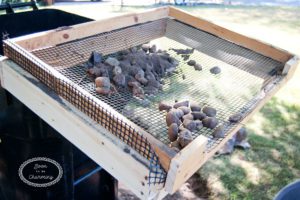
Used our hands to move it around so the dirt fell back into the bed and the rocks stayed on the screen.
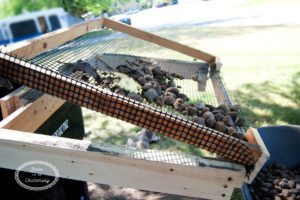
Then we lifted the screen, which was hinged, and dumped the rocks into a wheelbarrow.
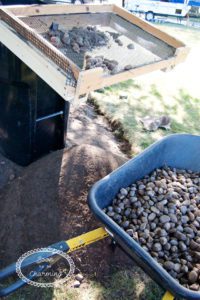
It worked so well!!
We sifted rocks out of that flowerbed for more than a week straight. It seemed there was no end to the rocks. This was the dirtiest job ever! We were covered with a dirt film from head to toe every time we worked on it.
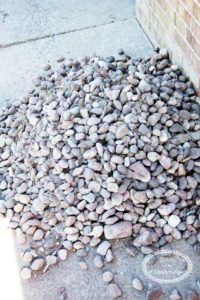
This picture doesn’t do it justice….it was a huge pile of rocks!
The front flowerbed was finally ready for woodchips. Next week, I promise to reveal the woodchips as we finish off the flowerbeds! You won’t want to miss it! Thanks so much for checking out this post.

MISSED LANDSCAPING PART 1 CLICK HERE?
CHECK OUT LANDSCAPING PART 2 HERE!
Need Help Sifting Rocks Out Of Your Flowerbed? Check These Out!

![]()

![]()
WHEELBARROW SIFTER SOIL SIFTER