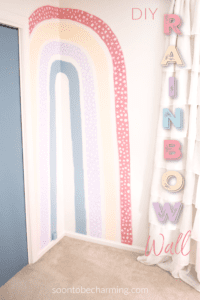
DIY Rainbow Wall
Do you ever have a project that you get stuck on? This rainbow wall project was mine! When quarantine started it was the perfect opportunity for me to re-paint the girls room. It took a little convincing. The girls room was painted a light purple color beforehand, which they loved, but it was time for a change. I really wanted to paint the entire room an off white color, the same as the trim.
With a turquoise bunk bed, bright pops of color in all their toys and stuffed animals…I thought the neutral wall color would really pull everything together. However, convincing two girls to go with off white was a little tricky. I want them to love their room, but I understand it is hard for them to envision what it would look like too. So part of the deal included painting a rainbow, they were willing to give it a try if it included a giant rainbow!
A Rainbow Wall
When I began, I was quite optimistic…but that changed pretty quickly. I definitely struggled with this project, but what fun is it if I only share the projects with you that go smoothly, so here it all is! The good, the bad and everything in between!
Taping The Rainbow
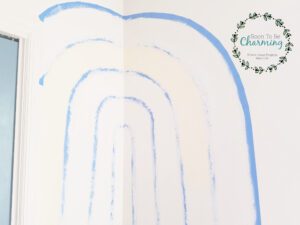
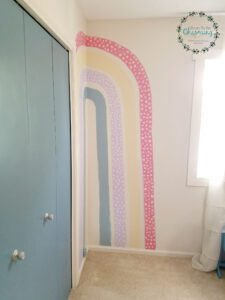
Taping a curve can be a little tricky, but taping a curve in a corner is even harder. If you have an open wall, that will work much better!
In my girls bedroom I didn’t have enough room for an entire rainbow, so my plan was to paint a half rainbow. Not so difficult right? Well, I just could not get the angle right.

I am a very visual person…and I could just tell it didn’t look right. I did a little research and found an example of a pencil and string to get the curve symmetrical. So I gave it a try.
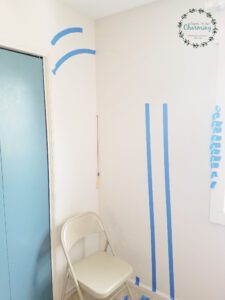
The pencil and string idea would work great on a flat wall, but it was a little tough with a corner.
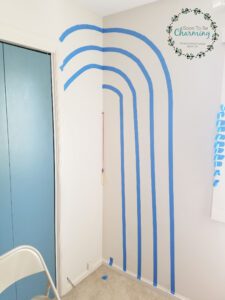
For my rainbow, I didn’t like that the curve on the left side was not symmetrical with the curve on the right side….but if I made the curves the same then I had almost a full rainbow.
This was the point that I should have started over and stuck to the half rainbow like I had envisioned, but I didn’t.

I kept moving forward. The angle was even, but it became a lot of rainbow in a small spot. I didn’t love it, but I didn’t hate it, so I kept it. I was hoping once the color was added it would all come together.
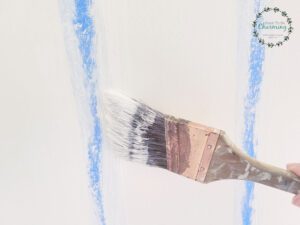
Once the entire rainbow was taped, I painted the base wall color over the tape lines. Don’t skip this step, it will prevent the rainbow colors from bleeding underneath the tape.
Rainbow Colors
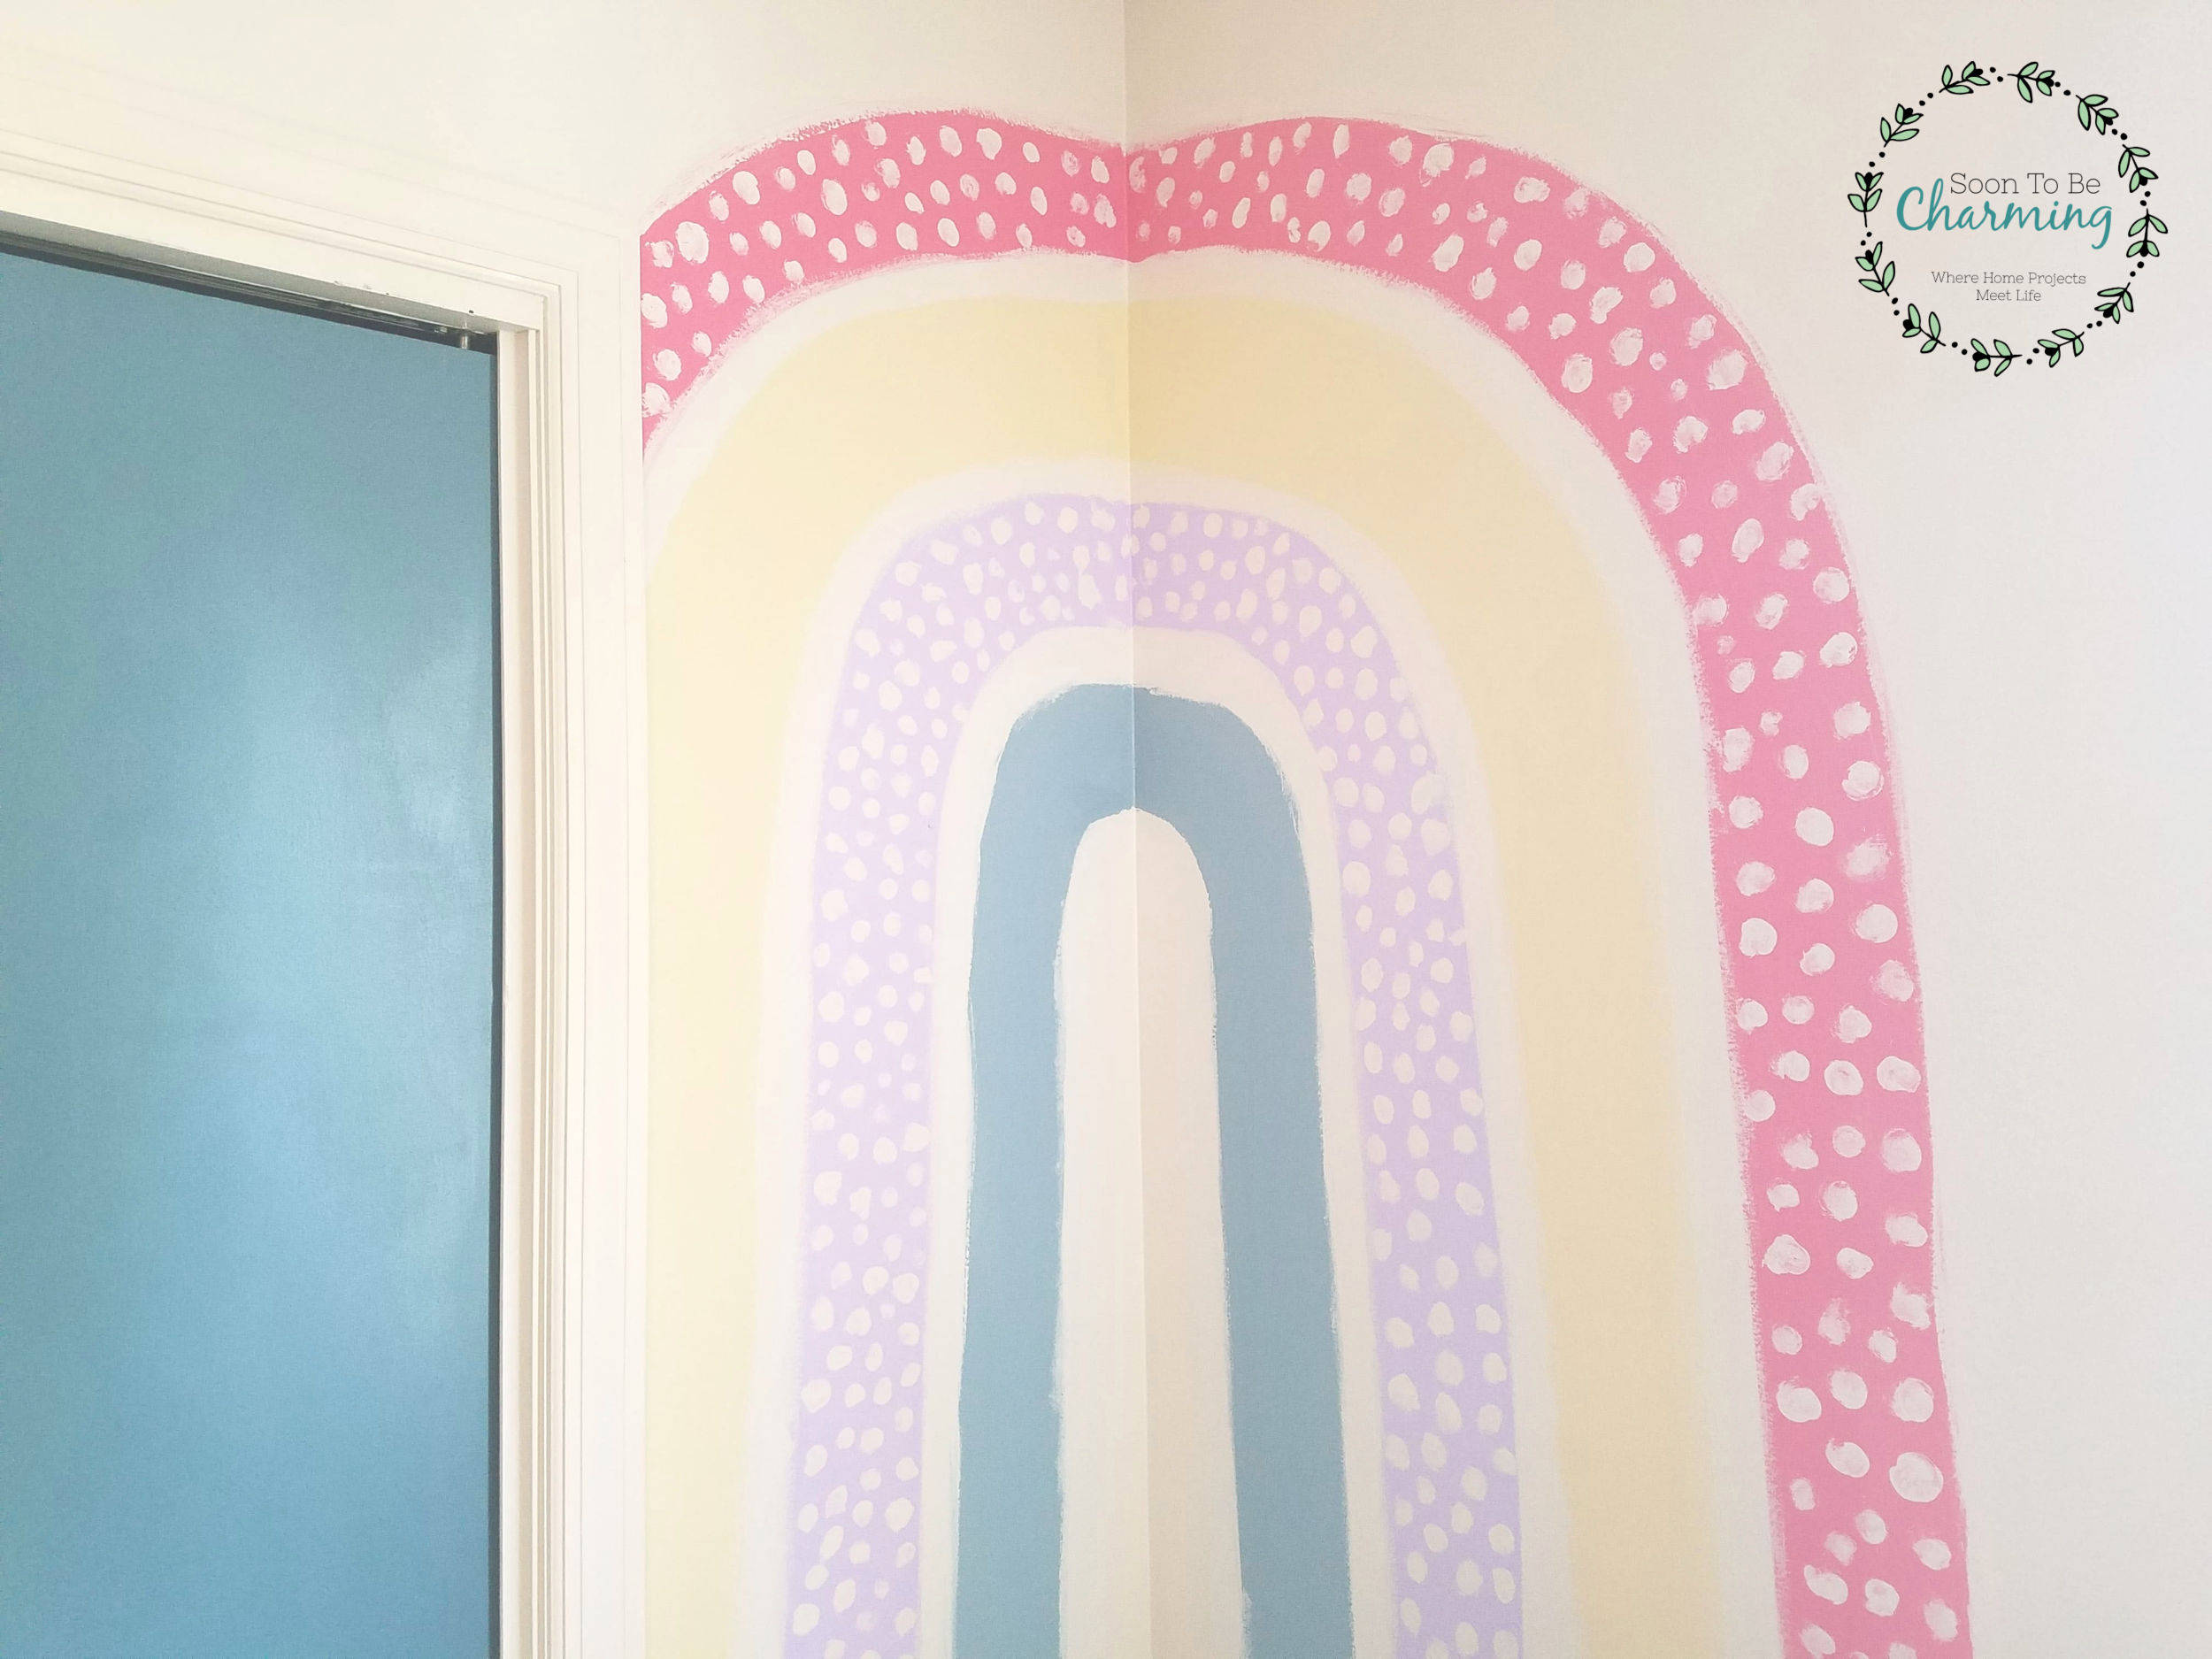
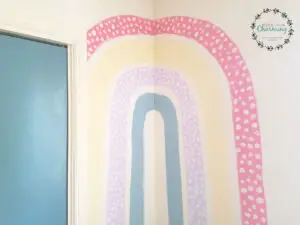
With the base coat dry, it was time to add color! I knew I wanted to add colors to match the girls bedspread, so I used pink, yellow, purple and turquoise.
Most of them I had from previous projects, but I did buy a couple sample sizes at Lowes. The pink is Iced Berry (Valspar), yellow is Standish White (Benjamin Moore), Purple is Sassy lilac (Valspar) and the turquoise was a color match to our girls bunk beds and then I added the base paint to lighten the color a little.
Once all the colors were painted, I pulled the tape off. It is always a great feeling to see crisp lines!
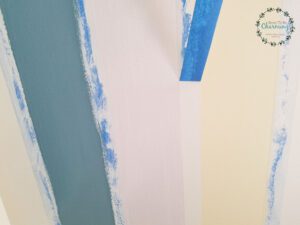
Here is where I had another dilemma. The purple paint I used at first was leftover paint that had gone bad. It was a little light because I thinned it out to try to use it. Plus, my rainbow lines weren’t exactly 5″ apart at every point. Now if it’s not suppose to be even that is one thing…but with crisp straight lines it should be even. I was struggling with what to do with this.
Bad Decision Number 2
I thought maybe adding ruffles would solve the problem…it did not. I ruined my clean lines and made it look worse. However, the beauty of this whole project is that you can always paint over it so sometimes it is worth the risk!
So here are my ruffles.

One other reason to try the ruffles was I wanted to redo the purple with better paint and I wanted to lighten the turquoise. The tape was already pulled, so it was impossible to repaint those rainbow lines and keep the crisp lines.
Note to self: don’t pull the tape until you are completely finished with your color.
To cover the ruffles, I brushed the base color in between and liked the more whimsical look.
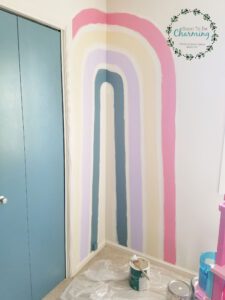
I was back on track! To add a little more whimsy I painted polka dots on two of the rainbow stripes.
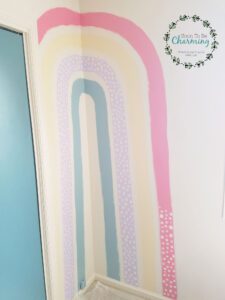
I loved that the polka dots were not perfect! To make them, I used a small brush and dipped it in the base paint (Shoji White by Sherwin Williams) and twisted the brush to make the polka dots.
For all the struggles, I think the rainbow turned out pretty well. I won’t say that it is perfect…but if you are thinking about painting a rainbow, I would say go for it! It’s only paint and if you hate it…just paint back over it! Sometimes you just need to try!
My oldest loves the rainbow and my youngest is a tough critic. While she has a few suggestions of how I could improve it, she did admit she likes waking up and looking at a rainbow every morning!
After much ado, here is the final rainbow!

Next week I will reveal more of the girls bedroom and touch on great storage solutions for a shared bedroom!
Thanks so much for checking out my post.
