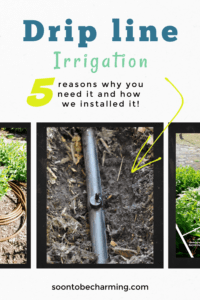
5 Reasons To Install Drip line Irrigation
Is anyone else sick of dragging the hose all over the yard? Our landscaping is currently “in process”, so we are continually adding new plants that need a lot of attention during the hot summer months. I drag the hose all the way around the backyard to water plants. Then pull the hose through the garage and up to the front to water all the plants up there! As much as it bothers me, it just seems like improving the watering process is never on top of the to do list! Well, I finally had enough and my darling husband made it happen! We installed a drip line irrigation system into our front flowerbeds and it’s time to bring it to the forefront. Let me show you just how easy it really is to install. Here are 5 reasons to install drip line irrigation.
This post contains affiliate links, which means if you click on or make a purchase I may receive a small commission at no extra cost to you. I appreciate your support!

1. IT SAVES TIME
Depending on how many things you need to water, it can save you close to 20- 30 minutes a day! I have a garden and several new plants that need to be watered. By adding a drip line system in the front, it cuts my watering time in half (we will install lines in the back once we redo our garden next summer)! Plus, no more dragging the hose up front…which is reason enough for me!

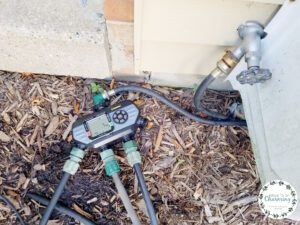
2. ABILITY TO SET A TIMER
Life is busy, well maybe a little less busy than normal because of Covid 19. However, schedules are beginning to fill up again. With a timer, you have one less thing to think about!
Determine when you want to water your flowerbeds, set the time and then decide how long you want to water each area. The timer we have allows you to schedule up to four different zones and water up to 4 times a day, which is perfect!
3. PLANT HEALTH
It is amazing what consistent watering will do. Last summer before we left for vacation, we bought a timer and set up a temporary sprinkler. It was incredibly hot while we were gone…in the high 90’s. When we returned from vacation, our garden had exploded! The plants were huge. My husband and I saw first hand the difference regular watering can make. The same goes with any plant, maybe it won’t be quite as obvious as a garden, but your plants will definitely benefit from consistent watering.
Another benefit of a drip line system is it slowly releases water at the base of the plant which keeps the foliage dry and reduces the risk of disease.
If needed, you can add micro spray attachments. We have two micro spray attachments along the flagstone pathway to help the Irish moss grow. These attachments do come in handy. While they do spray the foliage, they also water a larger area and are helpful depending on your landscape needs.
4. VACATION, NO PROBLEM
When you are getting ready for vacation, you have so many things to think about. With a drip line system in place, your watering is already taken care of! It is one less thing to worry about.
If you don’t have time to install a full drip line system before you go, you can always buy a timer and set up your hose with a sprinkler to water everything while you are gone. This is only a temporary solution, but will still work!

5. WATER EFFICIENCY
Let’s be honest, when you use a hose it is not the most efficient use of water. Using a drip line system, puts the water right at the base of the plants and exactly where you need it. I even read something about it reducing weeds because you starve weeds from water. Since we just installed our drip lines, I am not sure if that is true or not, but I will be interested to see! Regardless, drip line systems can improve your water efficiency.
Watering Tips
When’s the best time to water plants? Early in the morning, while it is still cool. The second best time to water plants is in the late afternoon or early evening. Early evening is late enough that you are past the heat of the day, just make sure there is enough time for the plant foliage to dry off before nightfall. If you have a drip line system, the foliage is not getting wet, so the timing of evening watering isn’t as relevant.
Drip Line Irrigation Terms
Note: This is what I have learned through researching our drip line system. I am no expert..but it should offer a little help when looking!
Blank Drip Line–
a hose with no emitters or holes, a solid tube. You will typically need 1/4″ tubing and 1/2″ tubing.
Emitter Hose–
a hose with holes already spaced, so water will seep out. It typically tells you how far apart the holes are spaced.
Connector or Barbed Fittings–
this is what you need to attach smaller hoses or sprayers to your main line.
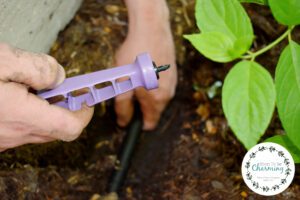
Drip Line Hole Punch–
a tool to punch the emitter holes.
Micro-Sprayers–
These are attachments you can place on the ends of a drip line hose.
Here are pictures to help show you how we installed our drip line irrigation!
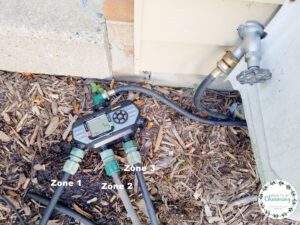
Zone 1
In zone 1, we used a 1/2″ tee fitting to split this watering zone into two sections, along the porch and the front island flowerbed.
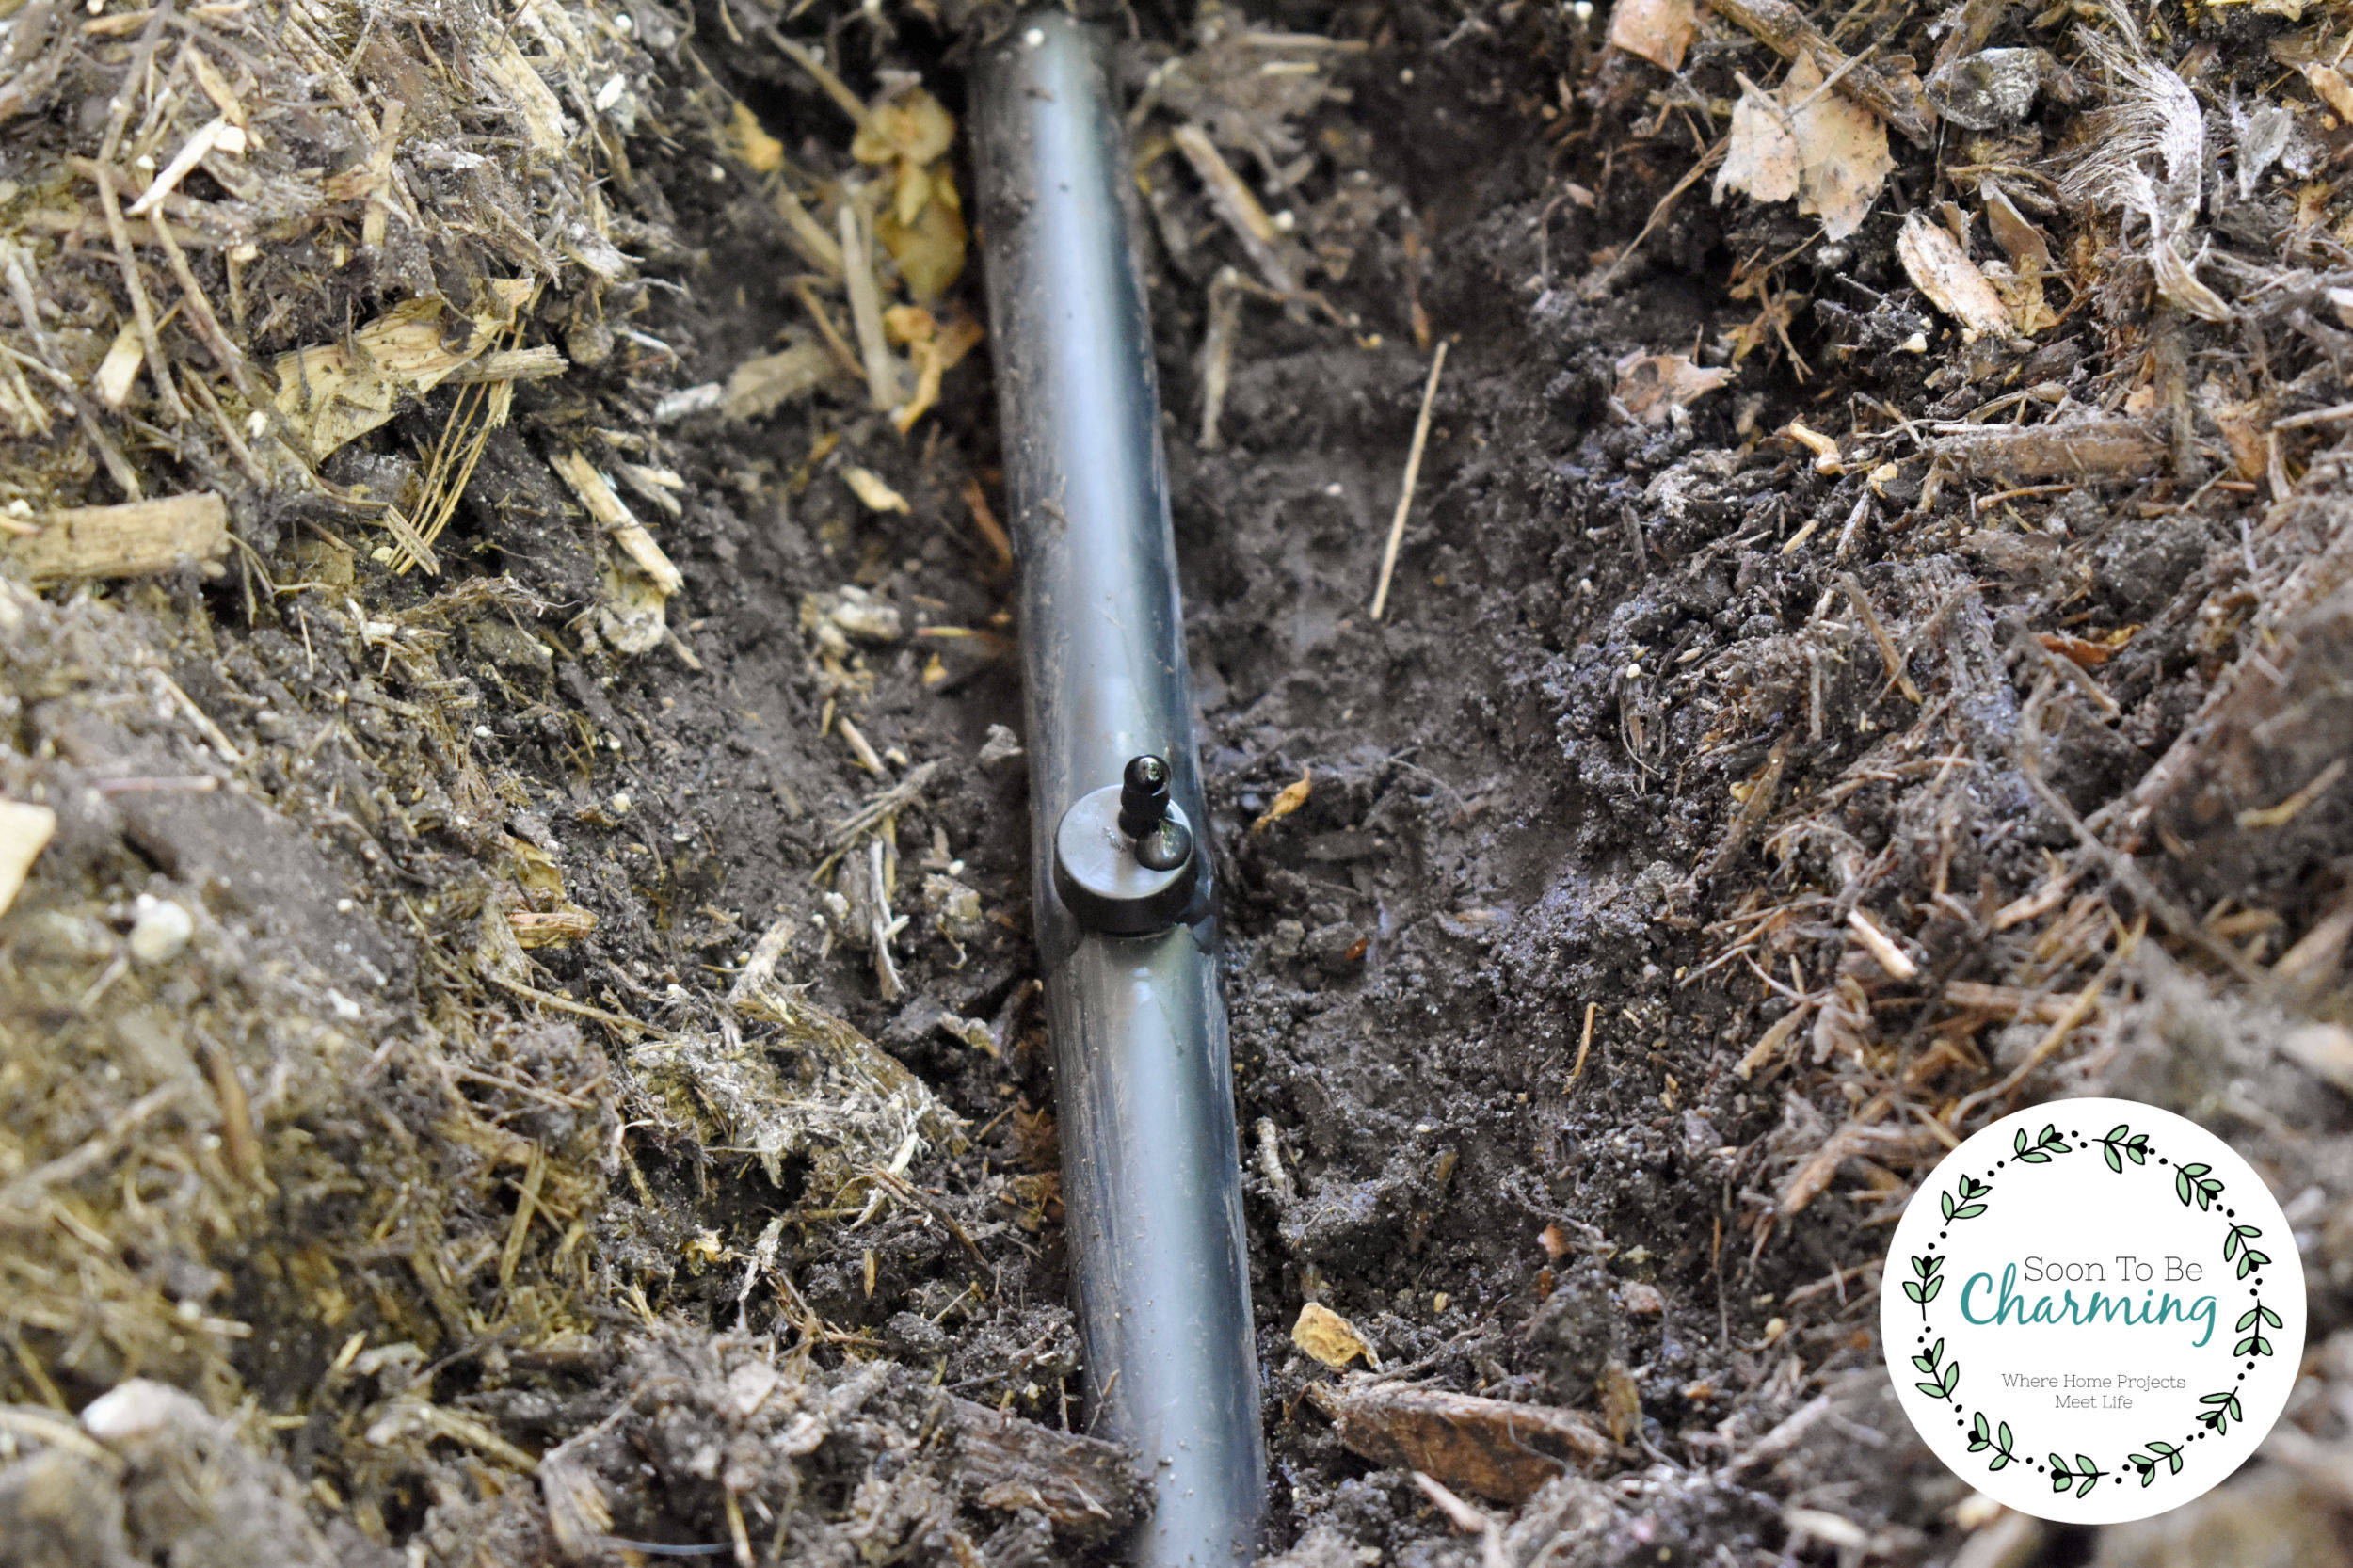
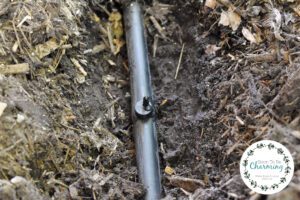
Along the porch, we uncovered the hose to tap into it.
![]()
Use a drip line irrigation tool to make a hole. It’s basically a hole punch for tubes!
Next fill the hole with a connector.
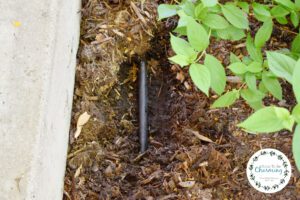
On the connector, we attached a 1/4″ hose (make sure your hose fits the connector). Then stretched the tubing to the base of the plant.
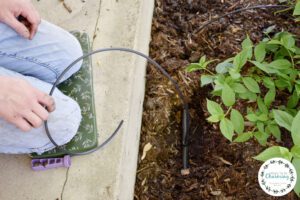
Cut off any extra. Do not bury the end of the tube or it can get clogged.
In the second section, we buried the 1/2″ blank drip hose under the ground and to the island bed. Then used a 1/2″ connector to a 1/2″ emitter hose.
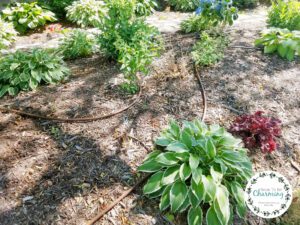
We snaked the emitter hose throughout the flowerbed, making sure to get close to all my hydrangea plants. They need the most water, so I wanted to make sure to have the tubing go near the base of all those plants.
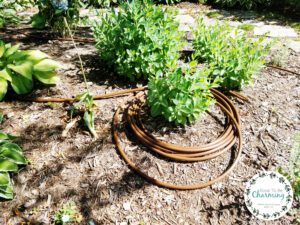
We had a lot of hose left (as you can see below), so we cut the tube, capped the end, and then buried all of it under the woodchips.
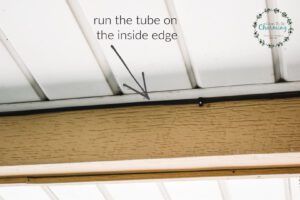
Zone 2
On the second line we placed a barbed connector into the 1/2″ tubing and used a 1/4″ blank drip tubing to run up our post. Mounting clips fasten the tube to the porch beam. Then pull the tubes down into the hanging pots.
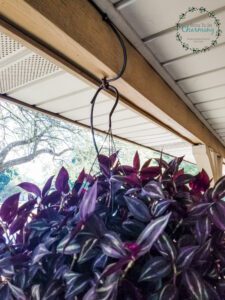
Having a dripline to your hanging baskets is so amazing and so easy!!
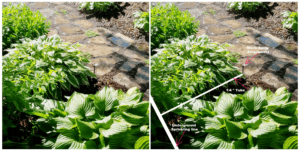
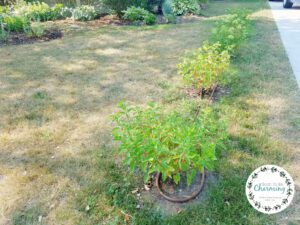
Zone 3
The third line was used to water newly planted little limelight hydrangeas! We planted a hedge of hydrangeas to create a soft border between our property line and the neighbors. We are not finished with the flowerbed yet, but we used the rest of the emitter hose from the front island bed. Don’t mind the brown grass…it’s been in the 90’s all week with no rain! Working on our grass is on the list for next summer.
Getting Started!
Drip line kits are a great way to get started. They typically included everything you need, including a timer. Figuring out how long to run your water takes a little guesswork. Once you program your system, make sure to check your plants and see that the soil is getting damp enough. We had to adjust the drip line to our hanging baskets a little because they were getting too much water (the baskets were dripping). It was an easy adjustment to reduce the watering time.
Having drip line irrigation is so beneficial! It is good for the plants and helps water efficiency…but the biggest reason is, it just makes your life easier! For something that doesn’t cost all that much, it will make a huge impact.
Thanks so much for checking out my post!


![]()

![]()