Tips To Install Your Own Roof

A DIY Roof was one of the hot topics for my husband and I a few years ago. Our roof needed to be replaced, and we knew that hiring a company to get a roof done was expensive. We priced out the materials we would need from a local hardware store…but could we really do this? Can you really install your own roof?
This decision was also influenced by a terrible experience we had earlier in the summer with a chimney repair company. We hired someone, who had been in business for over 20 years…yet the quality was the worse I had ever seen in my life! In addition to the poor quality, he literally threw dried mortar from our roof into the neighbors yard and shoved excess chunks down into our chimney instead of picking up after himself. We hired a company because my son was having surgery and we needed both my husband and I to help. It was a huge mistake! Especially being DIYers at heart, it was a tough pill to swallow.
Lesson Learned!
I am thankful that we learned some valuable lessons from that bad experience and that something like that didn’t happen on a bigger project, like our roof. My husband continued to tell me that he could tackle the roof himself and he is incredibly handy, so we began getting really serious about our DIY Roof.
Side Note: If you are in a position where you need to hire a company, here is my number one tip….ask to personally see a recent house that the company has completed. Especially if it is an outside project like roof, siding, or a chimney. If it is an indoor project that may be a little more difficult to line up…but ask. Most likely the company will have to get approval from a customer, but that is how you can truly see how they work. Everyone has a different expectation of quality, so see it for yourself! If what you see meets your expectations, then you probably found a good company to work with.
Install Your Own Roof!
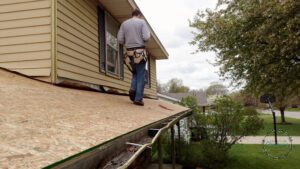
Time to dig into the roof. To start, this was not a simple roof job. We had 3 layers of shingles to remove, plus we decided to replace all the sheathing on the entire roof. The previous sheathing bowed when you walked across the roof, and if we were already scraping three layers off, we might as well upgrade the sheathing as well! We own a two story house, which means two roof levels. However, we do not have any dormers or valleys, so the roof line is pretty straight forward.
Tip: When you install your own roof, the money you are saving is on labor. Do not try to cut costs on materials. Do not get thin felt (leak barrier) to save a few dollars, because it will rip when you walk on it. Save your money on labor and not materials.
Step 1: Research To Install Your Own Roof
Another factor that helped us move forward with installing our own roof was that we had great resources. My husbands coworker roofed houses on the side for several years and he allowed us to use all his air tools, which was a huge benefit. We also had some family members that had helped roof houses before (not professionally), but they were familiar. If you have any connections, talk to any professionals you know and ask for tips or advice.
Here are a few things to research: how to properly install flashing, how many layers of shingles are allowed in your area (while it is common to have 2 to 3 layers of shingles on a house, each township or state has different requirements…so do your research), how to properly vent your house and any other roofing tutorials you can find. If you decide to reroof your house, you want to do it well! So don’t skip the research.

Step 2: Find Help
Roofing is not a one person job, which we found out on day 3! We had help for the first couple of days and then on the weekends…but we quickly realized that it just doesn’t work with one person. So up I went to the roof! While I wasn’t expecting to be involved in the actual roofing…I was and ended up working several 10 hour days! In all reality, I was geeked that I got to learn so much about roofing! If there were DIY patches, I would have totally earned my roof patch.

To give you a better idea of how much help you might need to install your own roof, it took us about 2 weeks to complete our roof. This was one entire week working on it every day about 10 hours a day and then the next week working on it in the evenings after my husband came home from work. During the weekdays, we had 2-3 people working on the roof, but on the weekends we had more like 4 or 5 people helping. Again, this was to strip 3 layers of shingles and replace the sheathing. If you are simply putting another layer of shingles on, the job will be much easier!
Step 3: Plan
Plan your roof project a few months in advance. You will need time to get the shingles ordered and all your supplies. Make sure to get your shingles delivered on top of your roof! It is amazing how heavy a pack of shingles can be…believe me you don’t want to lift that up and down a ladder more than you have to. So planning everything out is important! It would be helpful to ask your supplier how long they need to get a shingle order delivered. It may take longer than normal right now…so ask.
Mark the dates down on your calendar and begin writing in when your help is available. You will want at least two people each day.
Schedule a dumpster in advance and have it ready to go on the first day of your job. Go bigger than what you think, you’ll be surprised how quickly it fills up! Also, ask them how quickly they can replace the dumpster if needed. The last thing you want to be doing in the middle of your roof job is waiting for an empty dumpster.
Step 4: Choosing The Right Shingle Color
For me, choosing the shingle color was one of the biggest decisions! When you first get started, the options seem almost overwhelming. Start with features on your house that need to coordinate with the roof, such as brick, rock or siding. For us, we knew our siding was going to be replaced but our brick was staying. Our brick has a golden hue…so that was the main thing we went off of. I didn’t want all beige…but going totally gray wouldn’t work either, so I found some middle ground. We choose driftwood shingles by Owens Corning, which combines the brown and grays! Each company has their own version of driftwood, so grab samples and bring them to your house to figure out which shingle will work best.
Tip: Want to make sure your house colors all go? Search the shingle colors you are thinking of buying on Houzz and other sites, and see what houses come up and what siding colors they typically are paired with!
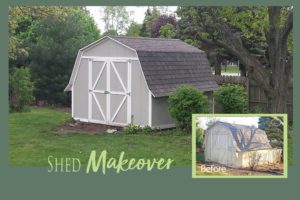
My guinea pig was our shed. We re-roofed our shed and painted it with the siding and trim colors we were thinking of using on our house! It turned out great…which gave me a lot more confidence moving forward with the shingle color on our roof. Want to see our shed makeover? Click HERE.
Step 5: Install Your Own Roof
After all the planning and all the research, it is finally time to tackle the roof! With our project, we were removing the sheathing…so we worked on one side of the roof at a time. We couldn’t leave our home exposed with no cover for long.
One thing that is not textbook is since we were replacing the sheathing, we did not scrape the shingles off. We used a circular saw with old blades and cut through all three layers of shingles right down to the sheathing and then just threw the chunks of roof into the dumpster. It actually worked really well and seemed to go quite quickly. This is obviously something that only works if you are replacing the sheathing! If you are only removing shingles, you must scrape them off without cutting.
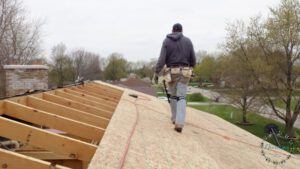
Getting the roof covered with all new sheathing was such a great feeling! Sheathing clips were placed in between the sheets and then they were nailed into place.
We had to watch the weather forcast a lot to make sure rain wasn’t coming…open roof and rain, not a good combination.
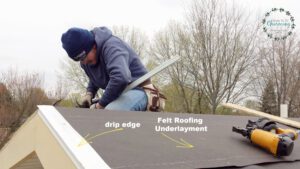
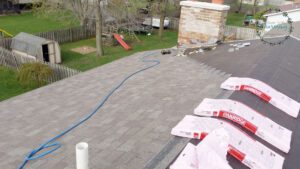
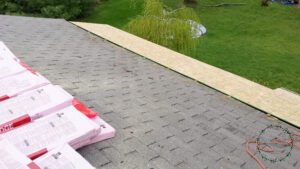
Once the sheathing was finished, we rolled out the felt underlayment.
Then put down the drip edge.
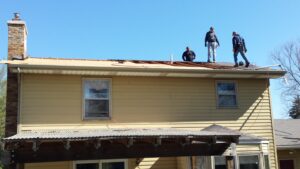
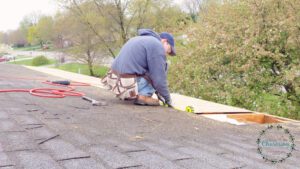
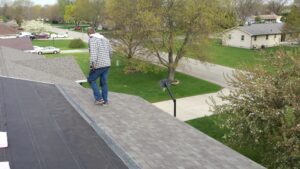
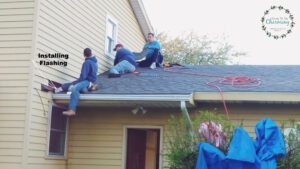
Air tools are extremely helpful to nail everything down quickly! Below we almost had the entire back completed…my husband used just a little extra time by the chimney to get the flashing installed correctly. He also used chalk lines to make sure the shingles were straight. You don’t want to end up with crooked shingles!
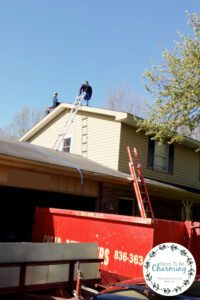
Now to shingle the top front side!
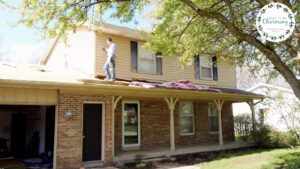
Of course, hindsight I realized I didn’t take a picture of the top completed. Anyways…onto the garage roof! Same process, except a little more flashing to work with and the roof over the porch.

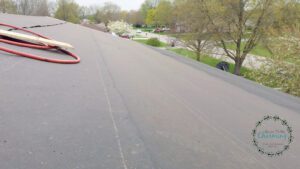
Open roof!
At this point, we had filled the dumpster and were trying to get it replaced with an empty dumpster. Rain was on it’s way and we were trying to get the roof closed up with sheathing! A little of the rain got into our garage and collapsed some drywall. It didn’t damage anything, but made a huge mess! However, if that was the only thing that went wrong…we’ll take it! So when I mentioned above to find out how quickly they can replace the dumpster…that was a lesson learned by us the hard way!
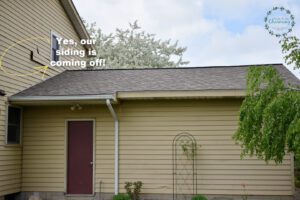
Back in the day they used to fold the aluminum siding down into the roof or at least they did on our house. When we removed the old shingles, the bottom sheet of siding was destroyed (beyond repair). We knew down the road we were going to reside (which will happen later this summer…finally!!), but at the time we tried having someone come out to replace the aluminum siding. Unfortunately, it wasn’t worth anyone’s time and you can only find white aluminum in the stores. To get by, we covered it with felt underlayment and it has been that way desperately waiting for new siding.
We talked to a retired aluminum siding expert to pick his brain about the flashing. My husband talked with him and just confirmed that they were installing the flashing correctly. It was helpful to get his advice, then my husband and family could go ahead and install the flashing with confidence. That was a trouble spot for us, as it wasn’t done correctly before and we were getting some water above our kitchen window.
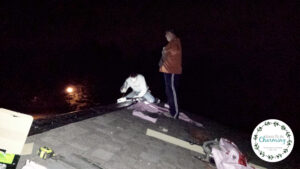
We finished the roof off by adding ridge vents on each of the peaks. We were out of daylight, but rain was on its way that night…so my husband and cousin finished in the pitch dark with a headlamp. Dedication!
Step 6: Collapse and Enjoy
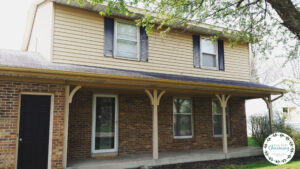
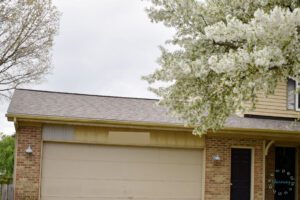
We finally had the roof complete!! Of course, I didn’t take any pictures of the completed project because well it was pitch dark and then once it was completed we collapsed! So here are some current pictures of our roof. Ignore the terrible garage door and again we will be replacing our siding later this summer (so stay tuned for that DIY project).
Here is our new roof!
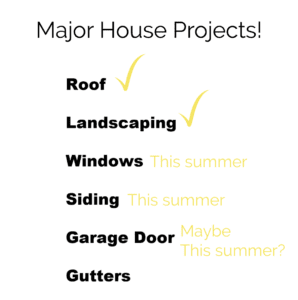
I didn’t call my blog Soon To Be Charming by chance…it takes time to redo a house, especially on a budget! If you are in the same boat, be patient. Create a list and pick off the big items one at a time.
If I could sum up our experience in a few words, here is what I would say: our DIY roof saved us about $8000, partly because we replaced all our sheathing in addition to removing and adding shingles. It was extremely physically demanding, so don’t expect it to be easy. We have a newfound respect for those who do this for a living! It is a big project, but doable for an experienced DIYer.
If you have any questions, leave them below and if I don’t know the answer, I’ll ask my hubby!
Thanks so much for checking out my post!
