How To Replace A Rotting Fence Post
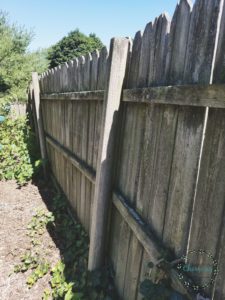
Nothing is more picturesque than a beautiful white picket fence. Unfortunately, our fence is far from white picket (which I hope to change someday) and is definitely not picturesque. Several of the post are rotting out and the entire fence is leaning in spots. It was like that when we moved in, but the leaning has gradually been getting worse, to point that we can no longer put it off.
This post contains affiliate links, which means I may receive a small commission if you click on a link or make a purchase, but adds no additional cost to you. I appreciate your support!
Our hopes were to replace all the fencing, but after pricing it all out….it’s just not a project on the top of our priority list. So for now, we decided to replace the few rotting fence post that needed attention. A bigger fence project will be coming down the road. In fact, we have looked into making our own fence panels! So maybe next year!
Want to plan your Spring or Summer Projects? Click here for a great printable to help.
Lets get started!
How To Fix A Rotting Fence Post
1)Remove The Fence Panel
First, you will need to remove the fence panels off of the rotted fence post.

Make sure to set your fence panels back out of the way, so you don’t trip on them. Also, make sure the nails are facing down or pounded down. You never want to fool around with rusty nails.
2) Removing The Rotted Fence Post
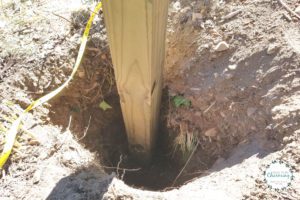
This step is not fun and regrettably, there is no quick way around it. The post and all the old cement that held the post, will need to be dug out.
Our post was so rotted that it literally just broke off!

3) Supplies
To install a new fence post you will need:

Cement– 1 bag for each fence post
You may want to use a quick setting cement. You will also need less supports the quicker the cement sets. We used a slower setting cement because it was less expensive…but if we were to redo it, we probably would have just spent the extra money to have the post set quicker.
Fence Post – 8 foot 4 X 4 pressure treated board (use an 8 ft board for a 6 ft fence)
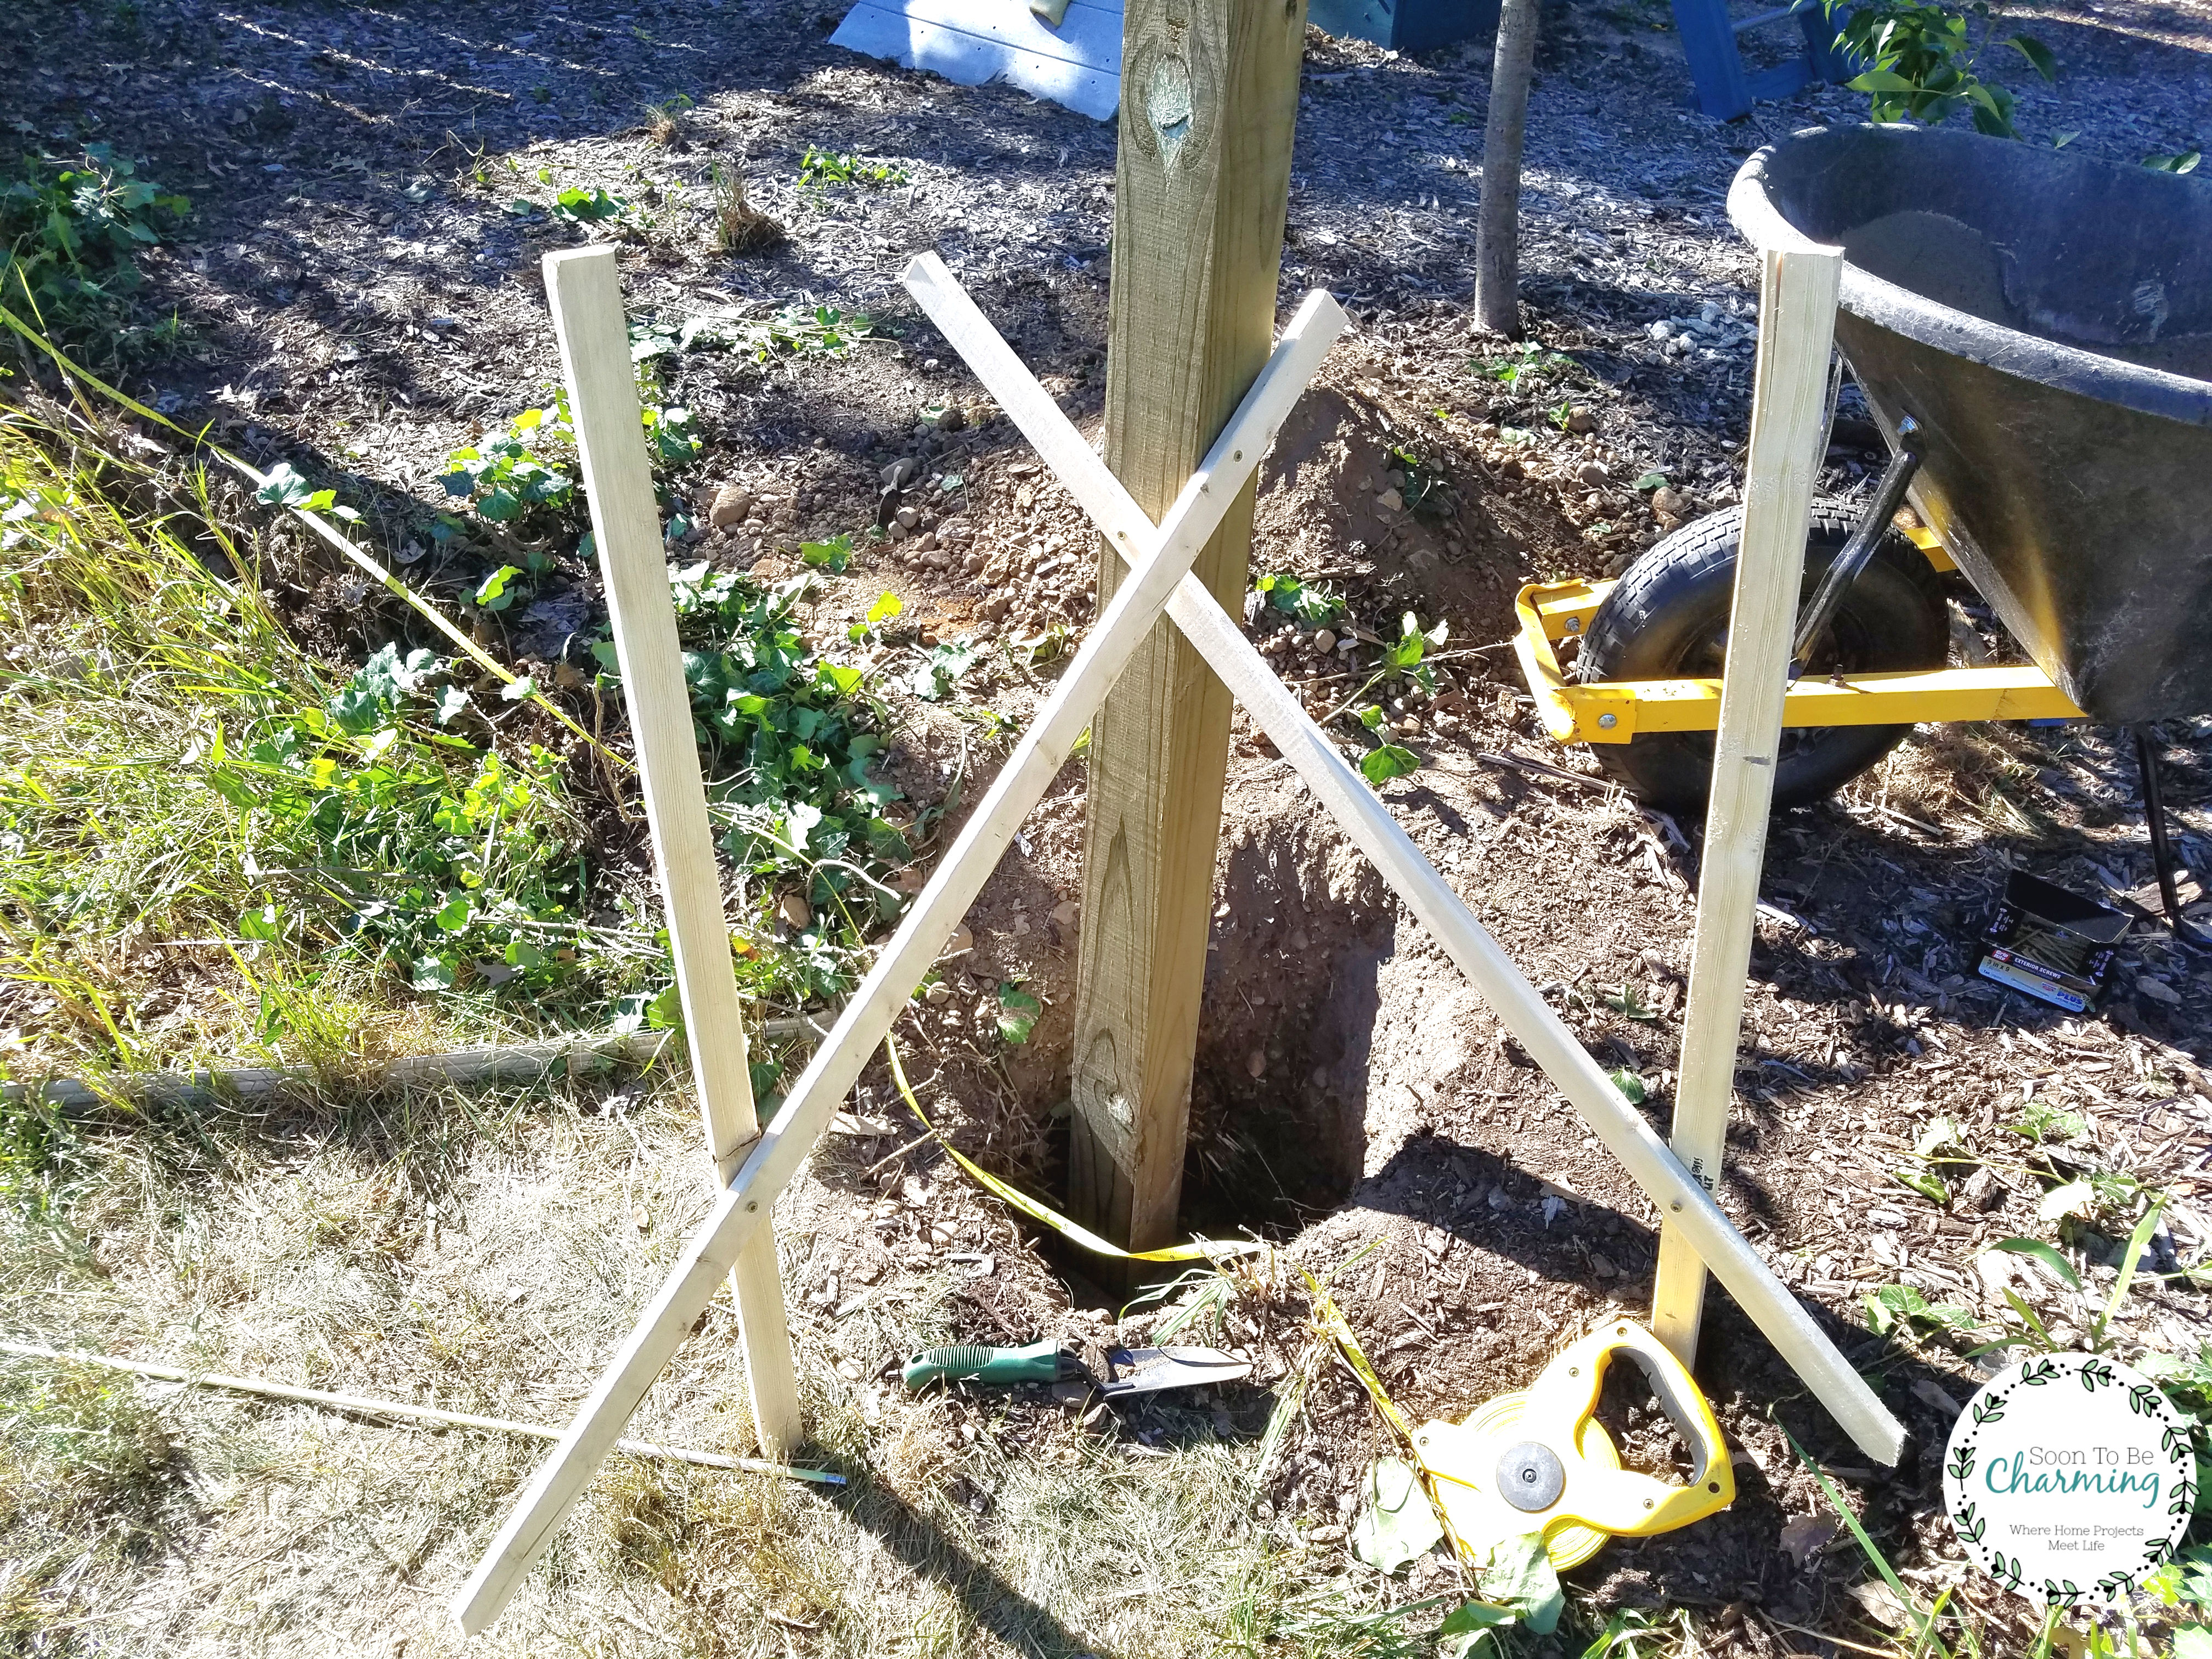
If you have scrap wood lying around, you can always use that…or 2 X 4’s. You will just need supports on two sides to keep the post in place while the cement sets.
This string is called a mason’s string and it is to make sure your new fence post stays level with the existing posts.
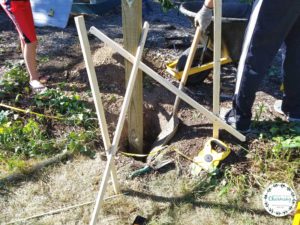
4) Installing The New Fence Post
Begin by placing the new post in the existing hole.
To ensure your fence panel fits onto your posts correctly, it is important to measure correctly. First, measure the width of your panel. If you have an 8 foot panel, measure from the edge of the previous panel (which should be in the middle of the post). At the other end of the panel, your 8 foot mark should hit in the middle of your new post.
Basically, just make sure your fence panel hits in the middle of your posts and not on the edge of your post.
Now is the time to add your string. This is to make sure your new post is level with the remaining posts. Attach your string tightly from the old post on the left to the old post on the right, with your new post in the middle.
If your new post is too high, dig a little more dirt out. If it is too low, fill a little dirt in. Keep adjusting until your post is level.

Once you have your post measured out and level, add your supports to keep it in place. Keep in mind your supports don’t have to look pretty, they just need to keep your post from leaning in any direction.

5) Mix Up The Cement
If your post is secure, you are now ready to mix the cement. A quick setting cement hardens in 10-15 minutes, so make sure not to mix it up until you are ready to use it.

Move your cement over as close to your post hole as possible. My husband mixed the cement up in a wheel barrow, but you could also use a bucket.
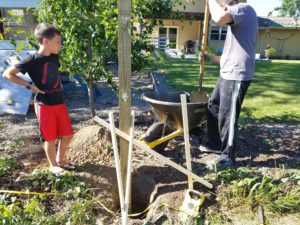
Then shovel the cement into the hole.
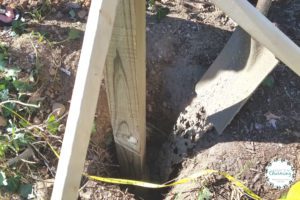
Let the post set. Make sure to read the cement directions and keep the supports on as long as it recommends. We let our posts sit overnight and then reattached the panels the next day! Sorry I forgot to take a picture of the panel back on the new post.
Even though our fence is not picture perfect, it feels great to at least have it standing upright. The project really doesn’t take long and I enjoy the peace of mind. Now we know it is secure and will last until we are ready to replace the entire fence! The neighbors will be happy too, not to have it falling over in their yard!
Love Landscaping? You’ll love my new eBook launching February 28th! Check out the preview HERE!

Thanks so much for reading this post! Let me know if you have ever tackled a fence project? I would love to hear about it!

Have spring or summer projects? Get supplies quickly at Home Depot!

