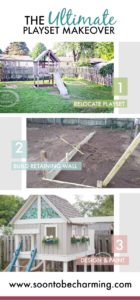
Playset Makeover Part 3: Design
Vision to Reality:
The playset is now moved over to the corner, the retaining wall completed and the grass seed down; operation playset was in full effect. Now my favorite part…design. I had a few ideas of what I wanted, but needed to get it down on paper to show my husband what I was thinking. I looked on the internet for design inspiration, but didn’t find anything that inspired me. Therefore, I came up with my own design.
I envisioned three key things; fun colors, flowerboxes and cute windows. The original playset had several design issues and safety concerns. On one side the railing was high, but on the next side it was low…it didn’t look consistent at all and the low railing was a little too low to be safe for the kids. The slide also had too big of a gap at the opening (which the kids could fall through), all of these things needed to be fixed in the new design.
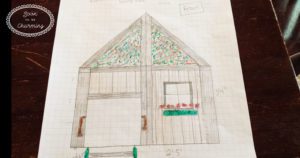
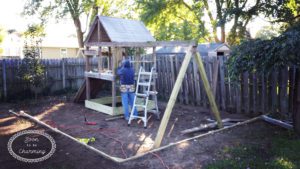
I went outside to measure all four sides, then began to sketch it out on graph paper. My husband laughs at me because my drawings are never to scale…thankfully he handles all the details and makes sure everything is consistent and level. Our goal was to redo the playset without spending a lot of money, so we quickly decided to keep the base of the playset along with the general frame. This decision is also why we moved the playset instead of building it from scratch in a new location. However, just because we didn’t want to spend a lot didn’t mean we couldn’t get creative.
New Design:
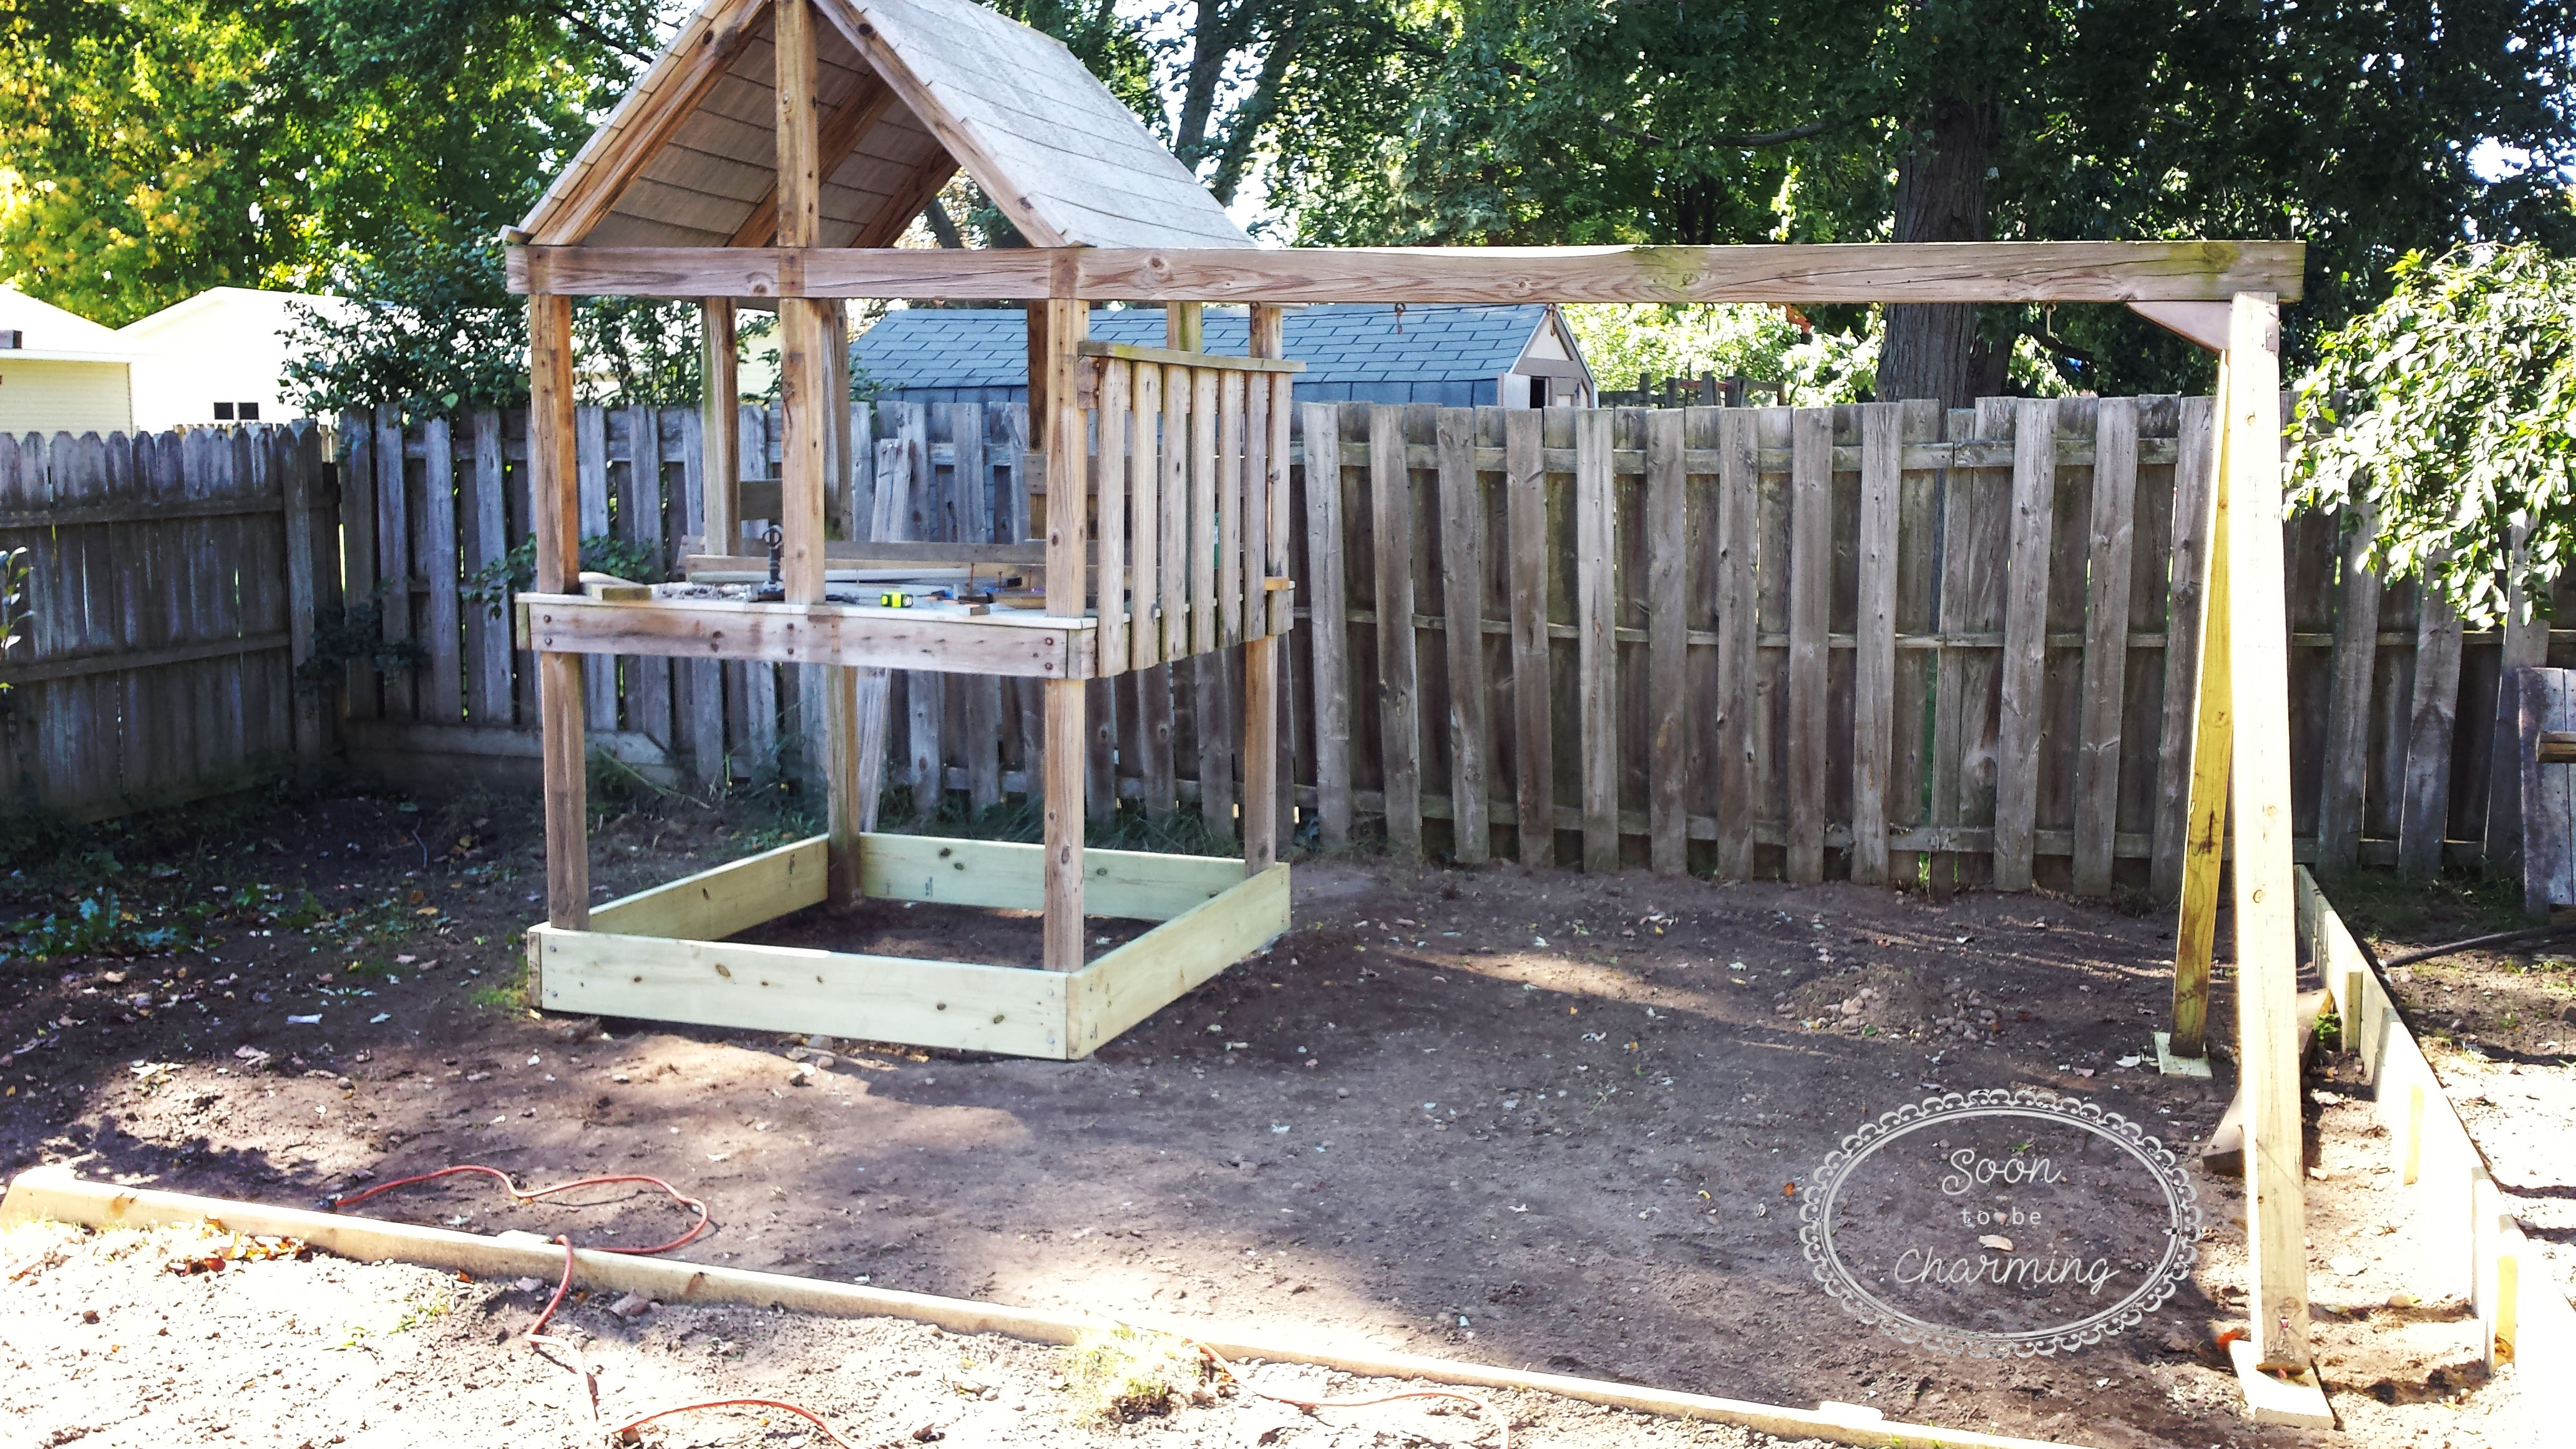
The original playset design was not what we wanted at all. Our remedy was to remove the boards from all four sides (only leaving the posts that support the structure). To rebuild the walls of the playset we found all the wood at a fence company. The fence company near us always has a huge scrap pile of free wood…they have deck boards to fence pickets and more. We drove by several times to see if anything new was sitting out and after two or three trips, we had enough wood for all the sides of our playset.
Adding Charm:
Windows! I love little windows and couldn’t wait to get little flower boxes made too. With my sketch, I wasn’t quite sure where we wanted the windows placed. During the process of putting the wood up on the walls…my husband and I talked through and figured out exactly where we wanted them. The main concern was to make sure the windows were high enough from inside the playset to be safe for the kids. I wanted to add trim to the windows too, but we would do that after we painted.

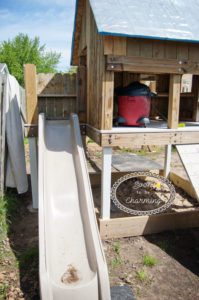
It was a huge bonus to find free wood for the playset walls, however, for this next part we needed to buy wood. We bought two more 4X4 posts to build a slide platform. In order to tuck the playset into the corner, we wanted the slide to come down parallel to the fence. To do this, we needed to build a small platform off the back of the playset. This was one of our best space saving ideas! Instead of a railing around the slide platform, we used some free fence pickets which made it look adorable.
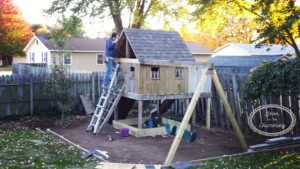
Time to Roof:
Originally, the roof consisted of composite deck boards. It worked best to take those boards off the roof and use them for the floor of the slide platform. By doing this, the floor would look consistent from the playset to the additional platform. My husband and I threw a few different ideas around on what roof materials to use and at the end landed on shingles. The main factor, we had some additional shingles around from our house roof project a few months earlier and this helped with the cost.
For the roof, my husband used OSB. Next he installed drip edge. The drip edge helps the roof look nice, as well as helping protect the edges of the OSB. Lastly, he added the shingles. To put the shingles on, he fastened them to the OSB, staggering the pattern per the manufacturers instruction. He completed shingles on both sides, then added roof cap shingles on the peak to finish the roof.
Color:
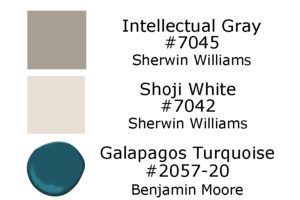
With the Walls on the playset, the slide platform built and the roof completed, the design was really starting to come together. Now to decide on color. Recently, we had finished redoing our shed in the backyard and so I wanted the base color of the playset to match the shed. For the main body, we stayed with Intellectual Gray by Sherwin Williams. The trim color, also staying consistent with the shed, is Shoji White by Sherwin Williams. I decided to accent in teal. Since it is a playset, I wanted the space to feel fun still. The teal color I chose was Galapagos Turquoise by Benjamin Moore.
Custom Touches:
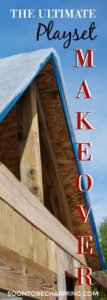
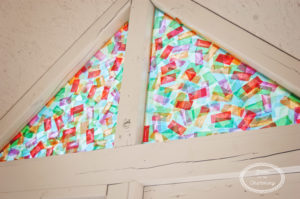
For the peak of the playset, I didn’t want to enclose the whole space with wood. I felt it would have made it too dark inside the playset, but I wasn’t sold on open windows either. Instead I came up with the fun idea to make it look like stained glass. It is a space for kids, so we decided on a safe material…plexiglas.
My husband measured the openings for the plexiglas, we needed two triangle pieces and one rectangular piece (for a side wall). Thankfully he was able to find some scrap plexiglas at work to save money. Once the plexiglas was cut to size, I used tissue paper and modge podge to make the windows. To see a full tutorial click Here. The windows turned out great and when the light shines through them…they look really pretty!
At this point, it was late fall. We had completed the roof and walls as desired. The weather was already too cold to paint…so unfortunately, we had to put our project on hold until spring.
Check out part 4 to see how we painted it at Playset Makeover Part 4: Painting and Final Reveal
If you have missed any of the process, check out Playset Makeover Part 1: Relocating or Playset Makeover Part 2: Building a Retaining Wall