Gas Fireplace Makeover- Final Reveal
After I finally emptied and cleaned out our gas fireplace, I stepped back to enjoy the spoils of my labor. However, instead of enjoying the spoils…it made me realize that this project was not done. The “clean” gas fireplace looked terrible. Now that you could actually see the entire back of the fireplace, you could also see all the huge clumps of grout all over! It looked anything but tidy.
Check Out: How To Empty Your Gas Fireplace and How To Clean Your Gas Fireplace Here!
This post contains affiliate links, which means if you click on or make a purchase, I may receive a small commission at no extra cost to you. Thank you for your support!

Determined to have my fireplace back, I ignored the fact that it didn’t look very nice and began putting it back together. I am not sure if I was in denial or just had extreme hope that it would look better once it was altogether.

Deep down, I think I just wanted my dining room put back together!

It didn’t take long before I realized this wasn’t going to work. I couldn’t leave my fireplace looking like that, it almost looked better with the soot on it.
For inspiration, I hit the internet to do a little more research.
While browsing images of several fireplace, I had my aha moment! I could paint the back of the fireplace!
Paint
If you decided to paint the inside of your fireplace, like I did, you will need a high temperature paint.
***A little side note…during this process, the one thing that surprised me the most was how none of the box stores carried anything needed for gas fireplaces. I had to buy everything through Amazon (below I will list exactly what I bought).
However, since I really wanted to get my fireplace together…I ventured to Lowes to see what type of high temperature paint they had. I figured they would at least have something I could use. I found this can of hi-temp paint.

In the products defense…it did not say it could be used on brick. I looked the product up online and a few people had commented that it did work on brick. I knew it was a risk…but thought I would try.
Before I began painting, I wanted to tape off the brick to ensure a clean line.

The Wrong Paint
The paint didn’t work! It was very thin and did not cover the messy grout. It was almost like a varnish.
Very disappointed, I moved on. I had to order new paint online and wait 2 more days. Which of course is not a big deal, but when your dining room is tore apart it seems like forever!
The Right Paint
Amazon to the rescue! My paint came as scheduled and I was ready to get to work. Again, the can did not note that it could be used on bricks, but online in the description it said it could be. I used THIS PAINT, plus Rutland makes several fireplace products, so I trusted them.
My husband actually helped paint this time and thankfully, it worked!

This paint went on much thicker and covered the messy grout! (part of the left wall and the floor in the picture below show the first can of paint…see how thin it was!)

We applied two coats of paint.

I couldn’t believe how great it looked! This is definitely what I had originally envisioned. A fireplace that was clean and tidy inside. We painted the gas line also (it used to be silver), to help it blend in.

Now to put the fireplace back together!
Supplies Needed To Freshen Up Your Gas Fireplace
- Silica Sand (not needed for a propane fireplace) *if Rutland Silica Sand is out of stock, click here for another option
- Vermiculite (optional for natural gas fireplace)
- Rock Wool *if Rutland rock wool is out of stock, click here for another option
- Platinum Embers (optional for more dimension)
- Lava Rock

Putting The Fireplace Back Together
Start by putting the burner pan back into the fireplace and attaching the gas.

TIP: It is a good idea to turn the gas on and make sure your flame is working before getting the entire fireplace back together.
Silica Sand
To create your first layer pour silica sand into your burner pan. We currently have a dual burner, so I poured silica sand into the top and bottom burner pans.
The silica sand is used to help distribute the gas evenly throughout the burner pan. You will need this if you have a natural gas fireplace. Do not use this if you have a propane gas fireplace, the sand will be too heavy for the propane.

Vermiculite (Optional Layer)
In my research, I found a lot of discussion saying you could use vermiculite instead of silica sand for natural gas fireplaces; so I went ahead and ordered the vermiculite. However, upon more research I felt like silica sand was the standard and most common first layer for a natural gas fireplace.
Since I still had the vermiculite, I went ahead and used it as my second layer. It is common to mix vermiculite and silica sand.
After personally working on the fireplace, I discovered most of the vermiculite is covered up by our next layer….so to save money I would have just purchased the silica sand.

Rock Wool
Rock wool is the real gem of your fireplace. Rock Wool is what makes your fire look like real coals are burning…so don’t skimp on the rock wool. The good thing is one bucket will give you more than enough.

To place the rock wool, grab some tongs and carefully pull small pieces out of the bucket and onto your vermiculite.

Your gas logs will lay on your burner pan, so make sure to have the rock wool almost hanging off the edges. This will ensure you can see more “coals” when your fire is burning.

Platinum Embers (Optional Layer)
To create a different element in your coals, you can also purchase platinum embers. They will burn brighter creating a more realistic looking fire. I have these embers and personally like the added dimension they offer.

Lava Rocks
You can add lava rocks before or after you add the logs. Use lava rocks to pour on the base of your fireplace and around your burner pan. This is not to layer on top of anything!

Placing The Gas Logs
Here is the test…did you take a good picture of your fireplace beforehand? Can you tell where your logs go?
It definitely took my husband and I a couple of minutes, but we soon figured it out. The logs look so different clean and the picture taken are of the logs covered in soot. They hardly look like the same logs!
CHECK OUT PART 1 IF YOU MISSED IT!
To remind you…here is the before!

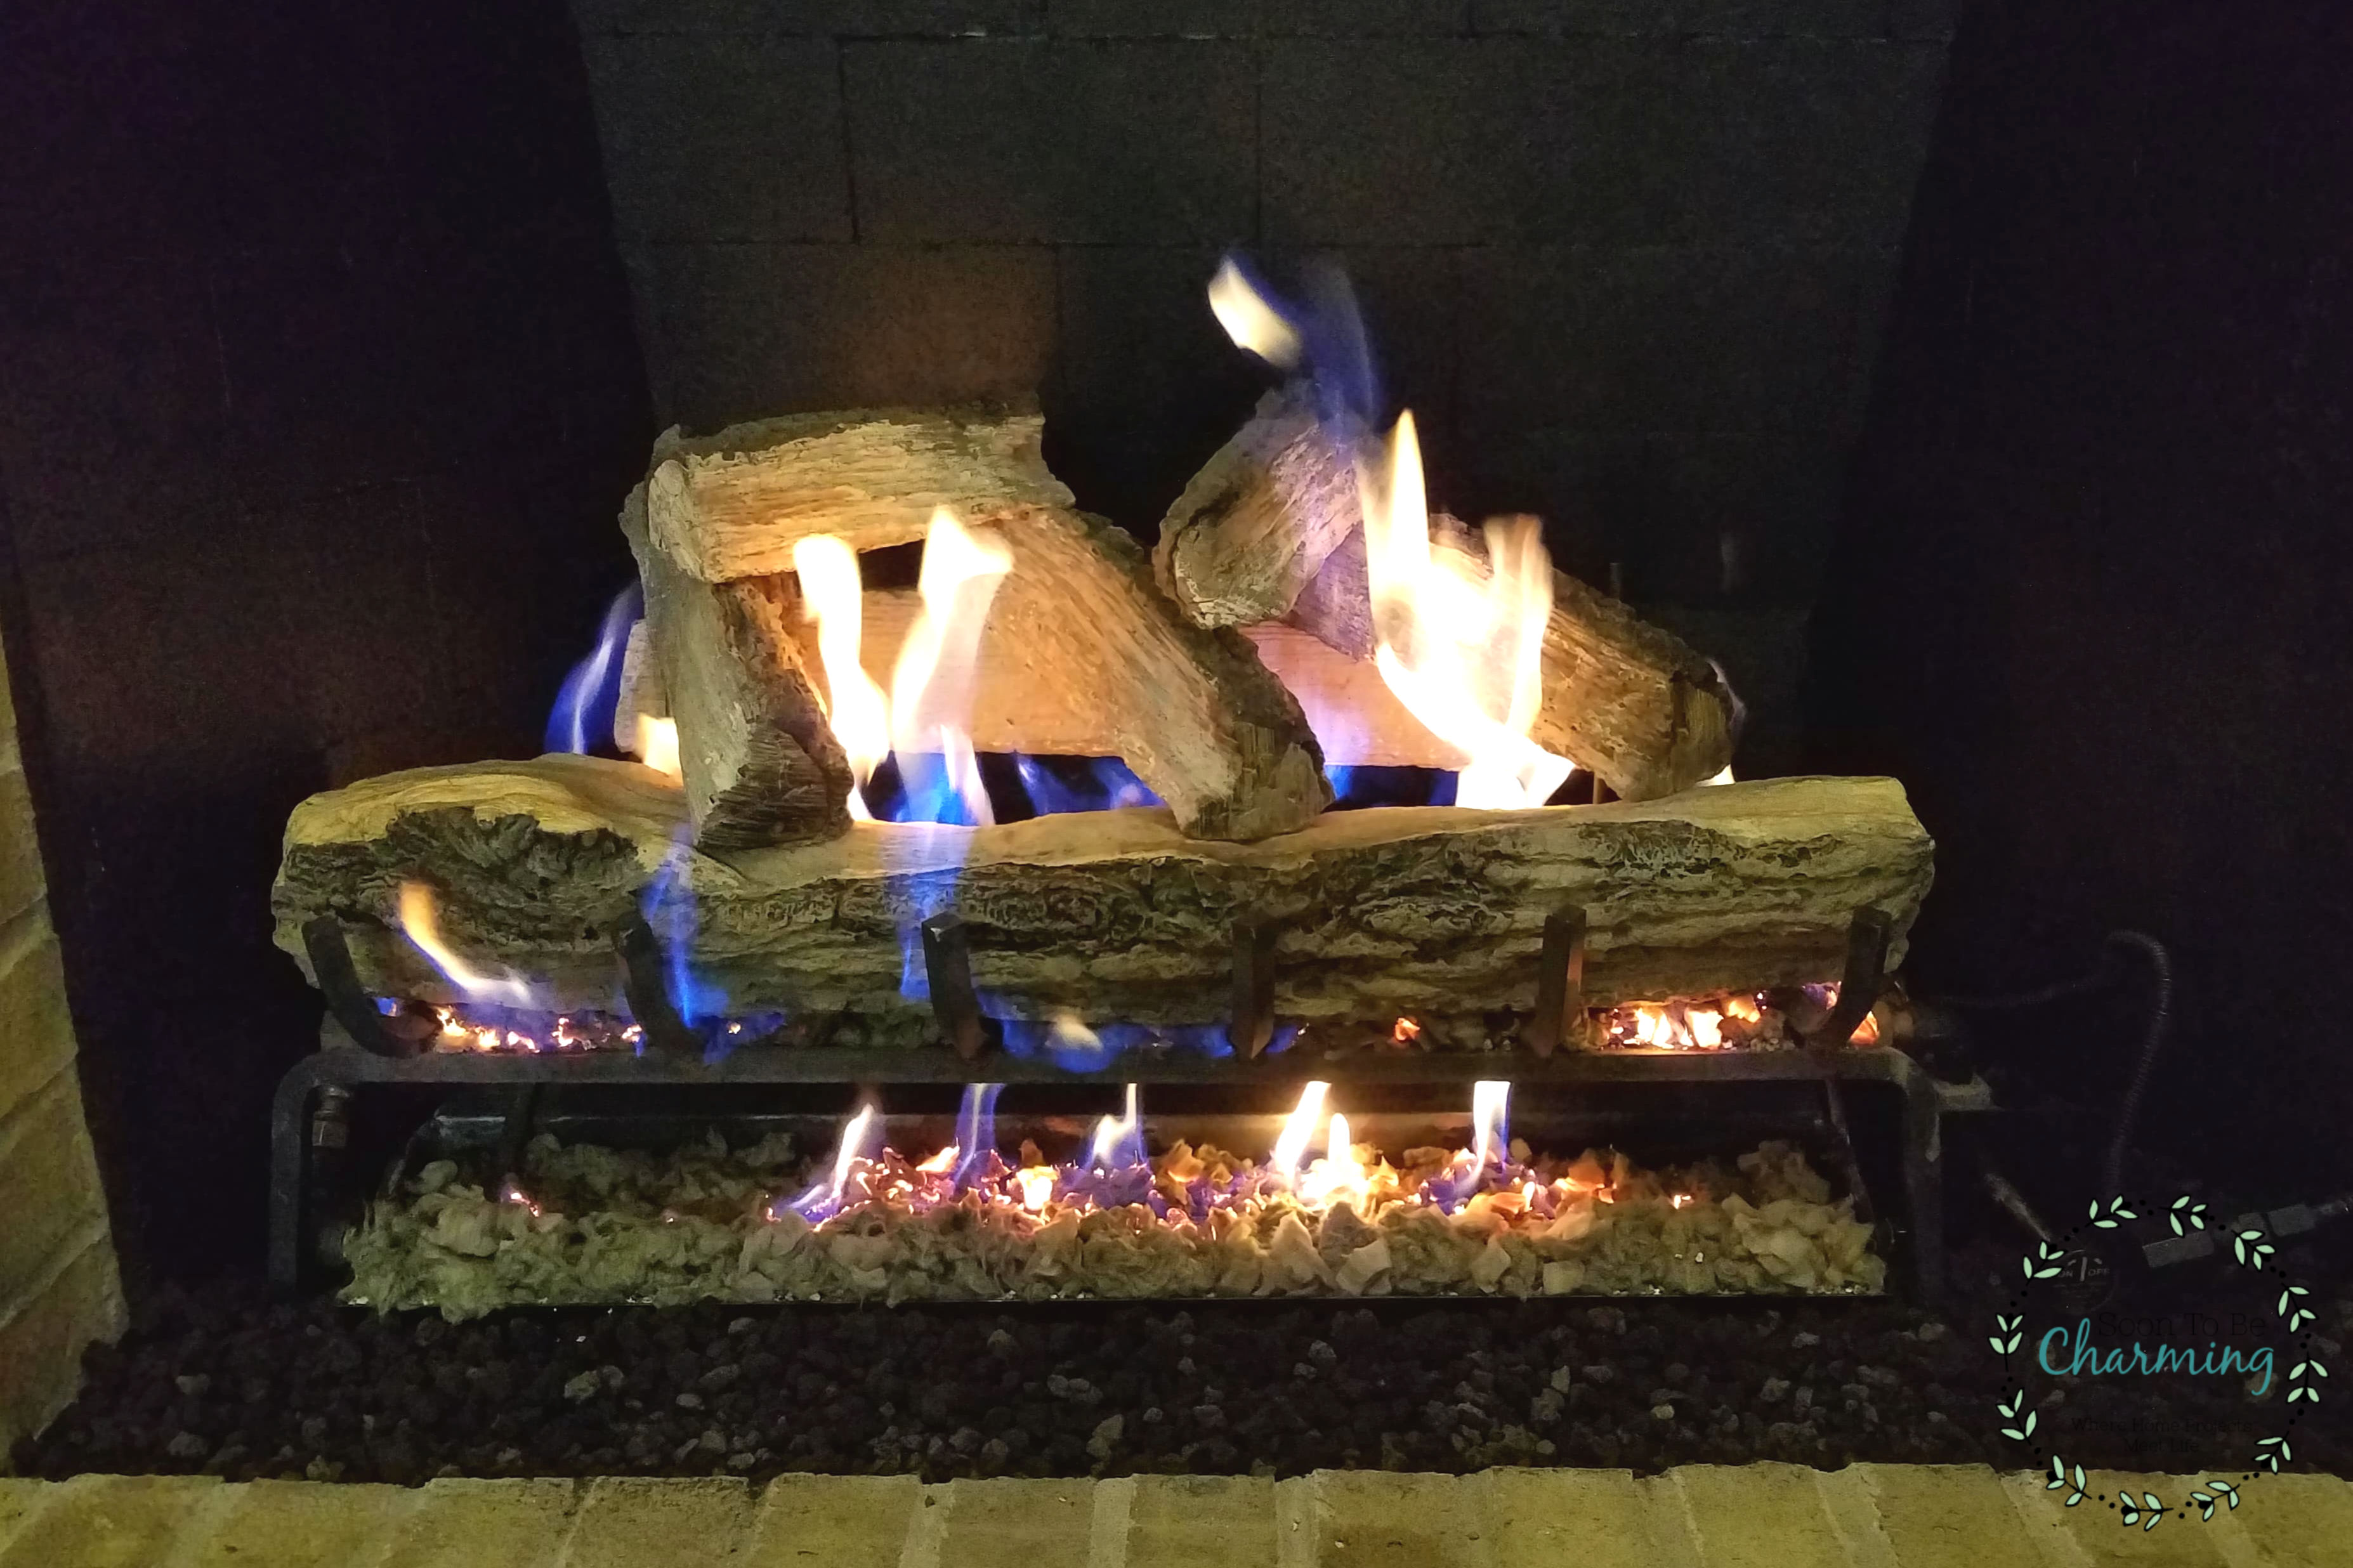
After emptying, cleaning and freshening up! Amazing right!!

Another added feature, that I didn’t expect, is how much better the flame looks. The flame is much more consistent with all fresh silica sand, and rock wool.

I finally have a clean and tidy fireplace to hang my stockings on!

I learned so much during this project and have a much deeper understanding of our gas fireplace and all that is involved. My fireplace vocabulary has certainly improved…hey that could be a good ice breaker at someone’s house… “You have nice vermiculite there!” Ha ha, OK I think you get the point.
Have you ever done a fireplace makeover? I would like to hear about it, please leave me a comment below!
Thanks so much for checking out my post!

MISS ANY OF THE FIREPLACE MAKEOVER?
CHECK OUT HOW I EMPTIED THE FIREPLACE IN PART 1.
SEE HOW I CLEANED THE FIREPLACE IN PART 2.
WHAT YOU NEED…
Share The Love! 
Thanks for the great post!
Can this technique be used on a gas starter fireplace with fake logs?
I was literally ready to paint my gas fireplace firebox and stumbled upon your site. It was fate! Did you consider painting your grate as well? Mine looks a little “charred” and could use a makeover, but not sure if I want to attempt and have it fail. also, did you give any thought into putting different rocks (glass, etc ) versus the lava again? I’m really debating! Thanks!
Hi Joanie! I did not paint the grate, however, our grate still looked pretty good when I tackled this project. I bet you could with a high heat paint, but since I haven’t done it I would recommend just reading over the high heat paint instructions and materials. The rocks are a hard decision, just consider the style of your home. Lava rocks are definitely more rustic and do not draw a lot of attention. Where glass rocks will draw more attention, allow you to add color if you desire and may give more of an elegant, modern or formal look. I hope that helps a little and have fun with your fireplace makeover!
About to update my vented gas fireplace. This article still holds water and has been more informative than most. I was wondering after some time has past is there anything you would have done differently from a design, aesthetic or effentsy standpoint? Thank you for a detailed article.
Thanks for the comment! Painting the back of my fireplace was still the best decision I made. It looks so great still and all the layers (silica sand, vermiculite, etc…) all held up as well. The only thing we may look into soon is the logs are getting soot on them again. There are a few different reasons for this, possibly log placement or unbalanced airflow (fuel air mixture). I’ll probably make another post when we get it figured out. Have fun updating your fireplace!
Great Explanation about the safety tips, Worth reading and sounds useful. Thanks for sharing
I thought that it was interesting when you explained that you accidentally used the wrong paint. I would imagine that remodeling your fireplace would be stressful to do yourself. I will be sure to hire a professional to remodel my fireplace so that I won’t be stressed out.
Hi Ashley, it was actually pretty simple, I would definitely do it again. Hiring a professional is definitely an option, but if you want to save money…it really is an easy DIY project. Thanks!
Your fireplace looks amazing! You’ve certainly inspired me…now to get my husband on board! Great job, Amy.
Thanks so much Laurie! I know it is not a fun project to tackle, but the results are definitely worth it. Post a picture on my Facebook page if you tackle your fireplace…I would love to see it!