DIY Pumpkin Sign

DIY signs are my nemesis! Yes, they are the sole downfall and the thorn in my side of my so called craft abilities. Signs seem so easy to make, yet I rarely attempt them because I feel like I won’t succeed. My letter painting skills are lacking, along with my chalkboard writing…but man do I always want those signs! The kicker is I refuse to pay $50 dollars for them, so I am left with an unending circle.
This week I came to head with my nemesis and let me tell you…if I can do this sign, you can too! This DIY pumpkin sign was so easy to make and I have to admit, it’s not perfect, but I made huge strides with my sign making abilities!
First things first, the printer does make all the difference. I have a laser jet printer, which I love, but it doesn’t work very well when transferring ink. I tried it on my DIY REVERSIBLE SIGN…which turned out OK, but a lot of the sign ended up being free hand and it was a lot more stressful than needed because the ink didn’t transfer very well.
A few months ago, I bought an HP Envy color printer and so this was my first attempt at making a sign. I found these instructions on the blog We Lived Happily Ever After and they are so easy to follow! Plus, making a sign worked so much better with an inkjet printer. So here we go, this is how I made my DIY pumpkin sign!
This post contains affiliate links, which means when you click on or make a purchase, I may receive a small commission at no extra cost to you.
DIY Pumpkin Sign
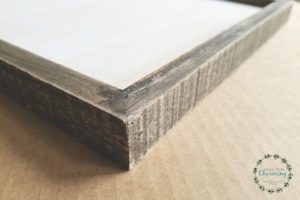
The frame, to make it easy I purchased a frame already put together. The sign had a wood painted surface, which would work well to transfer ink. I used a coupon and bought it for about $6 at Hobby Lobby.
Now I needed a sign to transfer. I decided to combine a few different ideas I saw on Pinterest and make my own sign in PicMonkey (my graphic design program). * The printable and my sign are just a little different. I updated the printable after I made the sign.

![]()
GET THE FREE PUMPKIN SIGN PRINTABLE HERE!
If you are already a Soon To Be Charming Subscriber, Click HERE and enter your password!
For the sign, you will need to print it off as a mirror image…but first grab a sheet protector.
![]()
Trim the tabs off of the sheet protector, keeping the pocket in tact.
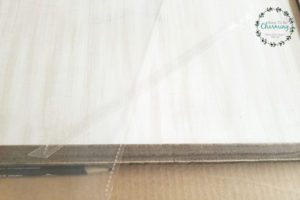
Slide a blank sheet of paper into the pocket of the sheet protector to keep it firm and load it into your print tray. Now print your sign in mirror image onto the sheet protector.
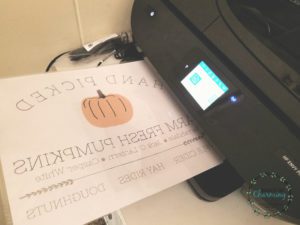
Be careful not to touch the ink or it will smear! Remove your print from the printer and pull out the blank sheet of paper from the pocket. Now place it on your sign, ink side down.

Make sure not to slide it once you lay it down or the ink will smear. Take a credit card and rub it over the ink to transfer it to the sign. As I was doing this step, the sheet protector slid just a little bit causing a few spots to smear. I think it just takes practice, but the smearing wasn’t terrible…so just a heads up, try to be extra careful with this step.
Rub the ink until you feel like it has transferred well and then lift the sheet protector off of the sign.

It worked! Honestly, it kinda of surprised me that it worked. I already had plan B figured out, re-paint the sign white, distress it and try again. The ink transferred great and using the sheet protector was so easy.

My mind is already onto christmas signs and what I can make next! I hope this inspires you to give it a try…I conquered some of my fears, and you can too!! Thanks so much for checking out my post!

PIN FOR LATER!