Reversible Pallet Sign
{This post may contain affiliate links, which means I may receive a commission if you click a link and/or purchase something}
This morning as I was still in bed, I faintly heard the toaster oven timer going off downstairs (my husband was making breakfast). Falling back asleep, I dreamed that the oven timer was beeping. I saw myself in a cream apron with red trim and walked over to the oven to pull out Christmas cookies. Quietly I chuckled to myself and turned back over, Christmas is definitely on my mind. I don’t even have a red and cream apron…so I am not sure where that came from, probably a Hallmark movie!
Anyways, I am excited to share with you my reversible pallet sign! A month ago, I made this DIY Thanksgiving Pallet Sign…I added a picture in case you missed it.

With the snow starting to fly, it was time to make it work with the Holiday decor. So with an easy flip, I was ready to get to work.
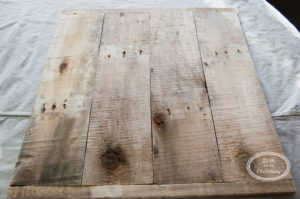
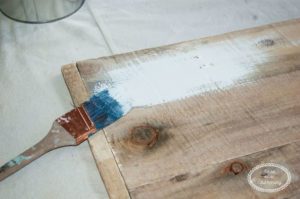
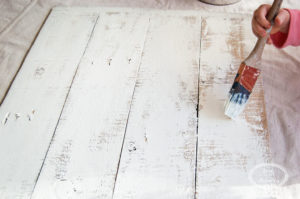
The back side of the pallet sign is rougher than the front. Also to mix it up, I decided to paint the whole side.
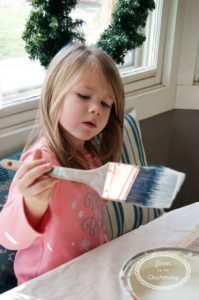
Well, when you have a great helper…you get to just sit back and relax!
Almost done. Since the pallet is so rough, I purposefully left some spots unpainted. It adds a little rustic charm.
Lettering
Once it is dry, I was ready to put the lettering on. You know this is where I get nervous. I did more research this time, I wanted to get vinyl letters or a stencil…to do anything except hand paint. Then I remembered, with the whole thing painted, if I don’t like it, I can repaint it. Ok, deep breath! Here we go.
First print your stencil out in mirror image. I found this great stencil for free on The Humming Homebody, click Here to check it out.
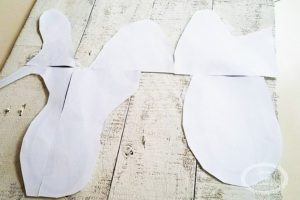
Transfer the ink to your sign by wetting it down. To see the full tutorial, click Here to check out my DIY Pallet Sign Post.
I had a little trouble with the ink transferring, but I have a laser printer and not inkjet…which probably makes a big difference. I used pencil to help trace out the letters. In the end, I made sure I could see the lines before I pulled the stencil off.
Time To Paint
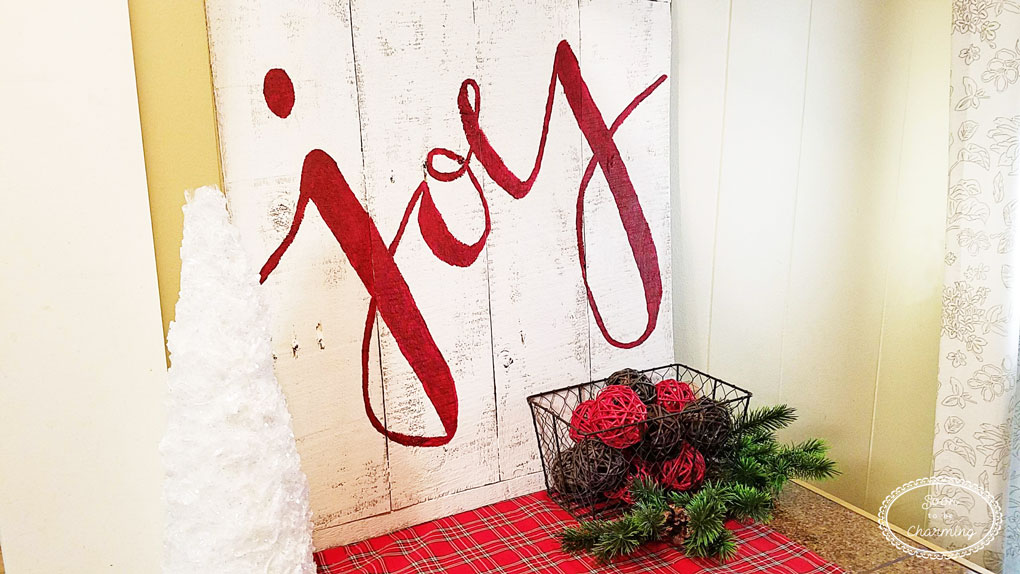
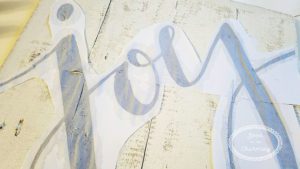
I wanted the word joy to really pop, so I painted it a deep red color.

With the white background, the red soaked in and turned a little pinkish. I painted a second coat to make it stay a true red.

Finished!
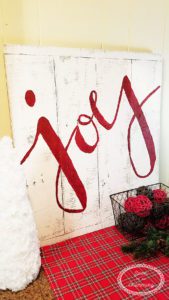
The sign turned out great. I won’t claim to be a letter expert at all…I have a friend who is, and well I have a ways to go yet. However, I love the versatility of this reversible sign and loved working on this project. Thanks for checking out my post!
Don’t DIY? Check out these great Holiday signs.