Creating a Mudroom Part 2: Pallet Wall
Pallet walls, I was hooked at first sight. I loved the rustic look and character that they add to a wall. I jumped at the chance to add one during our mudroom renovation. Besides loving the look, it would also be very durable.
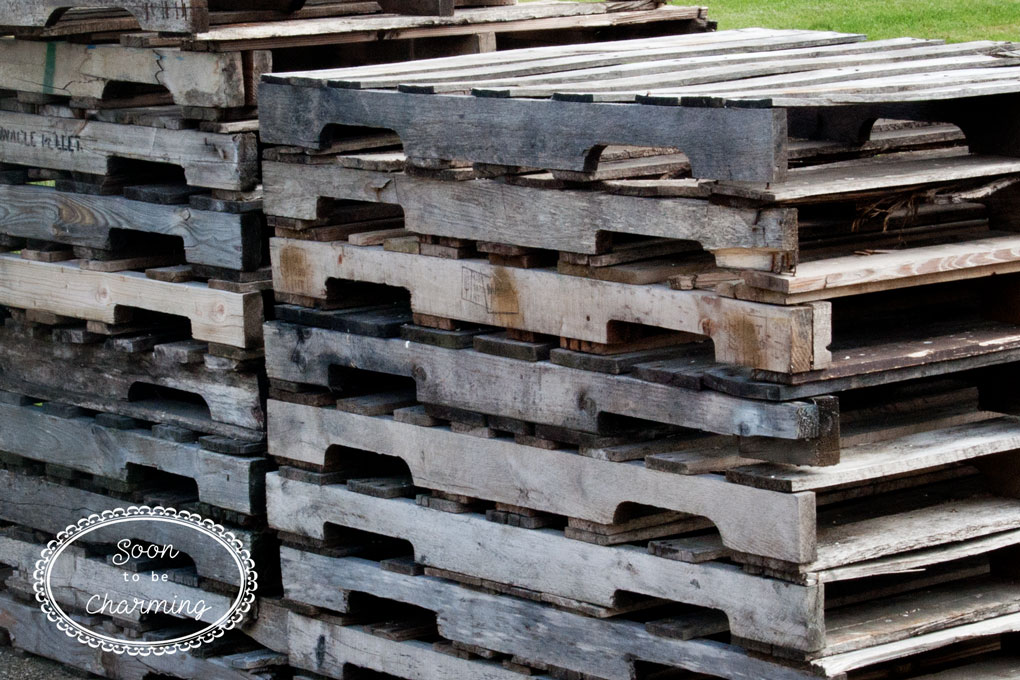
Step 1 Getting the Pallets
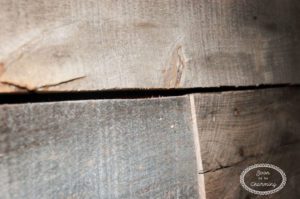
My husband and I started watching craigslist for pallets, we wanted weathered pallets…not new ones. Our goal was to get them all for free. We found a few on craigslist and then we started stopping at businesses and asking if we could have the pallets laying outside. Larger businesses didn’t really have permission to give them away and smaller businesses normally wanted to sell them, still not free.
We finally found a welding business that had large pallets in a huge stack. We talked to the owner and he was happy to get rid of them. However, the larger size pallets wouldn’t fit in our car. My husband cut them in half with a chainsaw and we still had to borrow a trailer. Before just grabbing any pallet, we looked through and picked the ones that were weathered. If they weren’t weathered enough, we left them.
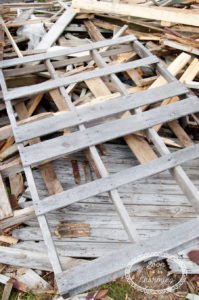
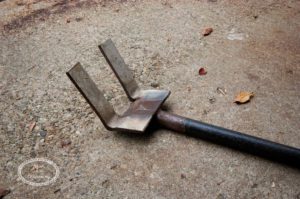
Step 2 Breaking Down the Pallets
My husband made a special tool to help break down the pallets. My husband calls it the Pallet Destructo XL 4000….aka a two pronged pry bar. You place it under the pallet board, then push down on the handle to pop the board up. Once the boards are off, the nails need to be removed. This process is very time consuming and tedious.
Step 3 Preparing the Boards
Once the pallets were broke down, it was time to lightly clean and sand them.
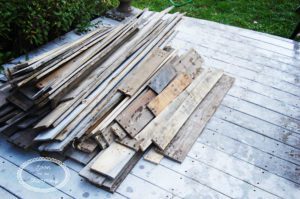
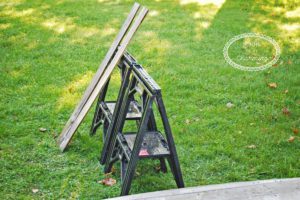
We made a soapy mixture in a bucket to clean the boards, rinsed them off with the hose and then laid them on end to dry.
After the boards had dried, we sanded them. We didn’t want to sand the finish off, we just wanted to lightly sand the boards to help prevent slivers.
Step 4 Preparing for the Wall
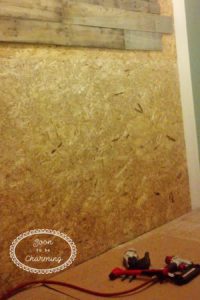
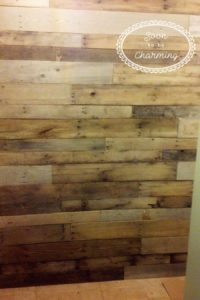
Before any boards could go up, we covered the wall with OSB. This would allow us to nail and glue the pallet wood to build the wall. Pallet wood is not perfectly even as you will quickly find out. To help the process, we sorted the boards into two widths. By doing this, it will be easier to keep the rows level.
Step 5 Building the Wall
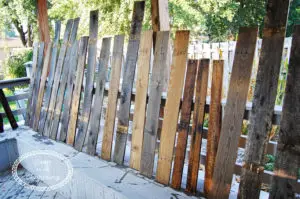
Let the puzzle begin, that is honestly how it felt. With two piles of boards, some narrow and some wide, at the beginning of each row we had to decide which width to do. By mixing up the width of the rows, it gave the wall a more random look. We ended up hand picking each board in every row. I would go out and look at the pile, find a board that I liked then pick a couple more to finish the row. It was time consuming, but worth it.
As far as color, some boards are dark and some are light. It was important to spread out the colors. At the end, we didn’t want all the dark boards in one section.

Part of the love of pallet boards is their character, which means they won’t line up perfectly. We tried to keep the gaps consistent, sometimes it took grabbing three boards to find one that fit best. After we completed each row, we put a dark stain under the row on the OSB (you could use a dark paint too). This is to help conceal the gaps by keeping the spaces in-between the boards dark.
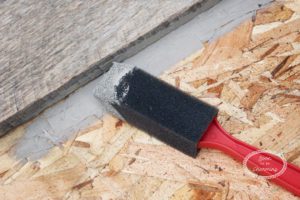
To get the boards to stay on the wall, we put an adhesive on the back of each board and then secured it with a few finish nails. The adhesive we used was Liquid Nails Multi-Purpose Construction Adhesive.
The space was so narrow, we would need to remove some boards to install the built-in. We had expected to do this and so left some of the boards without adhesive. In the end we removed a few more boards than we thought, but it was installed by the carpenter with a perfect fit. Once installed, my husband trimmed the remaining pallet boards snug with the built in and secured them with the same adhesive and nails as the rest of the wall.
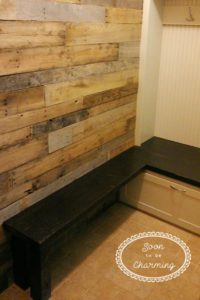
The pallet wall is one of my favorite features in our house. It adds such a beautiful view as you walk past from the hallway. It was the perfect choice to put in the mudroom. With all the “main” things done, it was now time to decorate. Check out the last and final post, Creating a Mudroom Part 3: Final Reveal in my next post!
Did you miss Creating a Mudroom Part 1? Click Here to check it out.
Thanks for checking out my post!

Great post, Amy! I LOVE your pallet wall. The Pallet Destructo XL4000 cracks me up!! Too funny!
Thanks Julie! I know he came up with that one all on his own =)