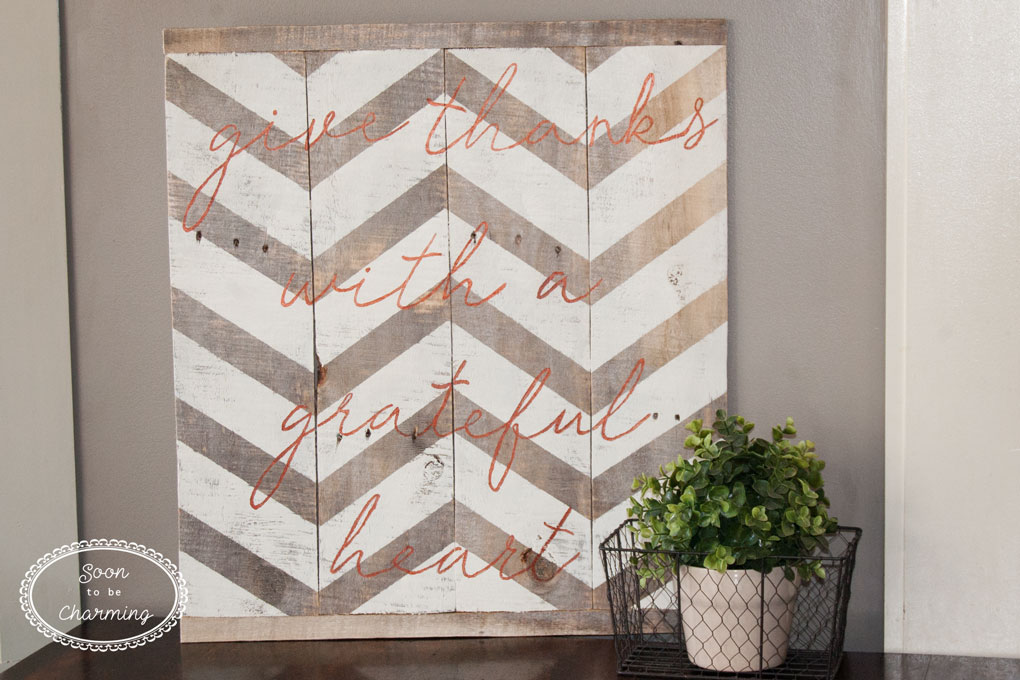
DIY Pallet Sign
This past summer I had painted a picture of hydrangeas and it was hanging in my breakfast nook. As the weather grew colder, I knew I would need to replace it with something. Before I took it down, I laughed one last time and recalled the stressful day in which I painted it.
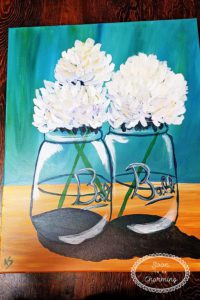
My friends and I were so excited to participate in one of those paint parties. They had both done it before, but this was my first time. I was excited and yet a little nervous. Well once we started….my excitement soon turned into stress. I was trying to be careful, but trying to keep up…being fast and careful do not go well together. By the end, I had a headache, basically broke out into a small sweat and was the entertainment of my much more relaxed friends. It is clear to say I didn’t find painting relaxing. It still makes me laugh thinking about it. Let’s just hope the picture I replace it with, isn’t so stressful!
A nail was in the middle of the wall where the famous hydrangea picture once hung….so what to replace it with? I absolutely love pallet signs, but had never made one before. The lettering had always made me nervous (I am starting to see a trend here). I figured I had put it off long enough and needed to at least try. I mean it can’t be more stressful than the painting class right? So here goes nothing!
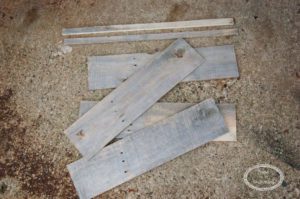
Step 1: Finding Boards
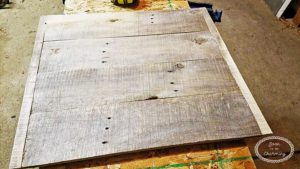
To make this sign, I rummaged through our pile and found 4 pallet boards. We have extra pallet boards from our pallet wall project. If you missed that project, check it out Here. Once I found the boards, my husband cut them to the desired length. In addition, two boards were cut thin to use as end caps.
Step 2: Assembly
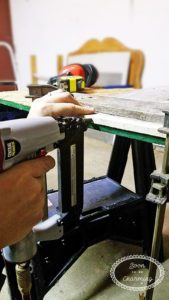
To assemble the boards, we began by laying them out and clamping them to a piece of plywood.
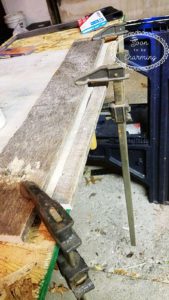
It is necessary for the length of the boards to be even because of the end caps. We needed to do a little trimming, so we used our saw and wood chisel. Once the boards lined up evenly, it was time to attach the end cap. My husband suggested using a little wood glue and then attaching them with 2″ finish nails.
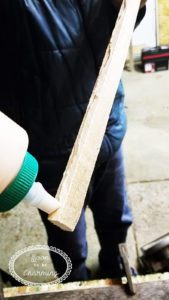
The pallet sign is thin, so using the finish nailer we had to be careful to shoot the nails straight. We didn’t want the nails poking through the top or bottom of the sign.
To secure the boards we put in three nails and then let the glue dry overnight. The assembly was officially done!
Step 3: Pattern
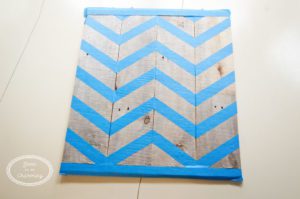
I decided to paint a chevron pattern on my sign. To do this, I grabbed painters tape and a level.
![]()
The level was to space out my lines. I laid it down and used the width to tape off the pattern.
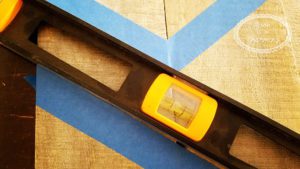
To keep the pattern consistent, I switched direction at each seam.
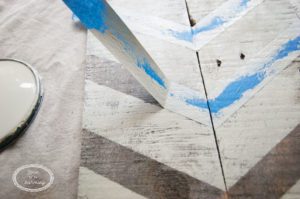
With the tape complete, I began to paint. The paint is an off white color and matches the trim in my house.
![]()
To help get clean lines, I started the brush on the tape and painted towards the middle of the chevron pattern. You don’t want to paint towards the tape or you could be pushing paint under it.
![]()
Now to pull the tape off.
It turned out great and the lines are nice and crisp!

Step 4: Lettering
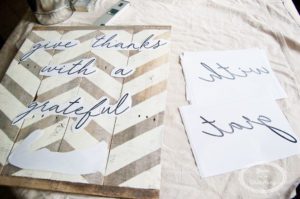
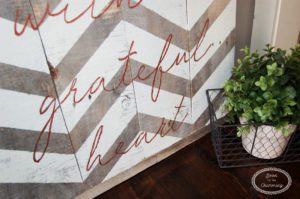
This is the part where I hold my breath….OK, it wasn’t that bad but I was definitely nervous. I loved how the chevron turned out and I was afraid I would mess it up. To be honest, it is not that hard. The more you do it, the easier it would get. The first thing you need to do is figure out what word or words you want to put on your sign. It actually took me a while to decide, but I landed on give thanks with a grateful heart.
With my saying decided, I created the words in Microsoft Word. After typing everything out, I printed it off and laid it on the sign to get the spacing. When I am ready to apply it, I will need to print it off as a mirror image.
I taped them down to make sure they didn’t slide.
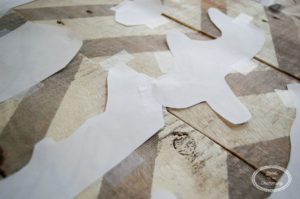
To transfer the ink onto the sign, I had a dish of water and a paint brush. I wet down the word.
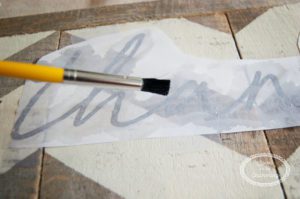
Once the word is wet, I used the tip of a sharpie (with the cap on) to press down on the letters and help transfer the ink to the sign. You need to rub it pretty hard. A couple times I wet it back down and rubbed it again. Slowly pull it up and make sure the ink transferred.
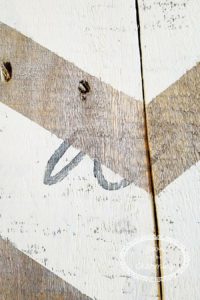
After the ink has transferred, you can paint the letters.
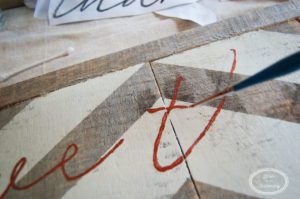
The first time I finished, I wasn’t 100% sure I loved it. One of the words needed to be fixed (I sanded it down and repainted the word). It looked much better after I fixed it…so here it is!
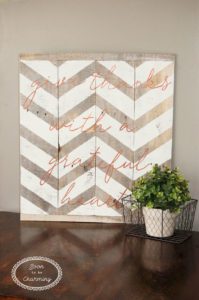
I love my pallet sign! The letters were a little bit of a stretch…but I will definitely try another sign sometime. In fact, I am planning on making this sign reversible with a Christmas saying on the back. Thanks for checking out my post and stay tuned to see the other side!