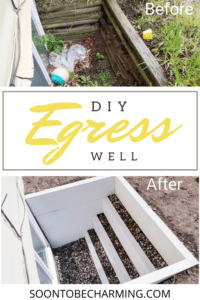
DIY Egress Well
I was walking around the outside of the egress well, measuring for our garden expansion, when my foot literally slipped right through the rotten timbers of our old egress! It was really unsafe and definitely needed to be replaced. My husband was busy helping my cousin roof his house, so I thought…I’ll just start digging! And dig I did! I was so proud of my super big hole! Plus it was a huge help to my husband to have the hole almost ready to go. Overall, rebuilding the egress well was a pretty simple project and it makes a huge improvement when you look out the window. Here is everything we did to build our DIY egress well.
This post contains affiliate links, which means I may receive a small commission at no extra cost to you. I always appreciate your support!
DIY Or Store Bought?
What type of egress well to go with? We went back and forth a little. Part of me, just wanted to drop a store bought well into the hole, attach it and say done. However, I knew I wouldn’t like the look of that in the long run. Our egress is in the basement living space and we see it every time we walk downstairs, so it is very visible.
We priced out the pre-built egress wells ( inexpensive models) and it was about the same cost as the lumber we needed to build our own egress. Looks like we found ourselves another project! Once we decided to move forward with building our own egress, we quickly planned out all the details and got ready to buy lumber.
Getting Started On Our DIY Egress Well
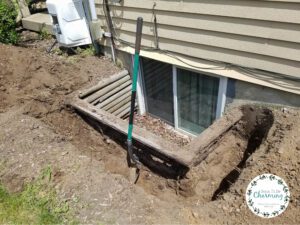
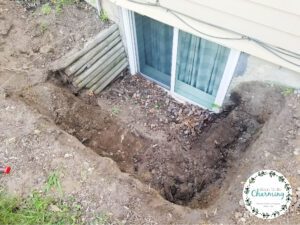
As I already mentioned, digging out the old egress well is the first thing to do. This is something I was able to do. It saved my husband a lot of time and effort as he was really busy working on a bunch of other things. Yes, we may have about 4 projects going on at the same time, but it is all prep for our siding project which is about to happen!
It didn’t take long, every day I would grab the shovel and go out to remove a little more.
Progress!
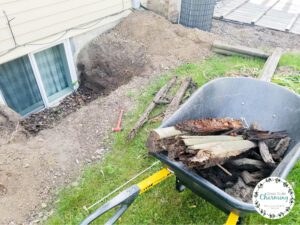
It helped open the hole up and make shoveling easier when I pulled all the old rotten egress timbers out.
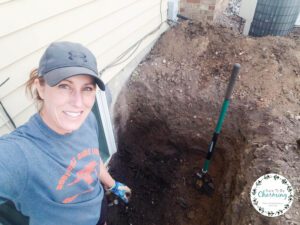
Almost done digging! Towards the end, it was a little tricky getting out! My husband and I laughed and teased that it would stink for me to get stuck in my own hole!
Removing the egress and digging made a huge mess of the surrounding area! I wasn’t looking forward to cleaning that up.
Hitting Rock Bottom, Literally
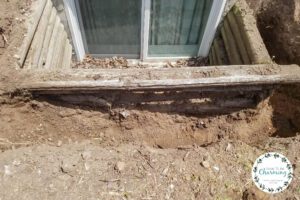
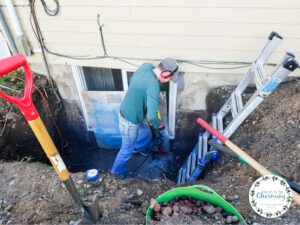
My hole came to a halt when I began hitting lava rocks at the bottom. It was really hard for me to get them up, so I called for reinforcement from my hubby.

We soon discovered there was cement in the bottom of our egress well! After discovering the cement, we took a day to try and figure out why it was there and what to do with it. It finally made sense. When they originally cut the egress window, they shoved the cut cement block out of the window hole and left it in the bottom of the well. The main problem, among many problems with this, is the cement was not level. We needed to begin building our new egress well deeper than this cement.
The only option left was to rent a jackhammer and get the cement out. Building a new egress well on top of uneven cement would be a nightmare. After renting the machine, my husband had all the cement out within an hour. Totally worth it!
To protect the window from cement chips, we did place a scrap piece of MDF in front of it. I was so nervous about breaking our window…it was just replaced a year ago when we broke it trying to get our couch into the basement! Want to laugh at our expense, check out the post here.
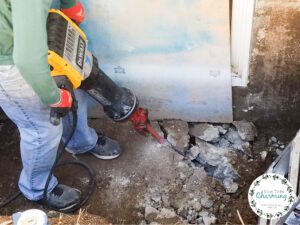
My husband called me over and had me try the jackhammer! It was so fun to try, but it weighed 85lbs! It would have been slow moving if I had to remove all the cement by myself!

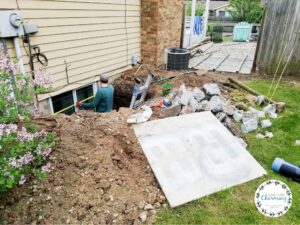
Now To Build The Egress Well
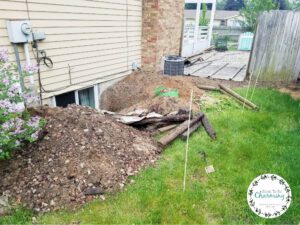
Back on track! The cement was now cleared out of the bottom of our egress. Our junk pile was growing as well, but at least our hole was finally ready!
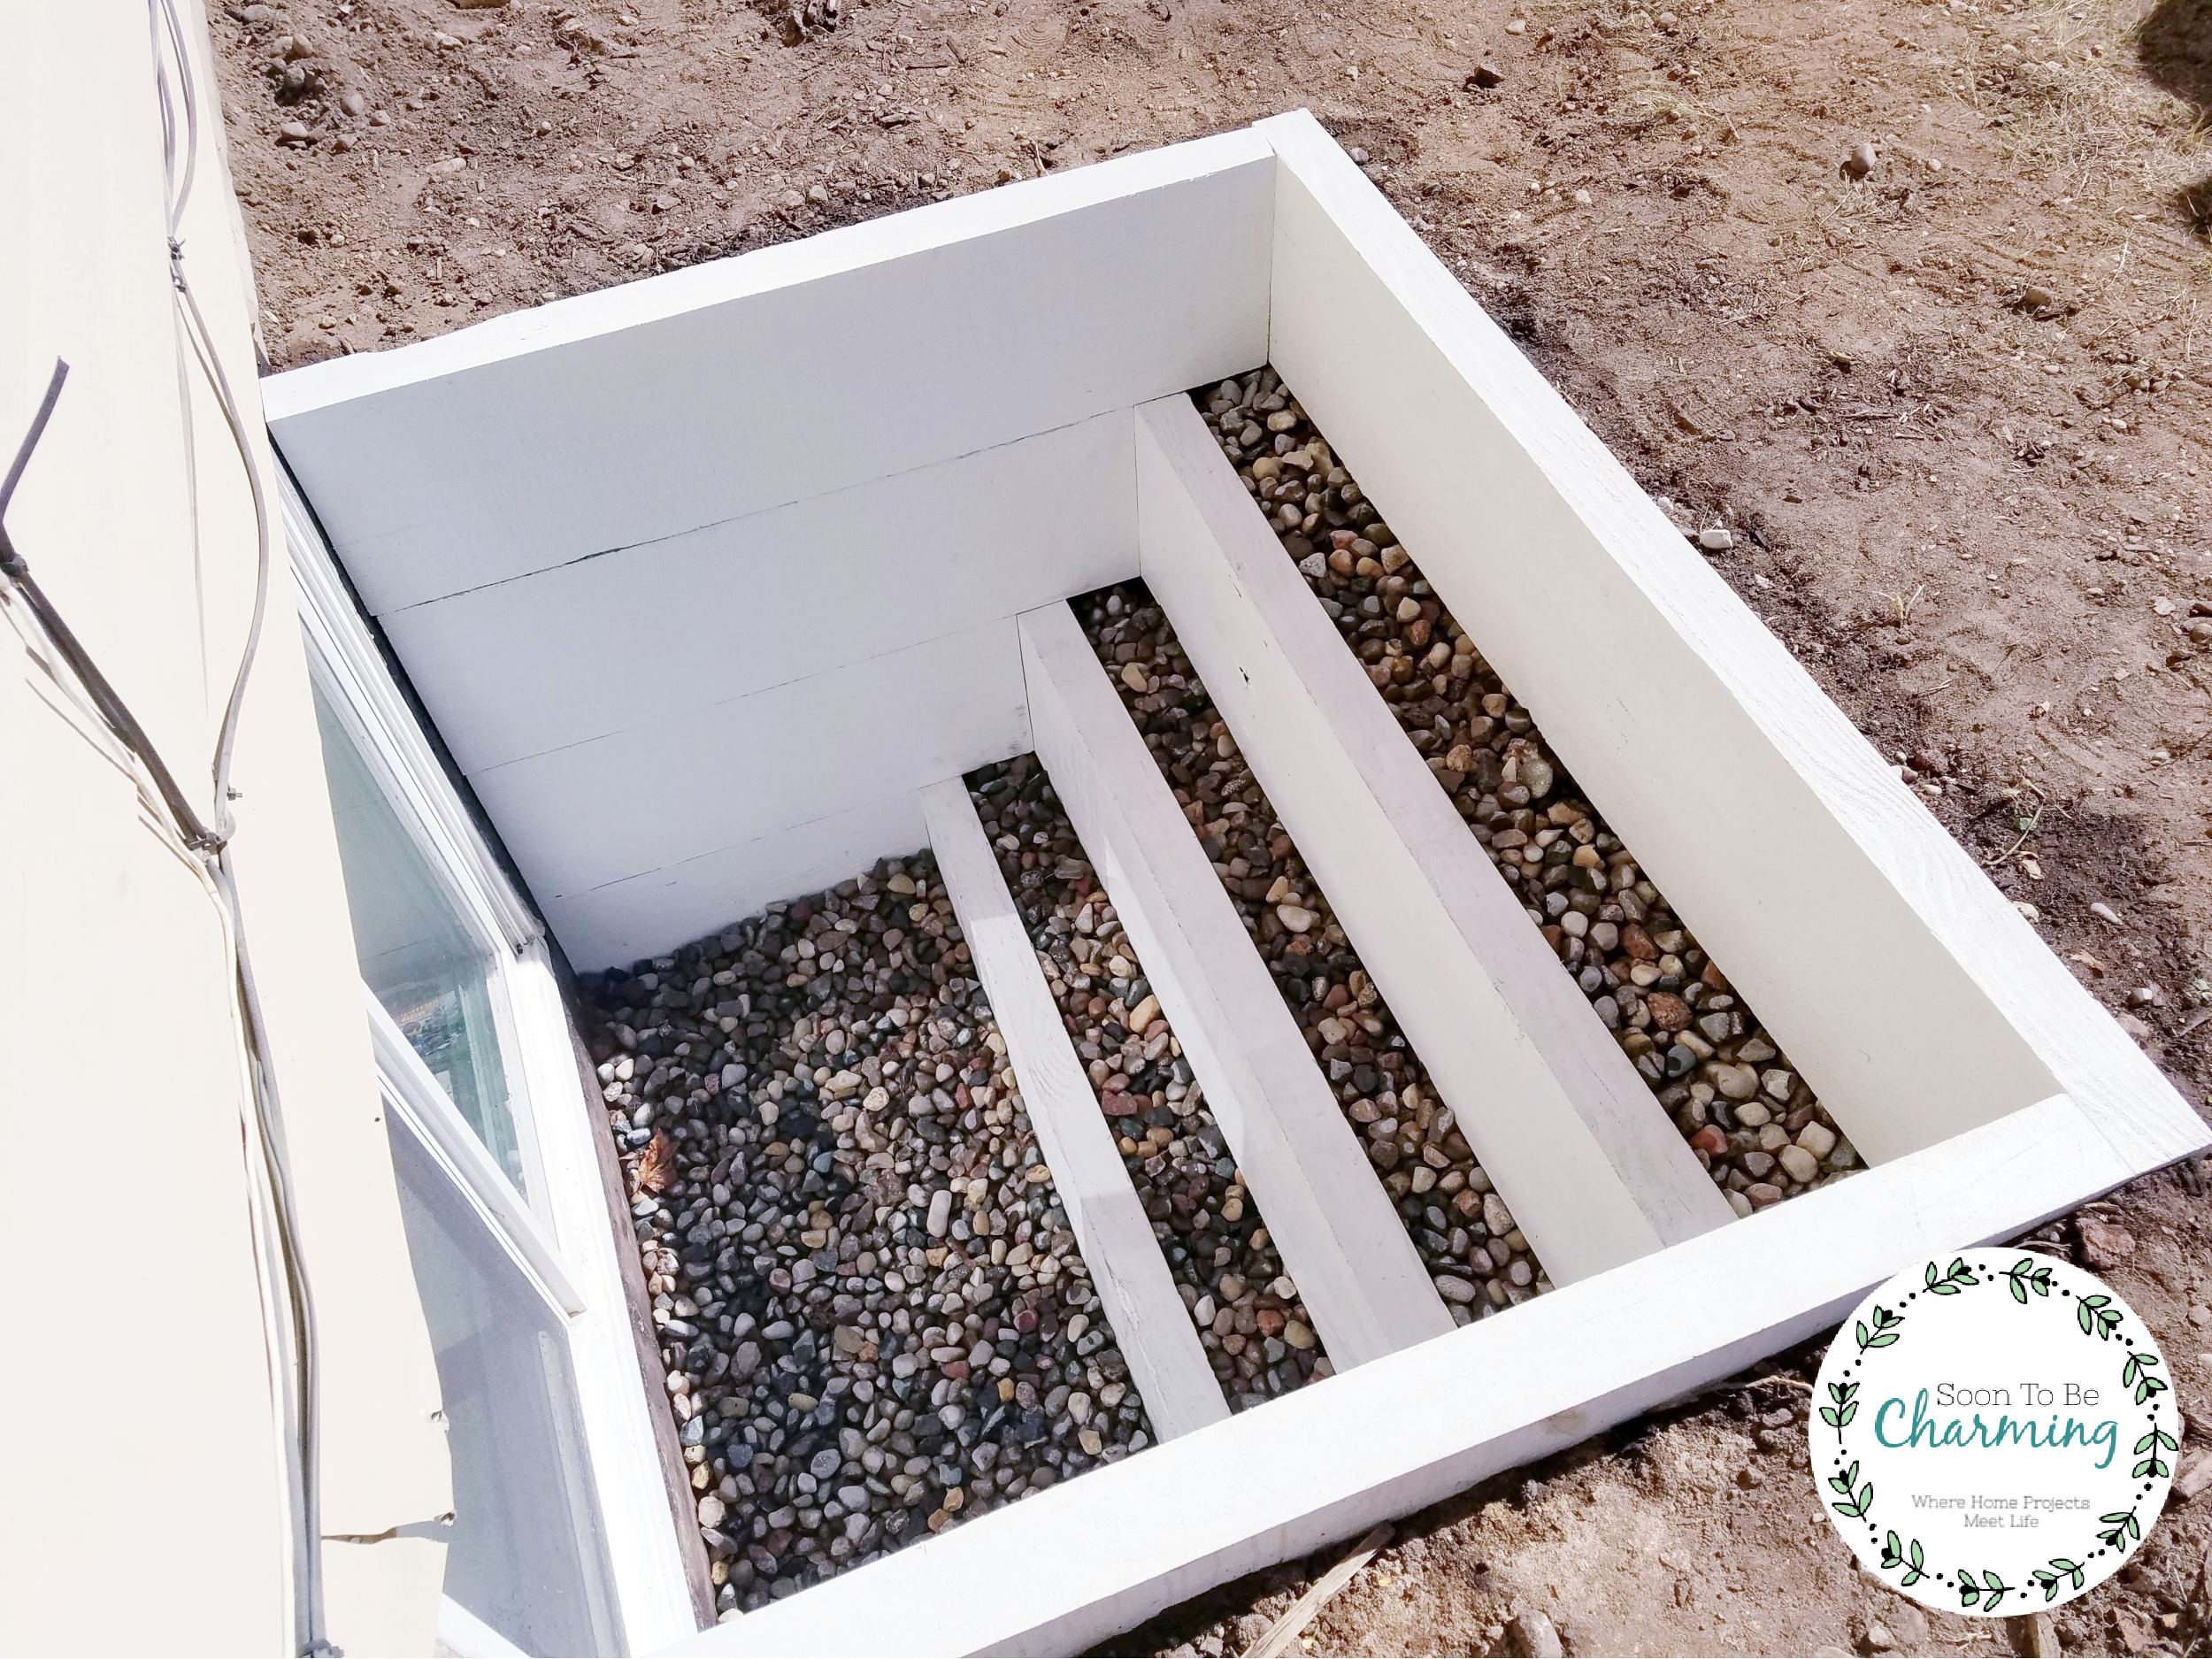
DIY Egress Well
Before we began building, I sketched out what I wanted it to look like. Then my husband and I figured out all the details. The length of each side, how wide, and what lumber we needed.
This is the design of our tiered egress well. Before building your own, make sure you research legal egress codes for your area. Requirements will vary by city and state.
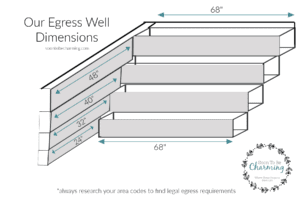
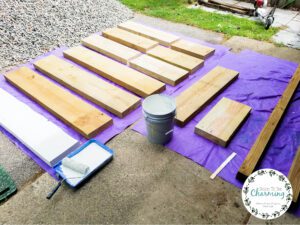
Our egress well was quite deep, so we decided to use 3″ x 12″ boards. It is probably not a extremely common size, but I love how they look. If your well isn’t so deep you could always use 2″ x 12″ boards. We had to special order the 3″ wide boards, but thankfully they came in quickly.
The boards were heavy, so we cut them to length the same day we picked them up. This allowed us to move them around much easier! I also painted them while they were still in pieces.
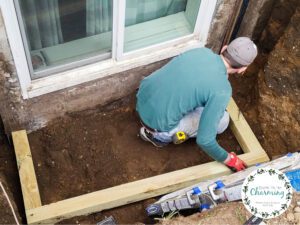
Building The Base
We used a 4 x 4 post for the base of our egress well. This allowed us to get the height we needed for the egress well without having to buy another 3″ x 12″ board, which was much more expensive.
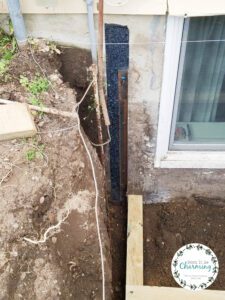
To attach the egress well to the foundation of the house, we used a flashing tape and angle iron. We secured the angle iron to the foundation using a ram set. We had angle iron in our garage already, so my husband just drilled holes into them to use for this project.
Note from my husband…he did say if he were to do it over again he would have used a construction adhesive instead of the flashing tape. Since our foundation wasn’t completely flat, he felt like there were small gaps with the tape. He also said that Tapcon concrete anchors is another way to attach your egress well to the foundation (in place of using a ram set).
![]()
![]()
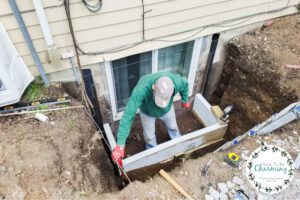
Now to put all the pieces together! We used 8″ screws to fasten the boards together.
![]()
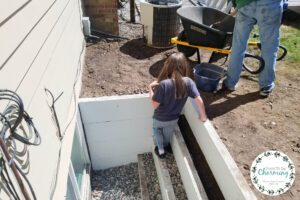
After the first tier, he backfilled the dirt and compacted it as much as possible. Then moved onto the next tier. He continued the same process until the entire egress well was built. My husband had the entire well built in about 2 hours. It didn’t take long once everything was prepped.
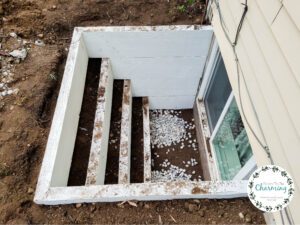
We smoothed the dirt out around the egress and then filled in the rocks. My daughter wanted to help fill in the rocks!
I scrubbed it down, once it was finished, to clean the dirt off.
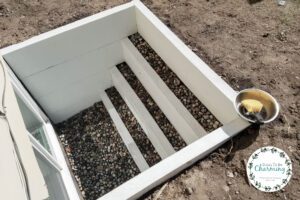
I am hoping to plant some creeping phlox soon, it will look gorgeous cascading down the tiers!
Don’t Miss Our Next Project!
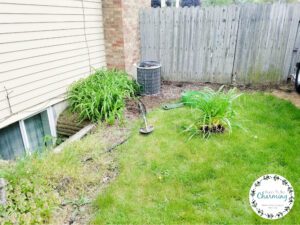
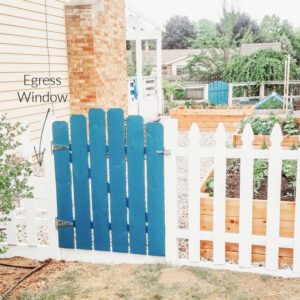
The egress is now in our garden, which we just expanded. Make sure to stay connected HERE, so you don’t miss out on the full post with all the details coming soon. It turned out amazing! I can’t wait to share it with you.
Here is a sneak peak! The before shot.
After!
Thanks so much for checking out my post!
